
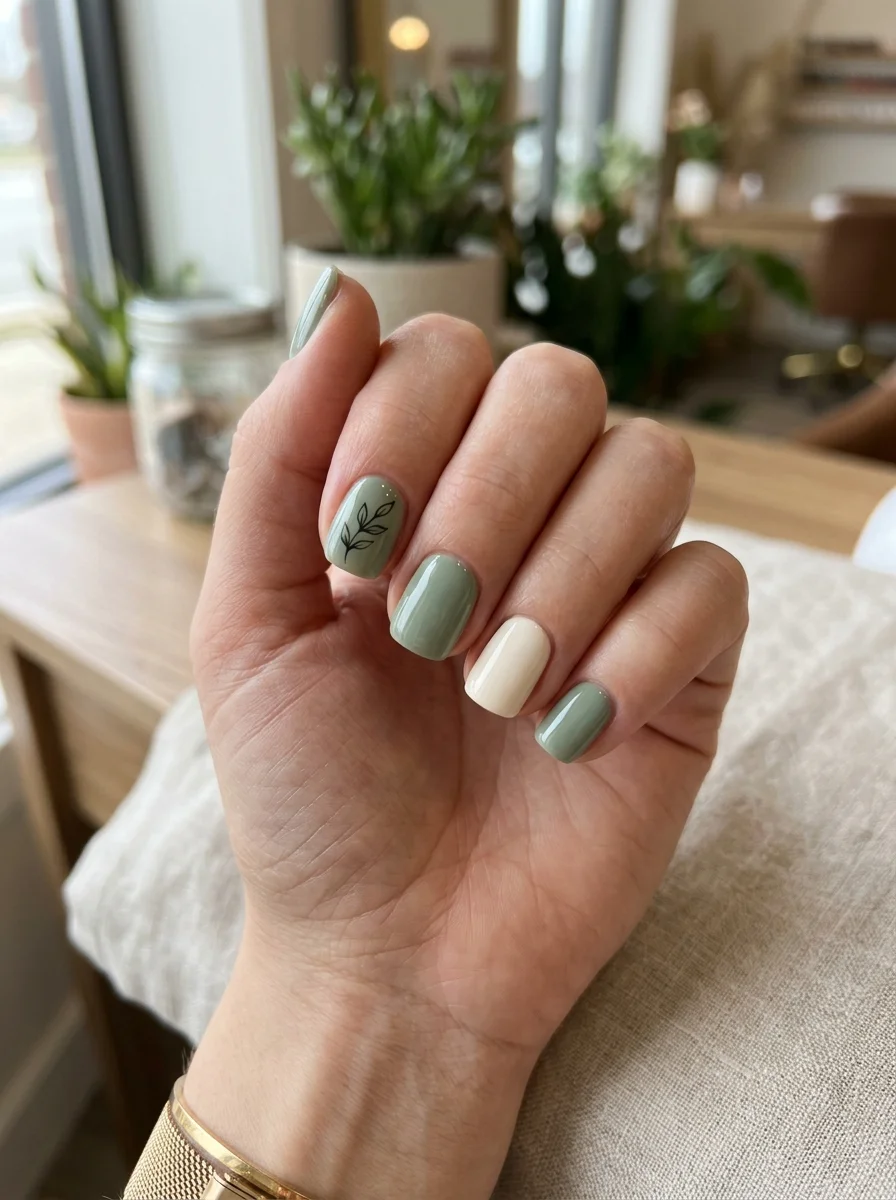
Short nails can feel limiting when most nail inspiration features long acrylic sets. Large flowers, thick French tips, and detailed patterns may look crowded on a smaller nail surface.
But you do not need extra length to enjoy a stylish manicure.
Some ideas are easy enough to try at home. Others can be saved and shown to your nail technician. There are options for work, weddings, parties, holidays, and everyday wear.
The main goal is to choose nail art that fits your nail size. Thin lines, tiny flowers, narrow tips, and open spaces can add style without making your nails look busy.
Why Short Nail Designs Are Worth Trying
Short nails are often easier to manage than long extensions. You can type, cook, exercise, clean, and complete daily tasks with less trouble. They are also less likely to catch on clothing or bend during hands-on work.
That does not mean they have to look plain.
The right design can make natural short nails feel neat and planned. A narrow French tip can help the nail look longer. A small dot near the cuticle can add detail without taking over the full nail. Vertical lines and open spaces can also create a longer appearance.
Short manicures work with many common nail shapes. Round and oval nails suit soft patterns. Square nails work well with clean lines and bold shapes. Squoval nails offer a mix of both styles.
You may also use less polish and spend less time painting short nails. This makes many designs easier to maintain at home.
The following ideas use color, shape, and small details to help short nails stand out without looking crowded.
Tiny Heart Nail Art
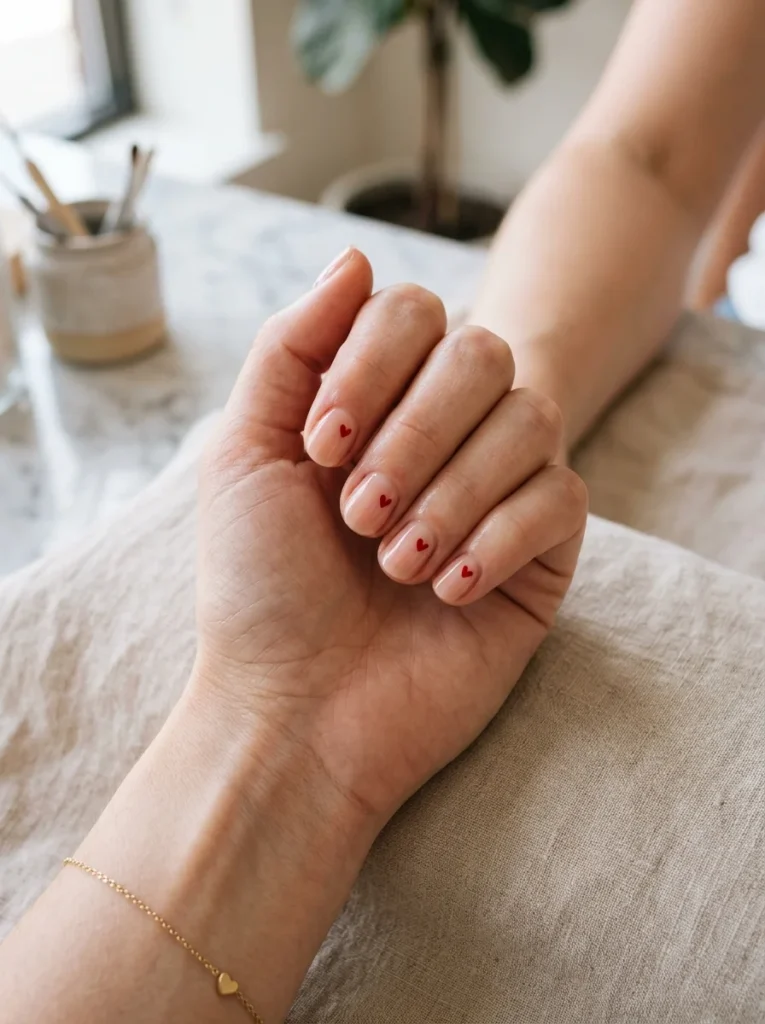
Tiny hearts create cute short nails without using a large pattern. Start with a nude, sheer pink, or clear base. Add one small heart to each nail or decorate only two accent nails.
Red and pink hearts feel playful and romantic. Black hearts create a bolder look. White hearts can feel soft and clean.
Use a toothpick, dotting tool, or fine brush to create the shape. Two tiny dots with a short point beneath them can form a simple heart.
This design works for Valentine’s Day, date nights, birthdays, or everyday wear.
Place the hearts slightly off-center for a more modern style. Leave enough open space around each heart.
Tiny Daisy Nail Design
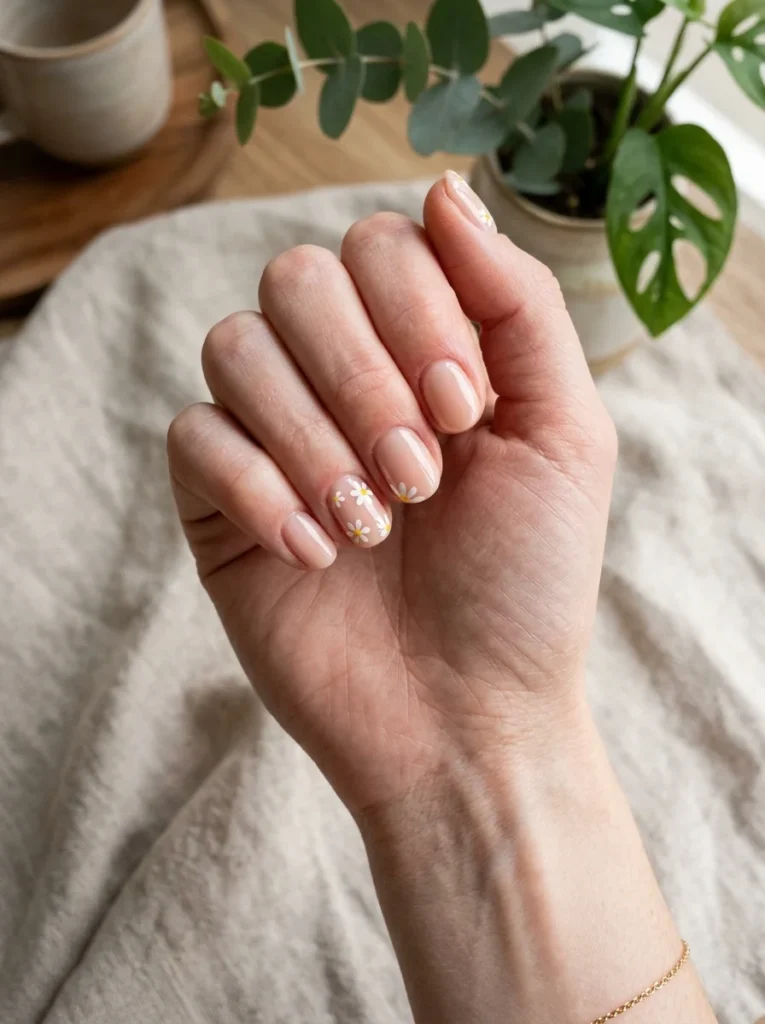
Tiny daisies add a cheerful floral detail to short nails. Use a nude, pale blue, light pink, or clear base. Paint small white petals around a yellow center.
Large flowers can cover too much of a short nail. One or two tiny flowers usually look more balanced. You can also use the pattern on only two accent nails and leave the others plain.
This design works well for spring, summer, picnics, holidays, and casual events. A dotting tool can help you create round petals. A toothpick also works for smaller details.
For a less common version, place half-daisies along the side or tip of each nail. This keeps the center open and gives the flowers a playful look.
Soft Pink Glazed Nails
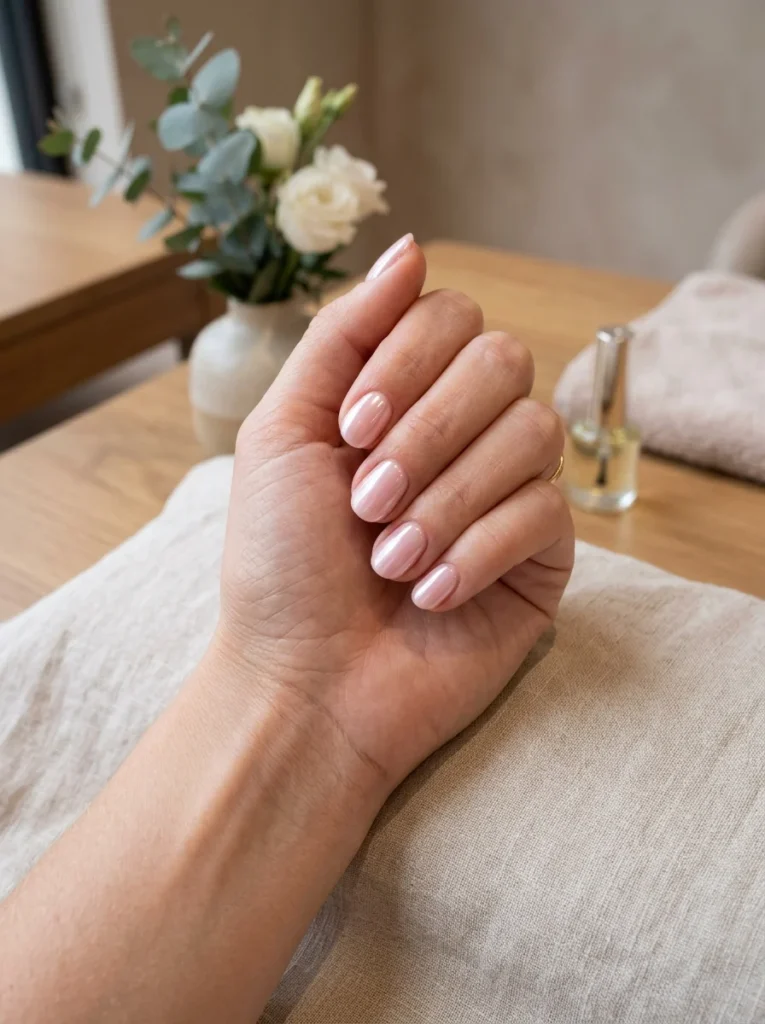
Soft pink glazed nails have a light base with a smooth pearl shine. The reflective finish catches the light and makes short nails look fresh without adding a busy pattern.
Start with a sheer pink polish. Then add a thin pearl powder, chrome powder, or shiny top coat. Keep the finish smooth so the light reflects evenly across the nail.
This style works well on oval and squoval nails. It is a strong choice for weddings, date nights, work, or everyday wear.
A cool pearl finish can look crisp and bright. A warm champagne shine can create a softer glow.
For the best result, avoid thick layers. The final look should feel light, glossy, and natural.
Short Tortoiseshell Accent Nails
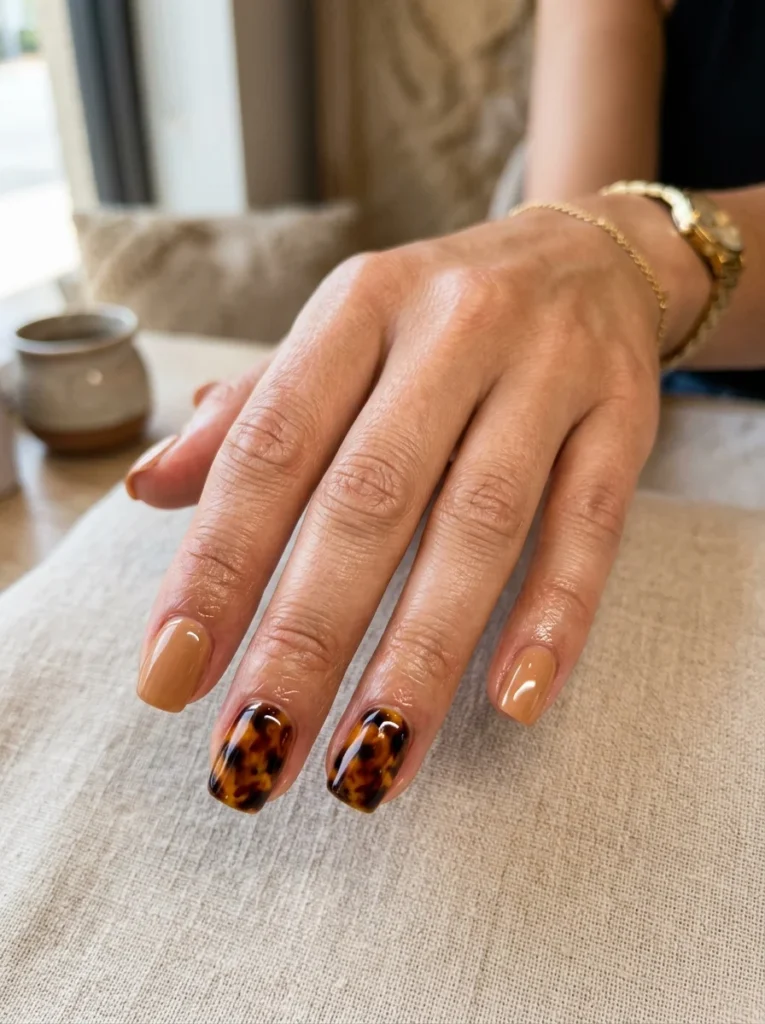
Tortoiseshell nail art uses warm amber, caramel, brown, and black tones. The colors are layered to create a deep, glass-like pattern.
Because the design has several shades, it can feel busy on very short nails. Use it on one or two accent nails. Paint the remaining nails in brown, cream, beige, or soft caramel.
This look works especially well during autumn and winter. It pairs nicely with warm clothing, gold jewelry, and neutral outfits.
A nail technician may be the better choice for a detailed layered finish. But nail wraps or stickers can create a similar look at home.
For a lighter style, add a thin tortoiseshell French tip instead of covering the full nail.
Short Red Nails with a Glossy Finish
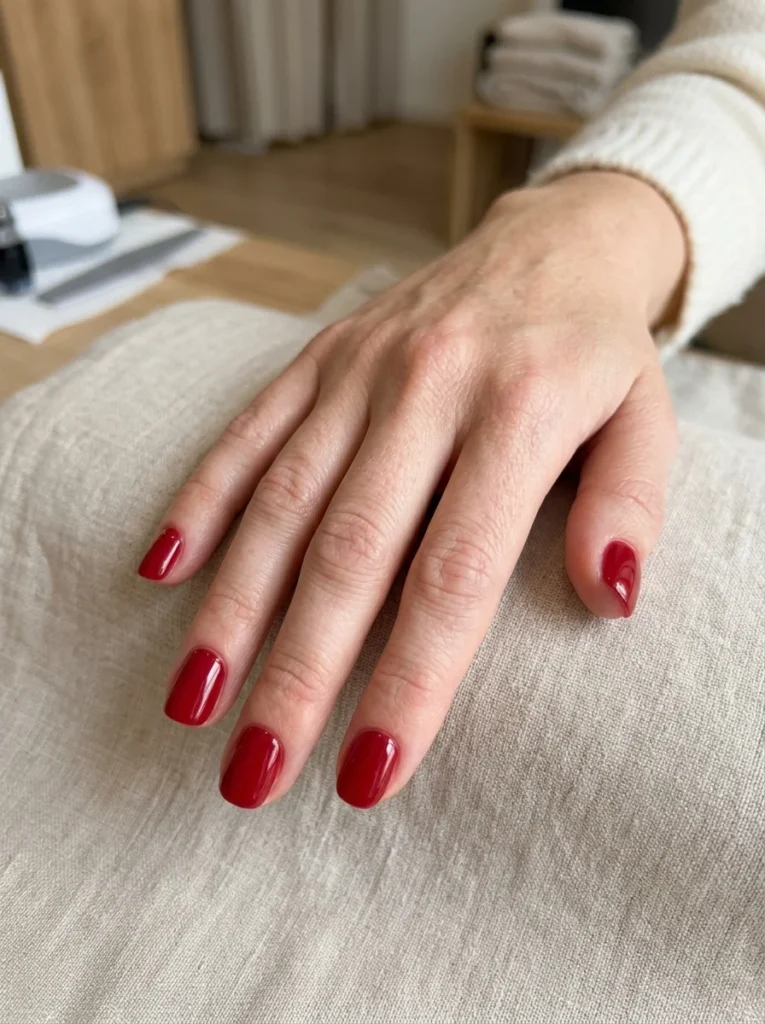
Classic red polish works on almost every nail length. On short nails, it creates a clean and confident manicure without the need for extra details.
Cherry red feels bright and playful. Tomato red has a warm look. Deep crimson feels richer and more formal. Choose the shade that works best with your skin tone and personal style.
The shape and finish matter with this design. File the nails evenly and clean the skin around the cuticles. Finish with a glossy top coat so the red polish stays smooth and shiny.
You can wear short red nails for work, dinner, holidays, or everyday outfits.
For a lighter version, use a nude base with a slim red French tip.
Short Blue Ombre Nails
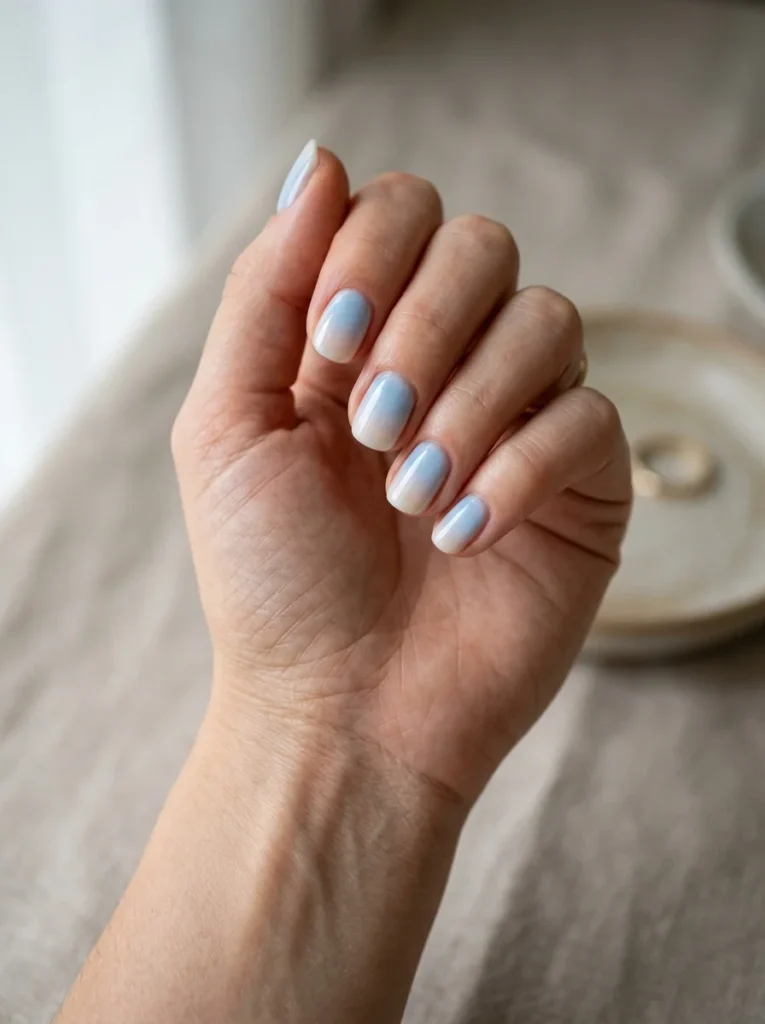
Blue ombre nails use a soft color blend instead of a sharp line. You can blend pale blue into white, nude, or clear polish.
A small makeup sponge can create the faded effect. Apply both colors to the sponge, then gently press them onto the nail. Repeat with thin layers until the blend looks smooth.
Sky blue works well for spring and summer. Navy and icy blue can create a winter style.
Add a glossy top coat to smooth the sponge texture and bring the colors together.
You can also create an ombre across the whole hand. Start with pale blue on the thumb and use a slightly darker shade on each next finger.
Sage Green Short Nails
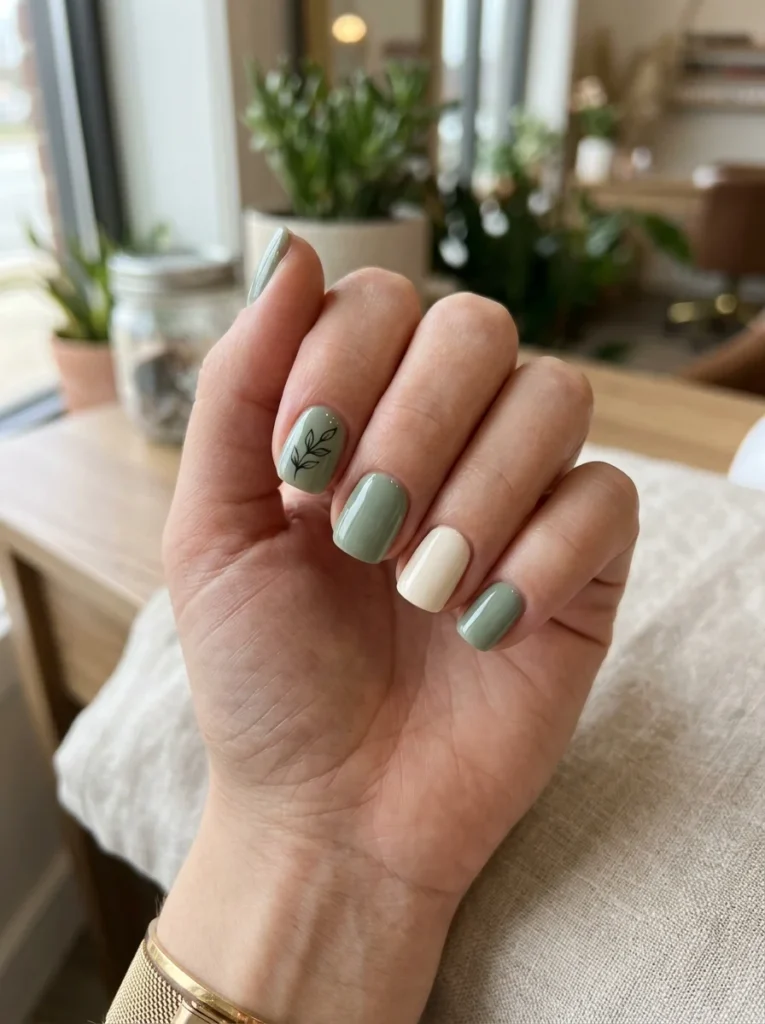
Sage green is soft, muted, and easy to match with neutral outfits. It adds color without feeling too bright.
You can wear a full glossy sage manicure for a clean look. A matte finish gives the shade a softer feel. You can also add one cream accent nail to break up the color.
Sage works well during spring and autumn, but it can be worn at any time of year. It suits rounded, square, and squoval short nails.
For a small detail, add one thin leaf or branch drawing to an accent nail. Keep the line narrow and simple.
This design is a good choice when you want earthy color without using brown, beige, or plain nude polish.
Pastel Rainbow Tips
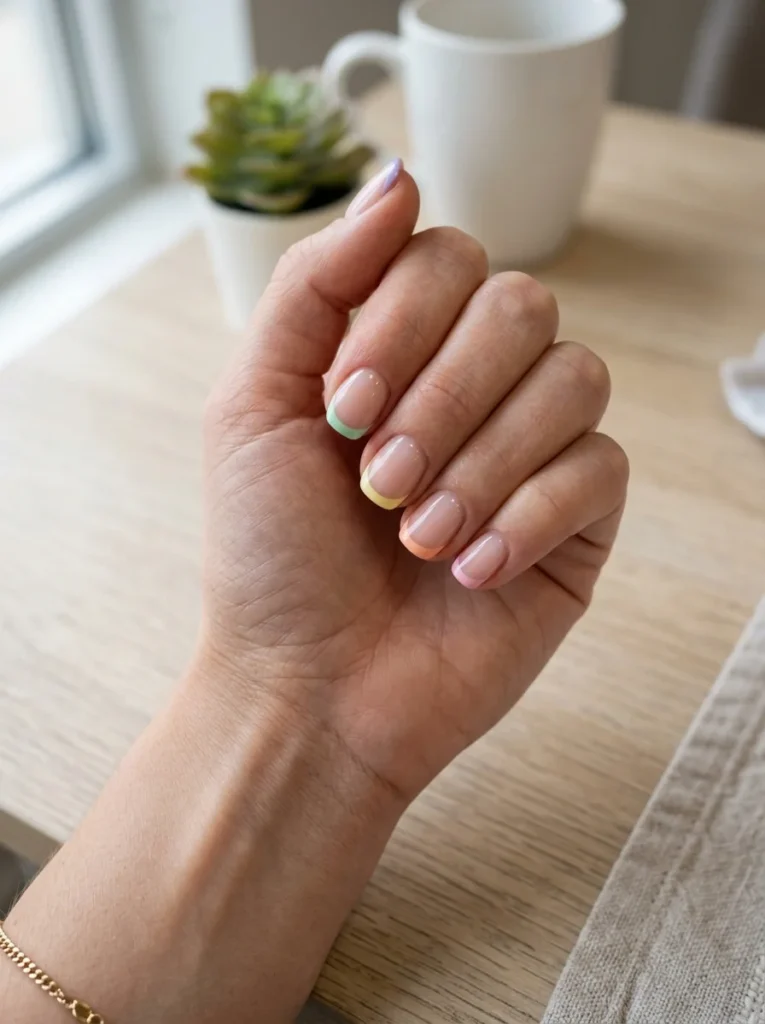
Begin with a clear, pale pink, or nude base. Paint a narrow tip in a different pastel shade on each nail.
You might use lavender, mint green, peach, soft yellow, and baby pink. Keep each tip thin so the design does not make the nail look shorter.
This style works best during spring and summer. It also suits birthdays, holidays, festivals, and casual weekends.
For a more planned look, arrange the colors from cool to warm across both hands. You can start with blue or lavender and finish with peach or yellow.
A glossy top coat helps blend the base and colored tips into one smooth finish.
Nude Nails with Gold Foil
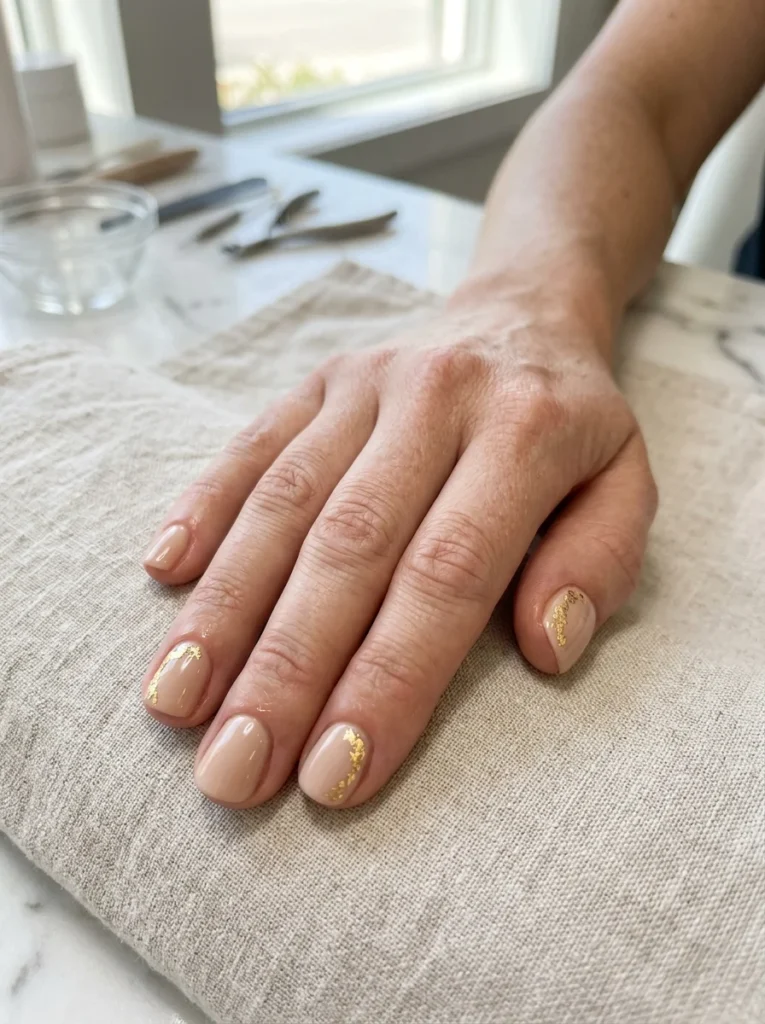
Choose a nude base that works with your skin tone. Beige, blush, peach, caramel, and soft brown can all work well.
Add small pieces of gold foil near the cuticle or in one corner of the nail. The foil does not need to look even. Random placement often creates a softer and more natural result.
This design is a strong choice for weddings, parties, holidays, and formal events. It can also work as an office manicure when the foil is kept small.
Use one or two accent nails for a subtle style. For more shine, place a tiny foil detail on every nail.
Negative-Space Half-Moon Nails
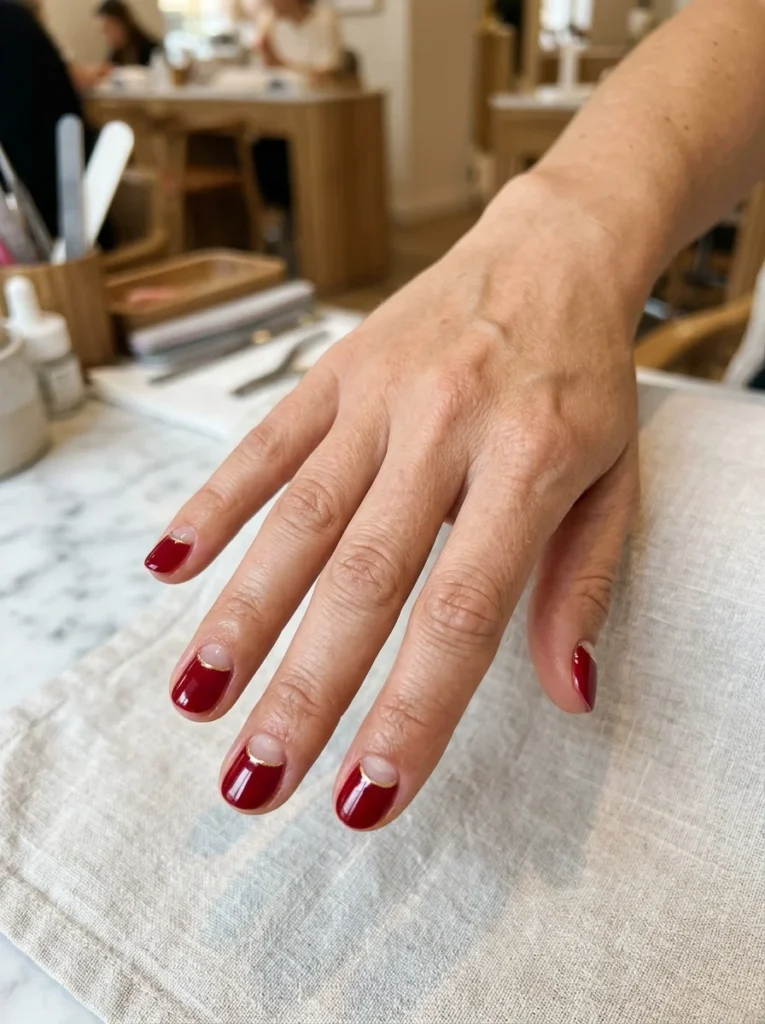
A negative-space half-moon manicure leaves a small curved area near the cuticle unpainted. The rest of the nail is covered with color.
You can use red, black, navy, green, or a pastel shade. The open crescent gives the design breathing room, which is helpful on short nails.
Guide stickers can help create an even curve. Place the sticker near the cuticle, paint above it, and remove it before the polish becomes fully dry.
This design can also make nail growth less noticeable because part of the base is already left clear.
For extra detail, outline the half-moon with a thin gold or silver line. Keep it narrow so the design stays neat.
Minimalist Dot Nail Art
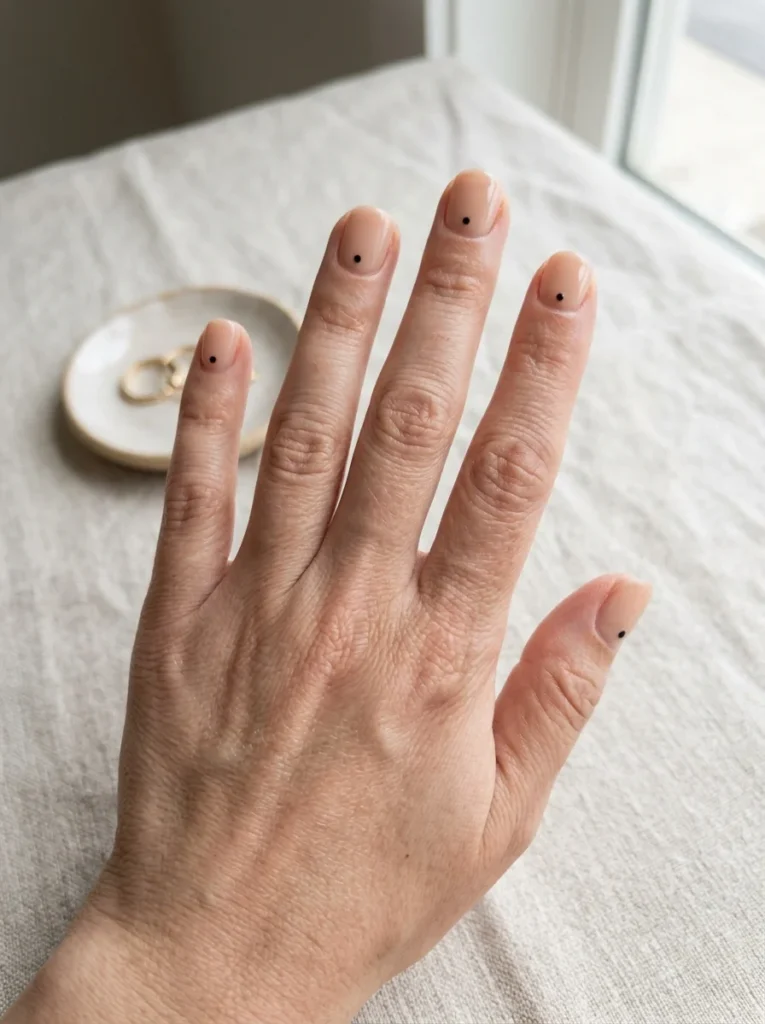
Begin with a nude, pale pink, cream, or clear base. Then add one small dot near the cuticle of each nail.
You can place the dots in the center or slightly to one side. Both options work well on short nails because they leave plenty of open space.
Black dots create a clean contrast. Gold dots feel more polished. Bright dots can make the manicure playful.
You do not need a professional dotting tool. The rounded end of a bobby pin can work for larger dots. A toothpick can create smaller ones.
Try black and gold dots on alternate nails for a simple evening style.
Milky White Short Nails
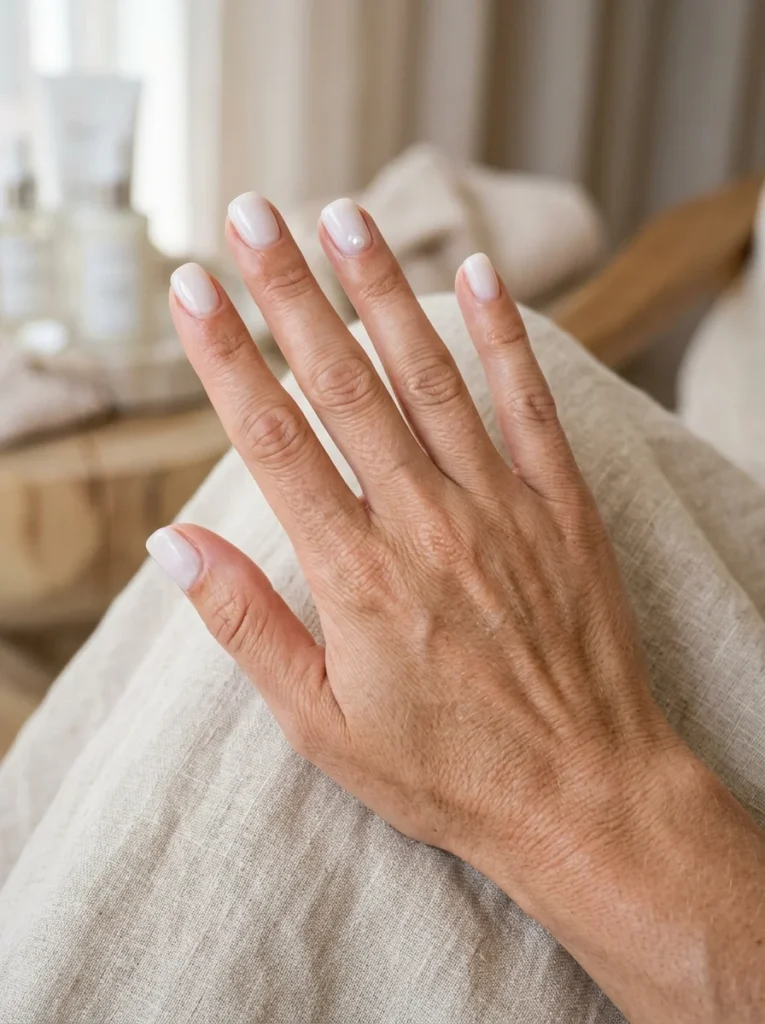
Milky white nails look soft, clean, and polished. Unlike solid white polish, a milky shade has a light and slightly sheer finish. Some of the natural nail may remain visible beneath the color.
This style works well when you want an elegant manicure without detailed nail art. It suits office days, weddings, dinners, and casual outfits. It also works during every season.
Apply two thin coats instead of one heavy layer. This helps the finish stay smooth and natural. Add a glossy top coat for extra shine.
For a small detail, place one tiny pearl or crystal near the cuticle of each ring finger. Keep the decoration small so the manicure stays soft and balanced.
Micro French Tips on Short Nails
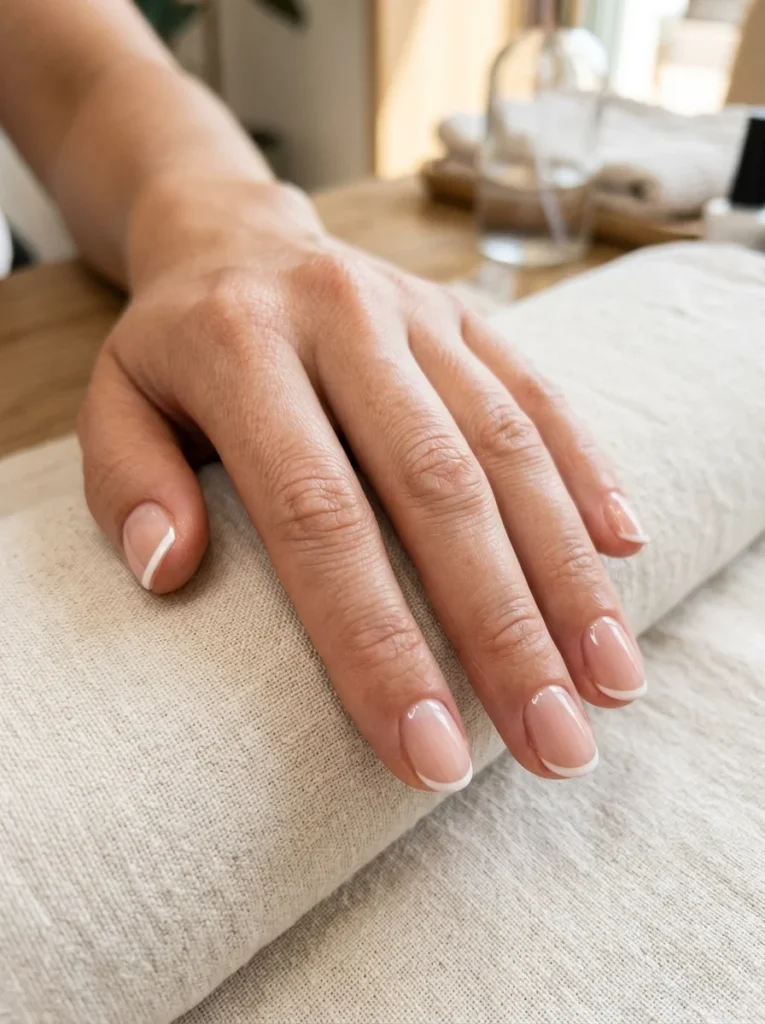
Start with a nude, sheer pink, or clear base. Then add a very thin white line across each nail tip.
The narrow line leaves more of the natural nail visible. This can make short nail beds appear longer. It works especially well on oval, rounded, and squoval nails.
White tips create a timeless style for work, weddings, or everyday wear. You can also use pale pink, blue, green, or lavender for a brighter look.
For a spring manicure, paint each tip in a different pastel color. Ask your nail technician to keep the tips thin and even.
Lavender Nails with Fine Line Art
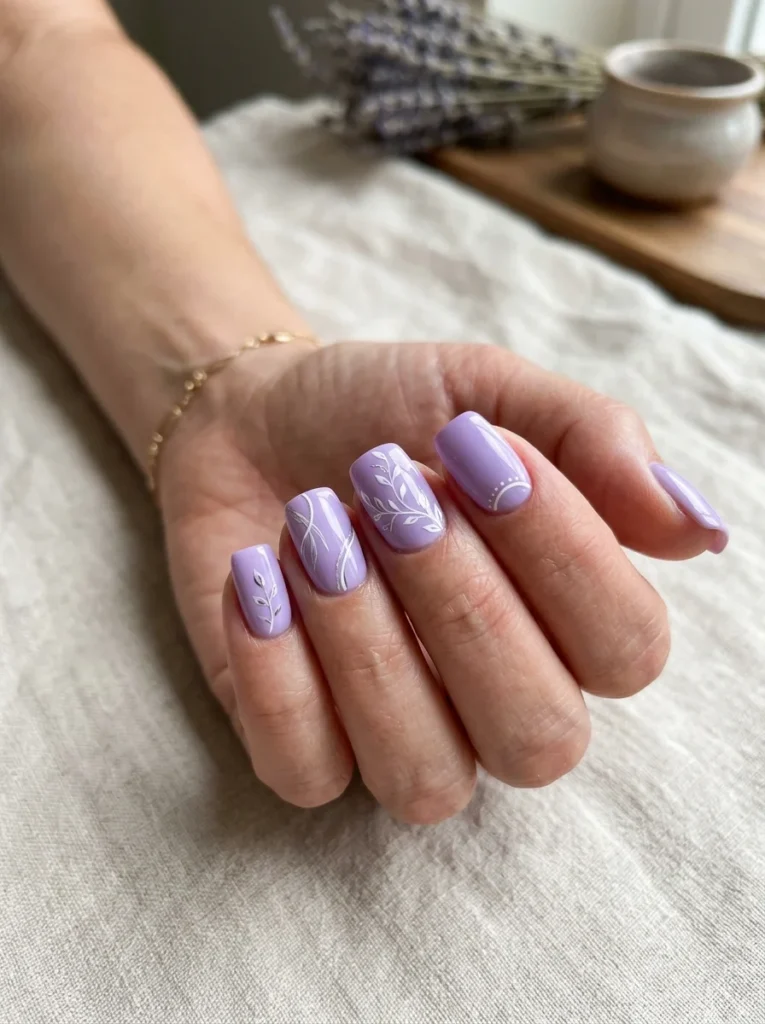
Add thin white, silver, or deep purple lines for a clean artistic finish.
The lines can be curved, straight, or slightly uneven. They do not need to match on every nail. Keep them narrow so the lavender base remains easy to see.
Vertical lines can help the nail appear longer. Side curves can make the design feel softer. This style works well on oval, round, or squoval shapes.
Finish with a glossy top coat to keep the lines smooth.
For a more creative set, continue one curved line across two neighboring nails. When the fingers sit together, the pattern will connect.
Chocolate Brown Chrome Nails
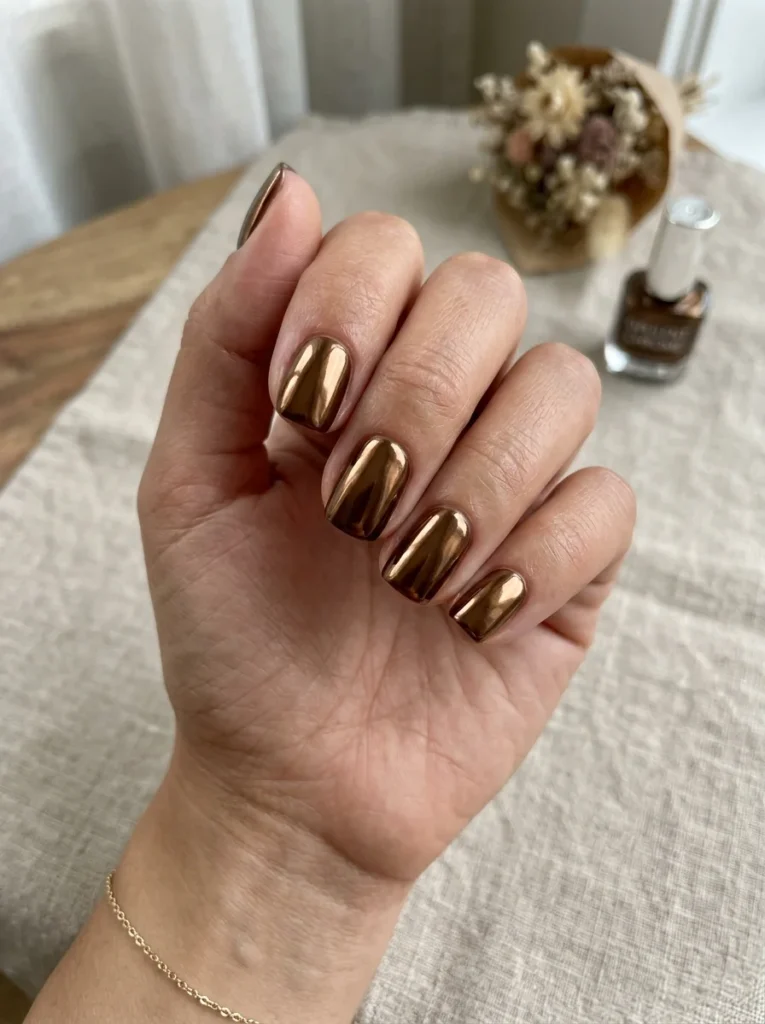
The shine gives the dark shade more depth and keeps it from looking flat.
Begin with a rich brown polish. Add copper, bronze, pearl, or warm gold chrome powder. The final shade may change based on the powder you choose.
This design works well during autumn, winter, evening events, and formal dinners. Rounded and squoval shapes help the dark color feel soft and balanced.
For a mixed finish, use chrome on every second nail. Paint the remaining nails with plain glossy brown polish.
This creates contrast while keeping the colors connected. Ask for a smooth chrome finish without thick or uneven patches.
Checkerboard Accent Nails
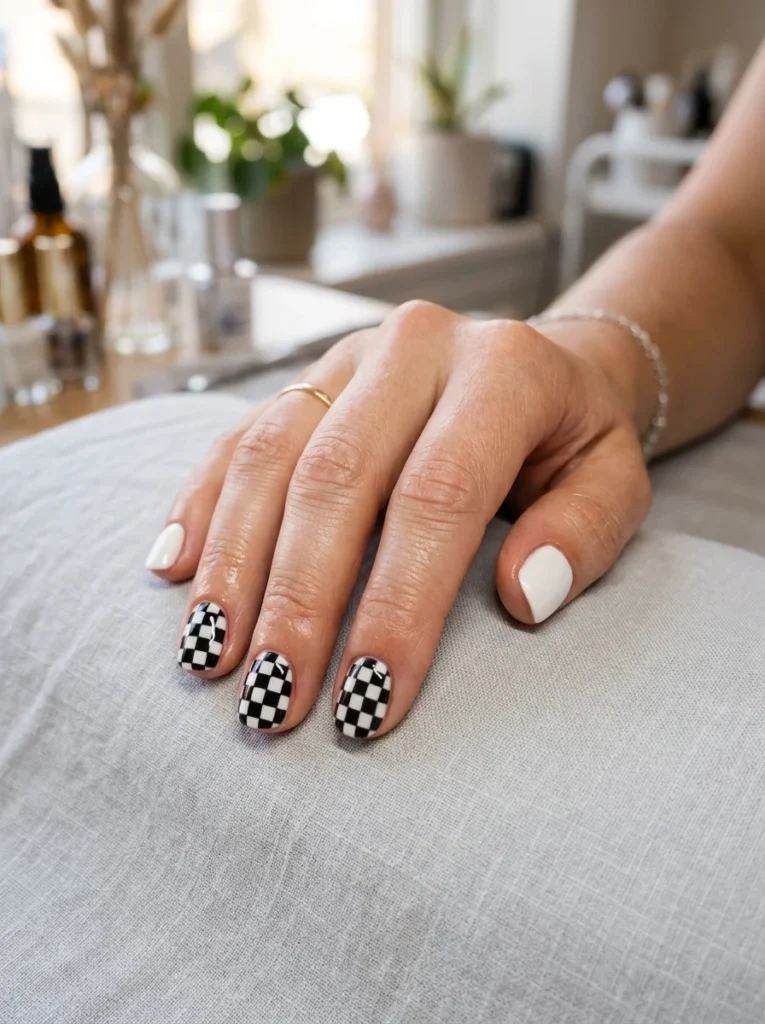
Checkerboard art gives short nails a bold graphic look. Since the pattern includes several squares, it works best on one or two accent nails.
Paint the other nails in solid colors that match the pattern. Black and white creates a classic set. Pink and red feels bright. Green and cream creates a softer style.
Keep the squares small and even. Large blocks may cover too much of a short nail. A thin brush, striping tape, or nail stickers can help you create cleaner lines.
You can also use only part of the pattern. Add a small checkerboard section in one corner instead of covering the full nail.
This makes the design easier to wear and recreate.
Burgundy Short Nails with Glitter Accents
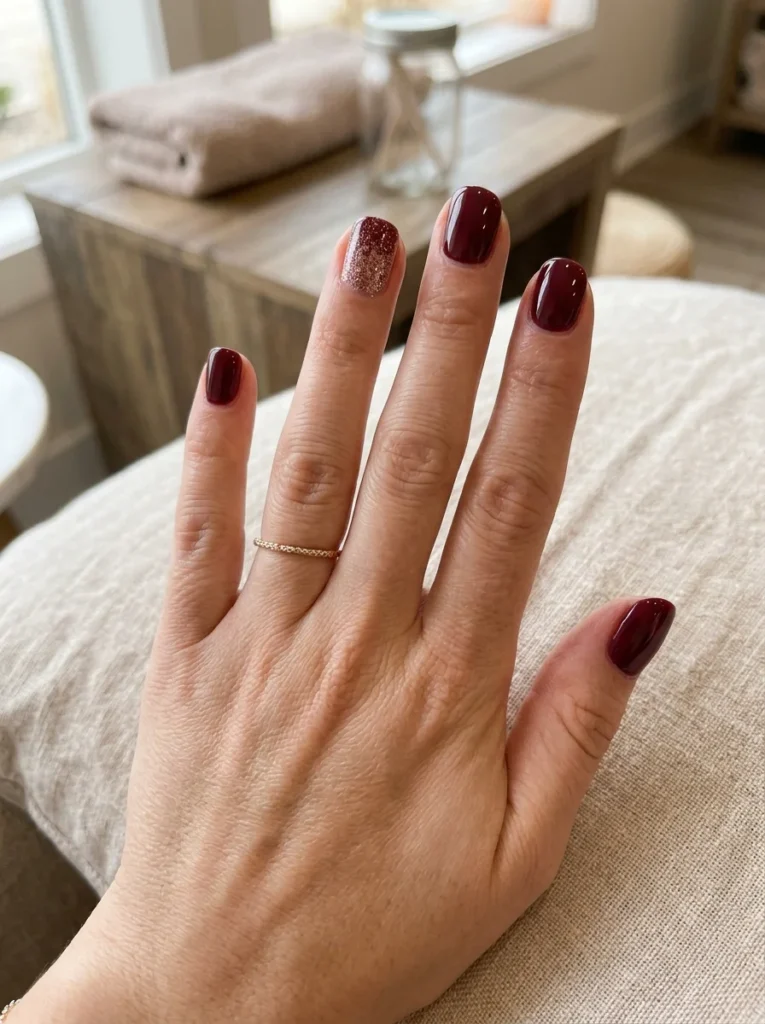
Burgundy polish creates a rich and polished manicure. Add a little glitter to make it feel more suitable for parties, formal events, autumn, or winter.
Fine glitter works better than large pieces on short nails. Apply it to one accent nail or place it near the cuticle. Gold, rose gold, and burgundy glitter all pair well with the dark base.
You can also create a soft glitter fade. Begin with more glitter near the cuticle and use less as you move up the nail.
Keep the rest of the design simple. Burgundy already has a strong color, so too many extra details may make the manicure feel crowded.
Finish with top coat to smooth the glitter.
Black-and-White Abstract Nails
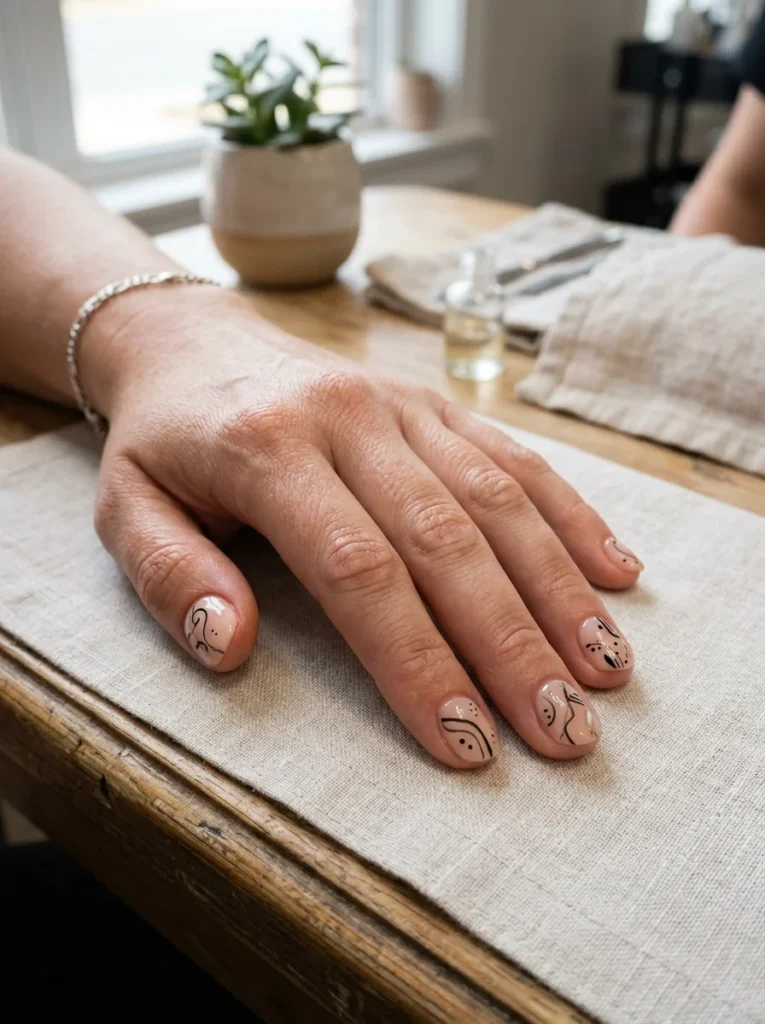
Use small swirls, curved lines, dots, or uneven blocks over a nude or clear base.
The open space is important. It gives each shape room to stand out and keeps short nails from looking crowded. Try to limit each nail to one main detail.
You do not need to make every nail match. One nail may have a curved line, while another has two small dots. The shared colors will keep the full set connected.
For a softer version, use abstract art on two accent nails only.
You can also paint matte black details over a glossy nude base. The change in texture adds interest without using extra colors.
How to Choose a Design for Your Short Nail Shape
Your nail shape changes how a design looks. Before saving a manicure idea, look at the natural shape of your nail beds and free edges.
Round nails have soft curved edges. They work well with tiny flowers, dots, soft colors, and simple glossy polish. Large square patterns may fight with the rounded shape.
Oval nails have a longer curved tip. Narrow French tips, vertical lines, and centered details can make them look even longer. Avoid very thick tips because they can reduce the visible nail space.
Square nails have flat tips and straighter corners. They work well with checkerboard art, color blocking, and clean graphic lines. Keep details away from the corners when the nail surface is very small.
Squoval nails combine a square tip with softer corners. They suit most short nail designs, including glazed finishes, abstract art, French tips, and neutral colors.
| Nail Shape | Designs That Work Well | Designs to Use Carefully |
| Round | Dots, flowers, soft shades | Large square patterns |
| Oval | French tips, vertical lines | Thick tips |
| Square | Checkerboards, color blocks | Crowded corner details |
| Squoval | Glazed, abstract, neutral | Very few limits |
These are helpful guides, not strict rules. A clean shape and even filing often matter more than choosing one exact design.
Easy Ways to Make Short Nail Art Last Longer
It is frustrating when fresh nail polish starts chipping after a day or two. Good preparation and thin layers can help your manicure stay neat for longer.
Start by removing old polish, oil, and hand cream from the nail surface. A clean nail gives the base coat a better surface to grip.
Apply one thin layer of base coat. Then use two thin coats of color instead of one thick coat. Thick polish may stay soft underneath and can dent or peel more easily.
Give each layer enough time to settle before adding the next one. Seal the tip of each nail with top coat. This can help protect the edge where chips often start.
Wear gloves while washing dishes or using cleaning products. Water and chemicals can weaken the polish over time.
Apply cuticle oil daily to keep the skin and nail area from becoming dry. Do not apply oil right before painting your nails.
Refresh the top coat after two or three days when needed. File small snags early so they do not turn into larger cracks.
Most of all, avoid using your nails to open cans, scrape labels, or press hard objects.
Simple Short Nail Designs You Can Do at Home
You do not need a full professional nail kit to create easy short nail designs. Many simple patterns can be made with basic polish and a few small tools.
Dots are one of the easiest options. Use a dotting tool, bobby pin, or toothpick. Small hearts can be made with two dots and a short point.
Striping tape can help you create straight lines and color-blocked corners. A makeup sponge works well for soft ombre designs. Nail stickers are useful when you want clean flowers, stars, or graphic shapes without painting them by hand.
A cleanup brush and a little acetone can fix polish around the skin. A quick-dry top coat can help protect the design.
Try This Five-Step Dot Manicure
- Apply a thin layer of base coat.
- Paint two light coats of your chosen color.
- Dip a dotting tool into a contrasting polish.
- Add one small dot near each cuticle.
- Finish with a smooth top coat.
Practise detailed art on one accent nail first. Once you feel comfortable, you can add it to the rest of the set.
Final Thoughts
These short nail designs show that natural nails can still look stylish, creative, and polished. You can choose a simple glazed finish, a bright French tip, tiny flowers, deep seasonal colors, or modern graphic art.
Think about your nail shape, daily routine, and skill level before choosing a design. Small details usually work best when the nail surface is limited.
Save your favorite idea for your next salon visit, or try one of the simple styles at home. Start with one accent nail if you are new to nail art. Small changes can make a short manicure feel fresh and personal.