Choosing your birthday nails should feel exciting. Yet it can quickly become another hard decision on your party checklist.
You may love glitter, but worry it will look too bold. You may want a simple manicure, but still need it to feel special in photos. Your outfit, nail length, party theme, and budget can also affect your choice.
Some designs are Easy and colorful. Others are clean, classy, or glamorous. Each idea includes useful tips for nail shape, outfit colors, and ways to make the look simple or bold.
Your birthday manicure does not need to follow a strict trend. It only needs to match your style and help you feel confident during your celebration.
How to Choose Birthday Nails You Will Actually Love
The best birthday manicure is not always the most detailed one. It is the design that fits your outfit, plans, comfort, and personal style.
Start with your birthday outfit. You do not need to match the exact color. Instead, repeat one small detail from your clothing, jewelry, bag, or shoes. Gold chrome can pick up gold jewelry. Silver glitter can work with silver heels or a crystal bag.
Next, think about where you will celebrate. Long crystal nails may look beautiful at a formal dinner. However, they may feel less practical for a day filled with games, cooking, or travel.
Your nail shape also affects the final look. Almond and oval shapes can give the fingers a longer appearance. Square and squoval shapes are often easier to wear at shorter lengths. Coffin nails provide more space for detailed art, gems, and French tips.
You should also choose a nail service that fits your plans. Gel can give you a smooth shine. Acrylic can add strength and length. Press-ons are useful when you need a fast option. Regular polish works well for simple designs at home.
Before choosing, ask yourself:
- What colors are in my outfit?
- Do I want subtle or bold nails?
- Will I need practical nails after the party?
- Am I visiting a salon or doing them at home?
- How much upkeep am I willing to manage?
Save two or three designs before making your final choice. This makes it easier to compare colors, shapes, and details.
Birthday Cake Nail Art
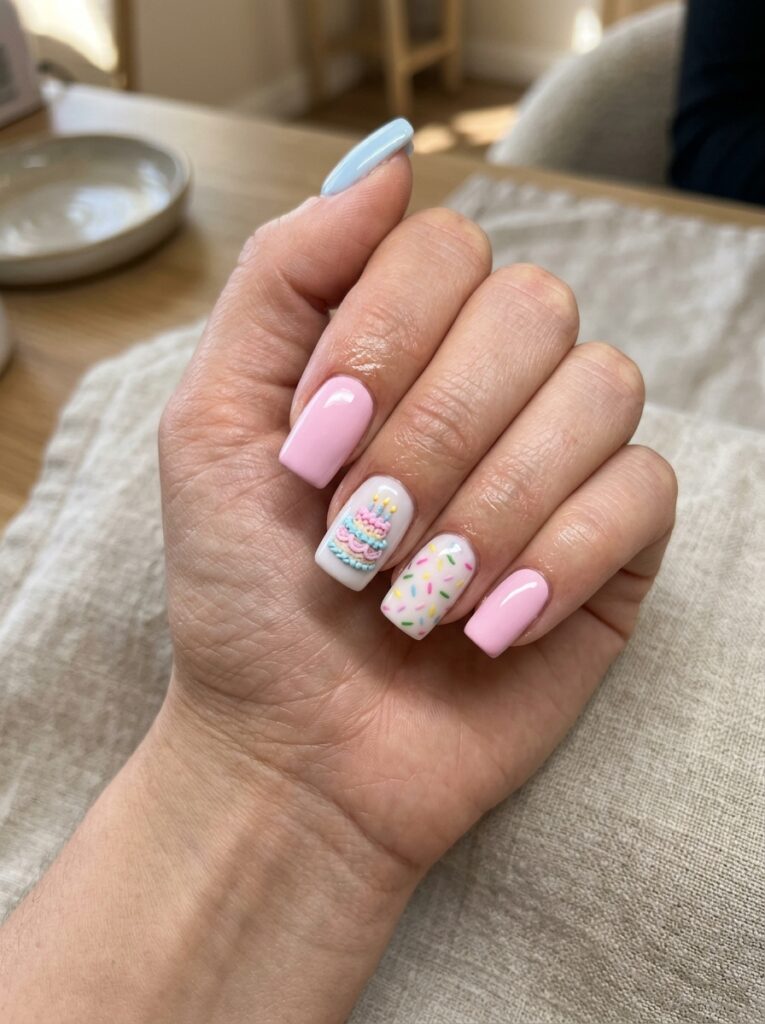
Birthday cake nails are perfect when you want your manicure to match the celebration. Small cakes, candles, frosting, and sprinkles can turn a basic nail set into playful birthday art.
Keep the detailed artwork on one or two feature nails. Use solid pink, white, blue, or pastel polish on the remaining nails. This prevents the set from looking crowded.
Short nails can hold tiny candles or sprinkle details. Longer nails provide more space for full cake designs.
This idea works well for teen birthdays, themed parties, and fun photoshoots. Add a small number or age detail for a more personal touch.
Black and Gold Birthday Nails
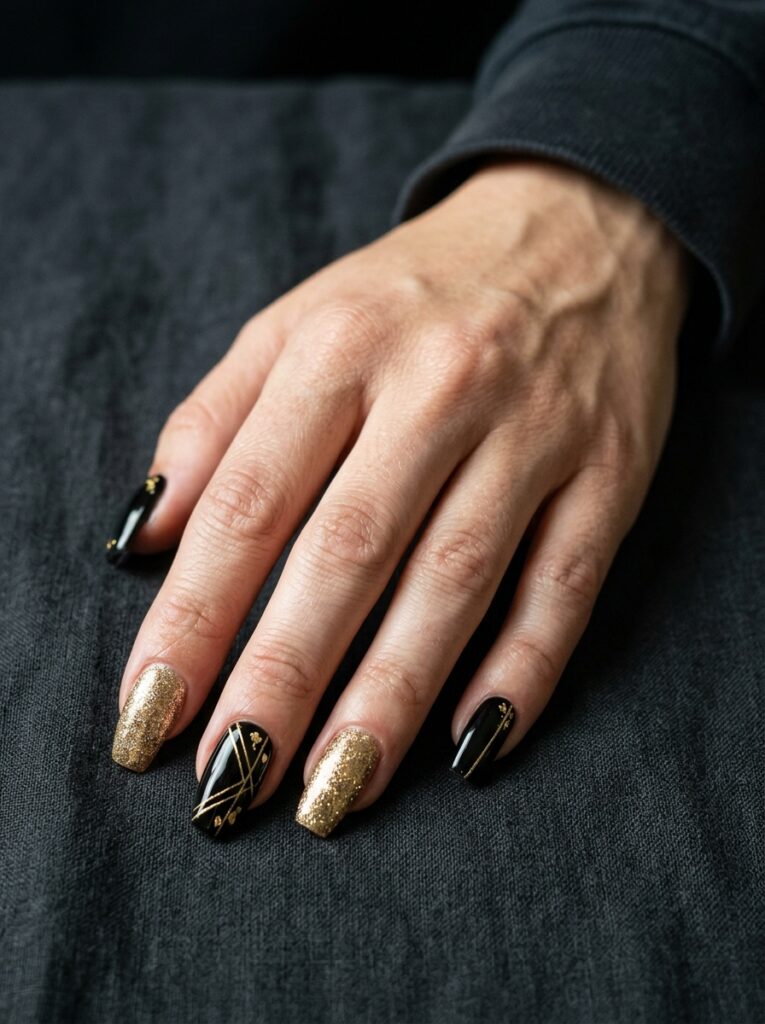
Black and gold nails feel rich, polished, and party-ready. Use glossy or matte black as your base. Then add gold foil, glitter, stars, swirls, or French tips.
Glossy black creates a smooth classic finish. Matte black feels more modern and makes shiny gold details stand out.
This style works well for night parties, formal dinners, and milestone birthdays. It looks especially good with a black dress and gold jewelry.
For a simple look, add thin gold lines to two nails. For more drama, mix full gold glitter nails with black French tips and foil accents.
Blue Star Birthday Nails
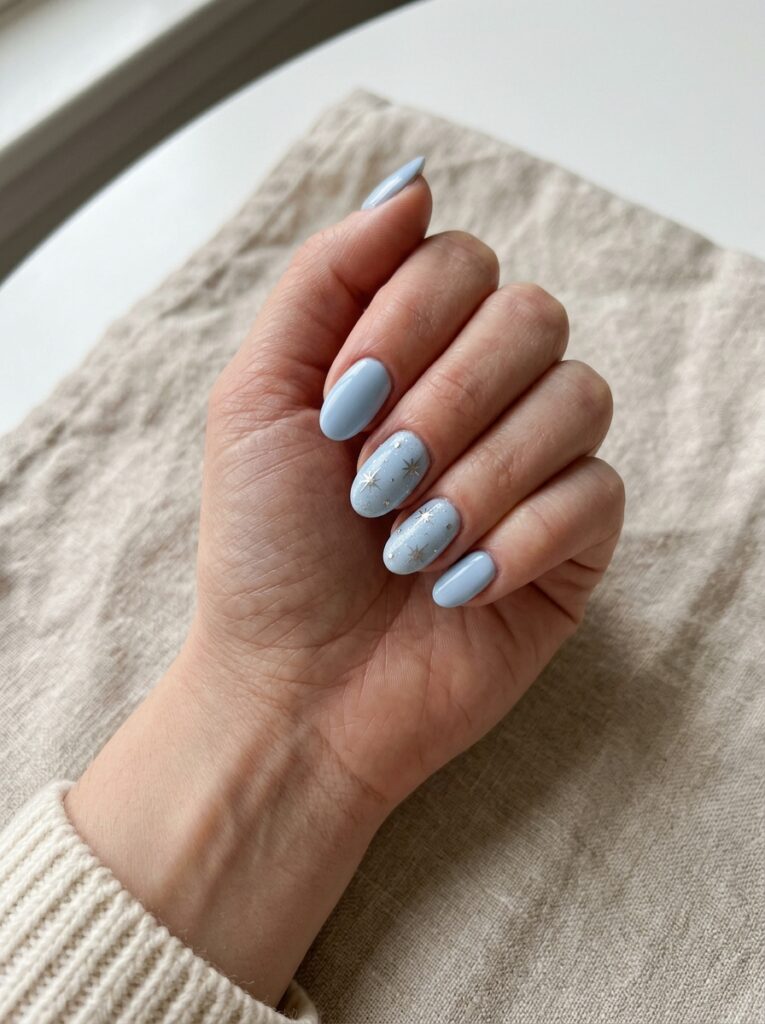
Blue star nails create a fun celestial look. Choose baby blue for something soft, cobalt for a bright style, or navy for a deeper finish.
Add small stars, silver glitter, moon details, or metallic dots. Pale blue looks fresh with silver. Navy feels richer when paired with gold.
This design works well for winter birthdays, blue outfits, and star-themed parties. It is also a nice choice when you want a birthday color other than pink or red.
Use one star accent nail for a simple set. Add constellations and glitter for a more detailed style.
Burgundy Birthday Nails
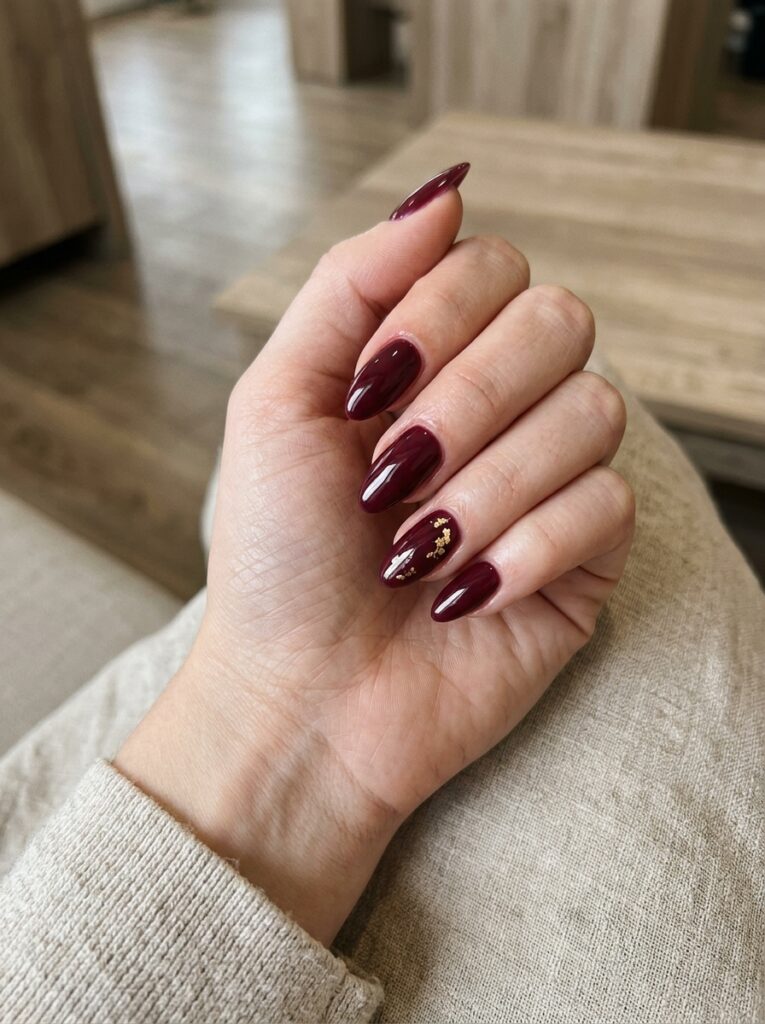
Burgundy nails feel rich and elegant. The deep wine shade works especially well for autumn and winter birthdays.
Wear it as a simple glossy color or add gold foil, chrome, glitter, or velvet polish. Cat-eye effects can create depth without using large gems.
This color works on almond, square, and short round nails. It pairs well with black, cream, gold, dark green, and brown outfits.
A full burgundy manicure is already striking. For a more detailed look, add gold lines or one glitter accent nail.
Classic French Tips With Rhinestones
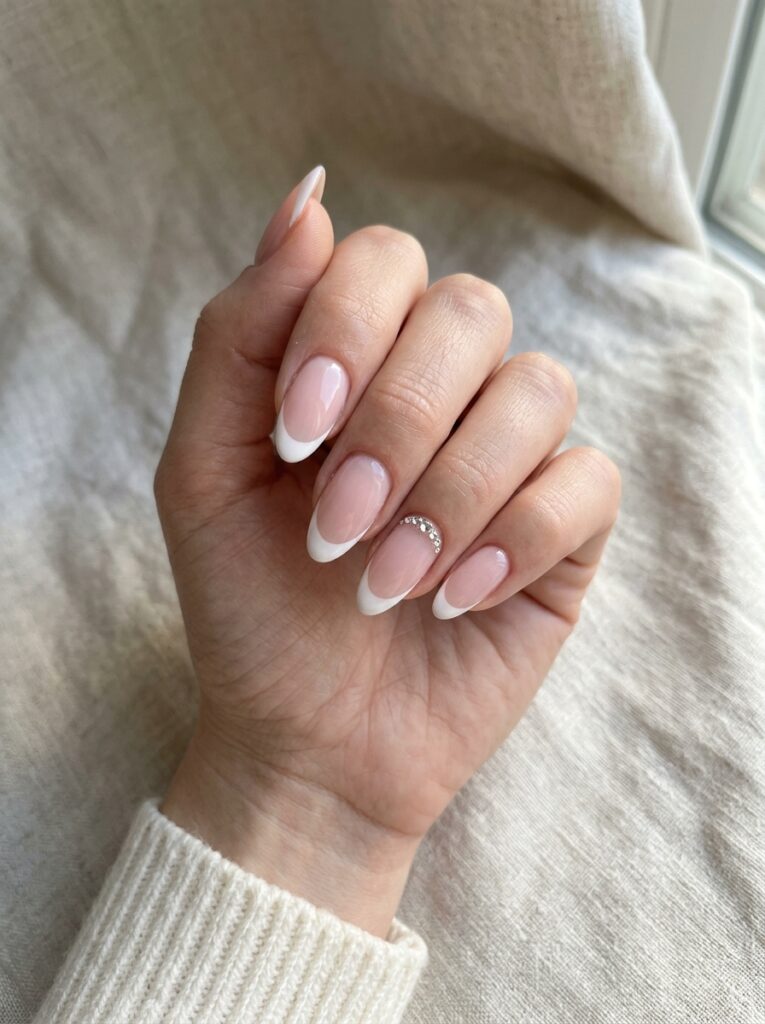
French tips are clean, timeless, and easy to match with almost any outfit. Adding a few rhinestones gives them a birthday-ready finish without changing their classic style.
Use a sheer nude or pale pink base with crisp white tips. Place small crystals near the cuticle or along one side of an accent nail.
This design works well for birthday dinners, formal parties, and elegant outfits. Almond nails give the look a soft feel. Square nails create a sharper finish.
Keep the rhinestones on one or two nails for a refined look. You can also replace white tips with silver, pink, or gold.
Confetti Birthday Nails
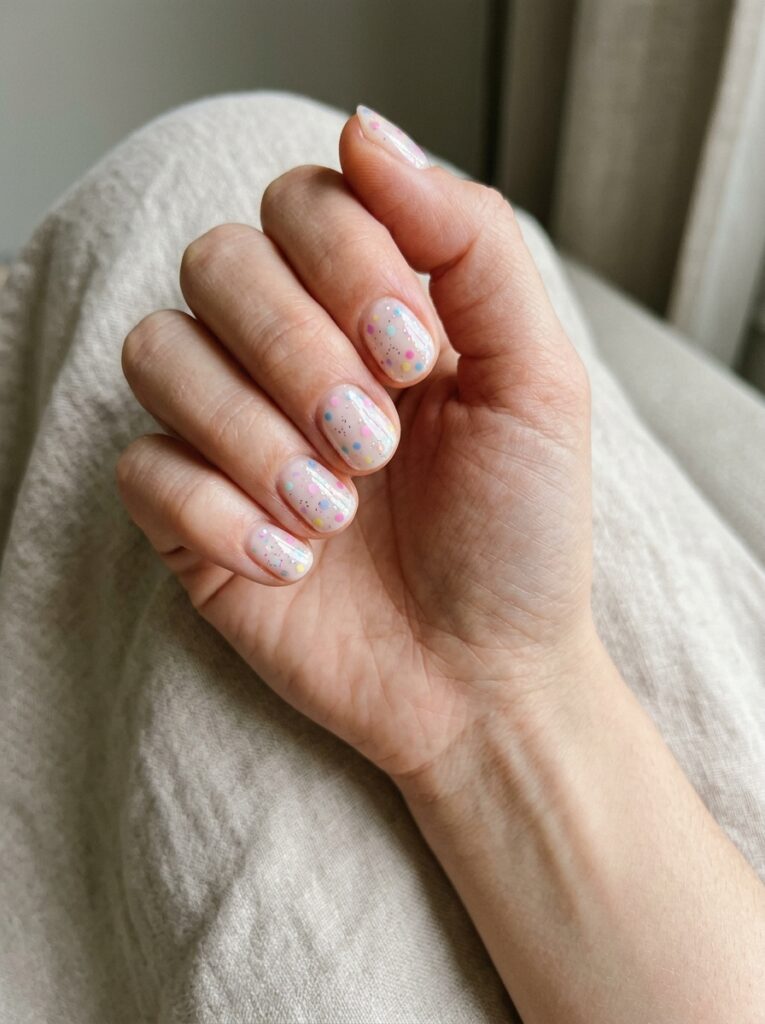
Confetti nails look cheerful and work with many party colors. Start with a clear, nude, or milky base. Add small pieces of colorful foil, glitter, or painted dots across each nail.
A neutral base keeps the design balanced. It also helps the bright colors stand out.
Confetti art works well on short nails because it does not need much space. It is also a good DIY choice. You can create the effect with a dotting tool or a glitter top coat.
Use many colors for a playful set. Choose two or three shades if you want a cleaner finish that matches your outfit.
Coquette Bow Birthday Nails
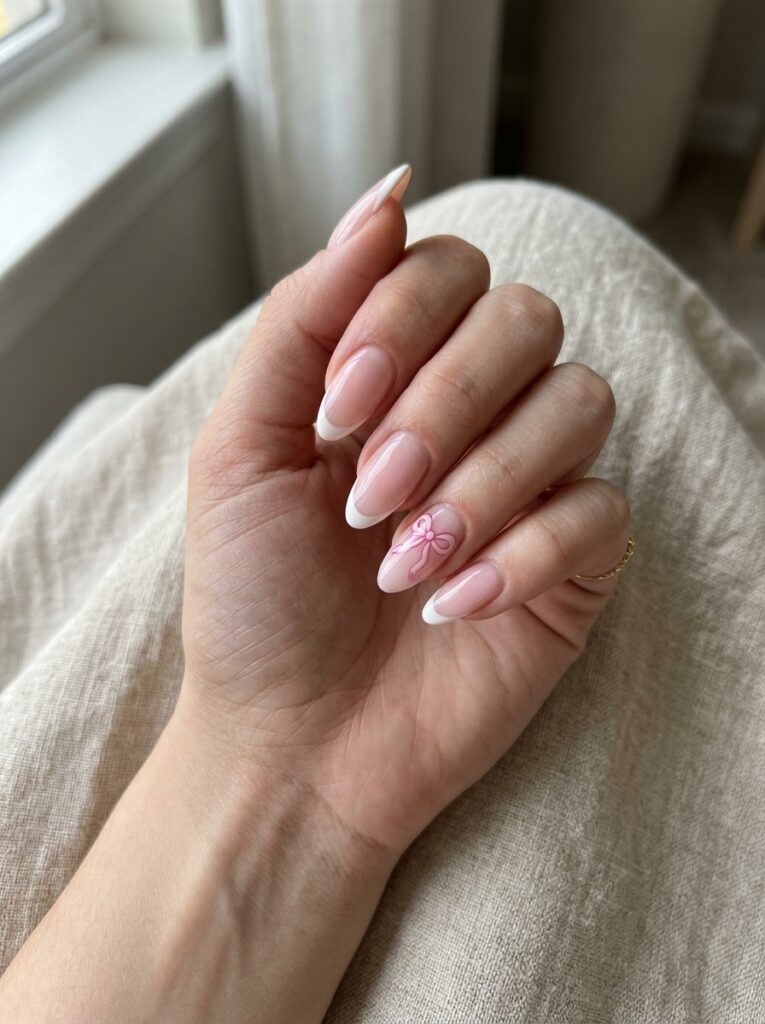
Bow nails are a sweet choice for a feminine birthday style. Use pink, white, cream, or red as your main colors. Add tiny ribbon designs, pearls, lace-style lines, or small 3D bows.
French tips make a good base because they keep the manicure clean. Place the bow on one or two accent nails so it remains the main detail.
This design works well for tea parties, romantic birthday themes, and soft outfits.
Keep in mind that raised bows can catch on clothing or hair. Painted bows are easier to wear and still give the same Easy effect.
Gemstone and Crystal Birthday Nails
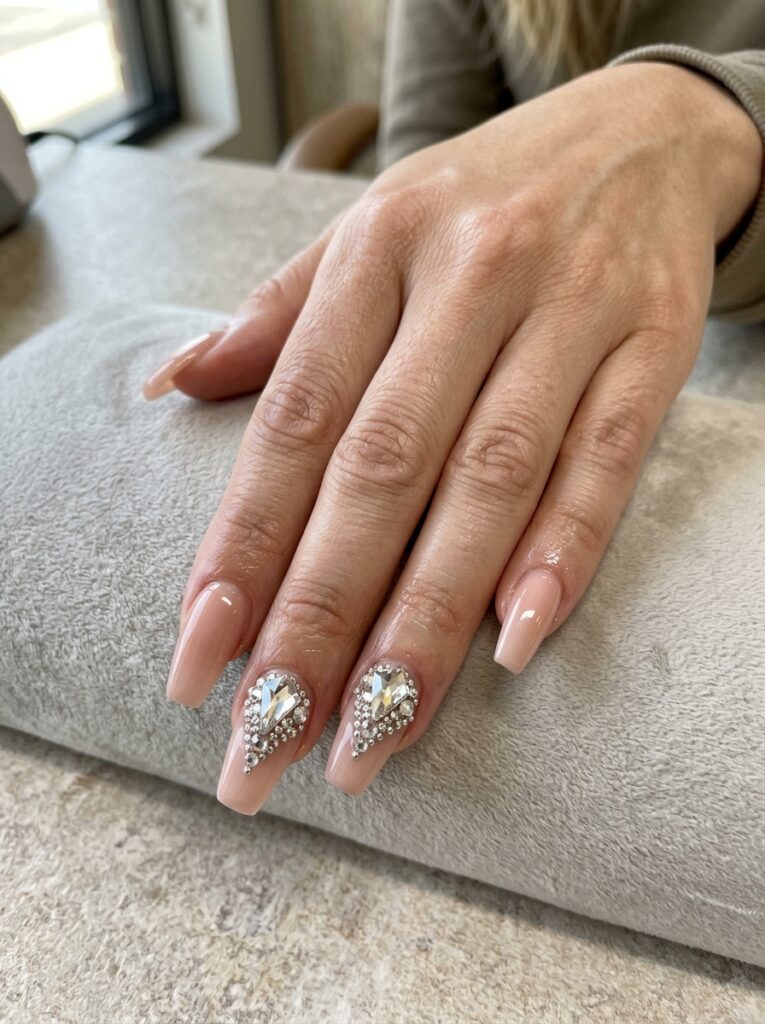
Crystal nails are made for readers who want a high-shine birthday manicure. Use rhinestones, gems, metallic studs, or small crystals over a nude, clear, black, or rich-colored base.
Medium and long nails give you more space for larger arrangements. However, short nails can still hold one crystal near each cuticle.
Keep bigger gems away from the edges of the nail. This can reduce snagging and make the set easier to wear.
Use crystals on two accent nails for a balanced look. Cover several nails with gems when you want a full statement set.
Glittery Pink Birthday Nails
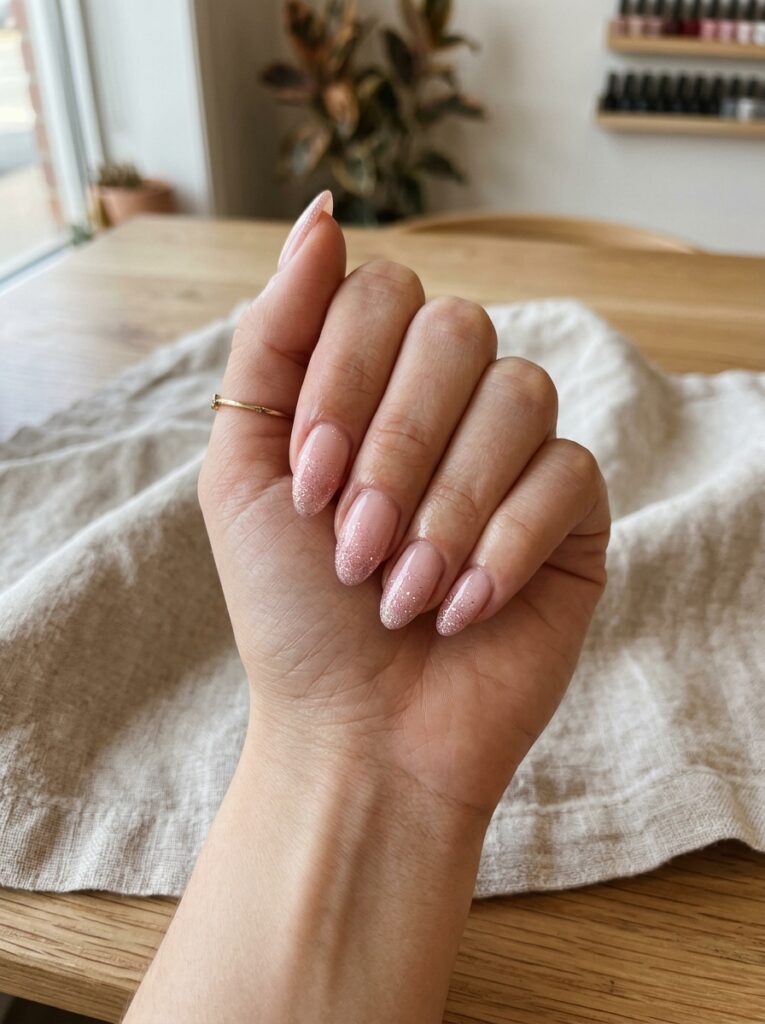
Pink glitter nails are a fun choice when you want a manicure that feels festive without looking too heavy. Start with a blush, baby pink, or hot pink base. Then add fine glitter to the tips or use it on one or two accent nails.
Fine glitter creates a softer shine. Chunky glitter feels brighter and more playful. A glossy top coat can help bring the whole look together.
This design works on almond, square, and coffin nails. Pair it with pink, white, silver, or black clothing.
For a simple version, use a sheer pink base with glitter tips. For extra drama, add rhinestones near the cuticles.
Gold Chrome Birthday Nails
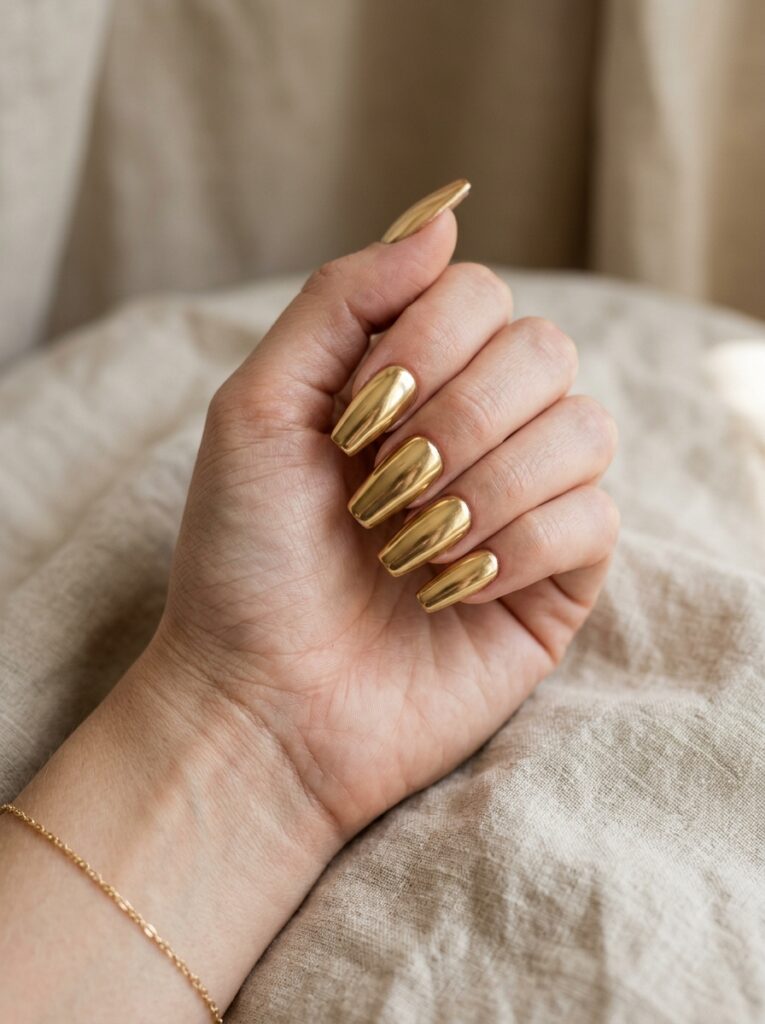
Gold chrome nails bring instant shine to a birthday look. The smooth mirror finish catches light well, which makes it a strong choice for evening photos.
You can wear chrome across every nail or use it only on the tips. Gold chrome French tips look cleaner and are easier to pair with everyday outfits.
This design looks beautiful with black, cream, brown, champagne, or dark green clothing. It also pairs well with warm-toned jewelry.
Full chrome works best when you want a bold look. For something softer, keep most nails nude and add gold chrome to two accent nails.
Milky White Pearl Nails
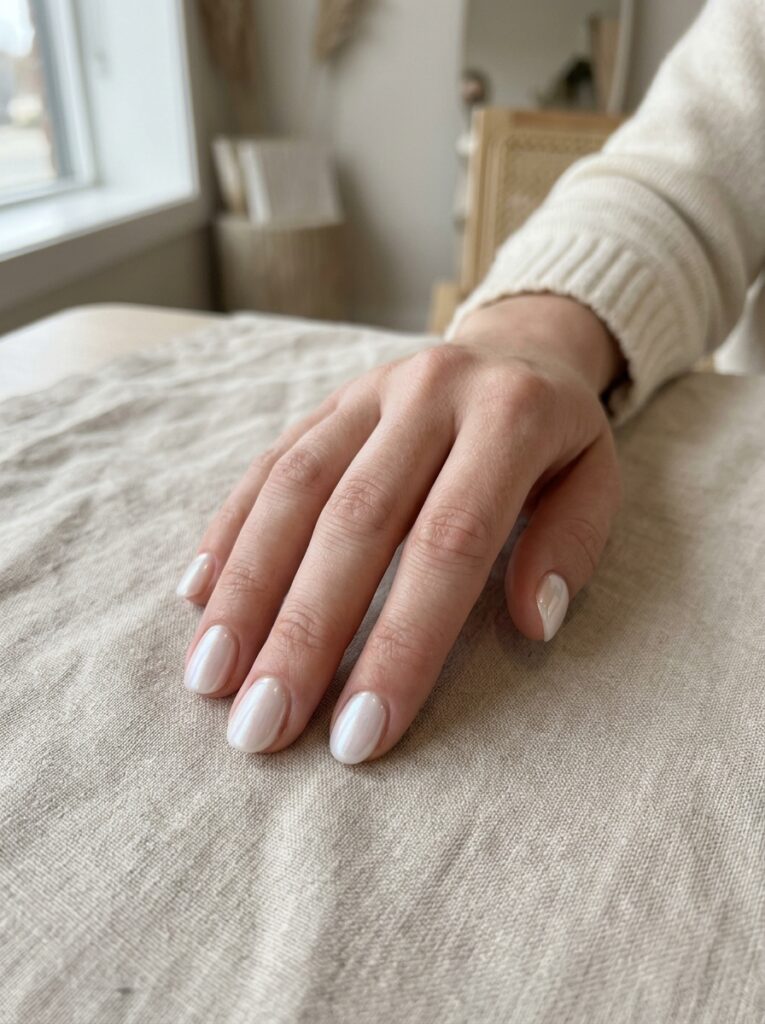
Milky white pearl nails are a soft choice for readers who want simple birthday nails. They look clean, bright, and polished without relying on heavy decorations.
Ask for a sheer white base instead of a solid white shade. The slight transparency gives the nails a smoother and more natural finish. Add pearl powder, tiny pearl accents, or a soft glazed top coat.
This manicure works well for brunches, white outfits, and soft glam makeup. It looks beautiful on short round nails and medium almond nails.
For a minimal set, use pearl powder alone. For extra detail, place small pearls along one accent nail.
Neon Birthday Party Nails
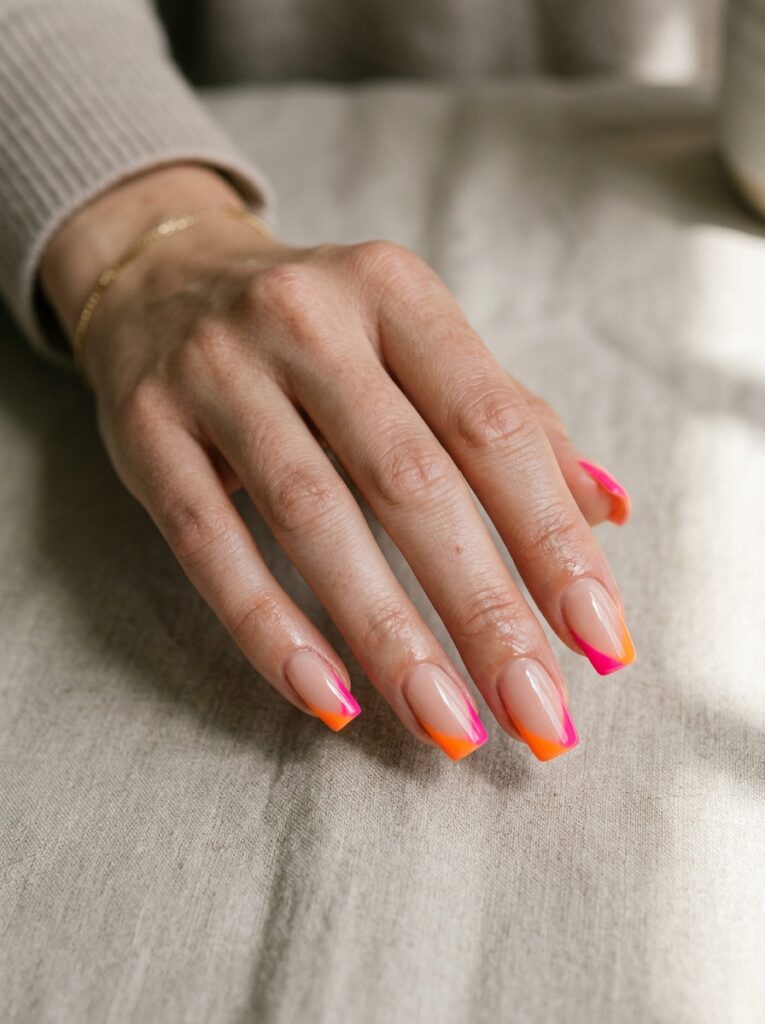
Neon nails are bright, energetic, and fun. They work well for summer birthdays, pool parties, beach events, and bold outfits.
Choose neon pink, orange, yellow, green, or blue. You can also mix two colors in swirls, tips, or color-blocked patterns.
A full neon manicure may feel too strong for some people. In that case, use a nude base with neon French tips or thin accent lines.
Keep the shape simple so the color remains the main feature. Short square nails and medium almond nails both work well with neon shades.
Nude Nails With Gold Foil
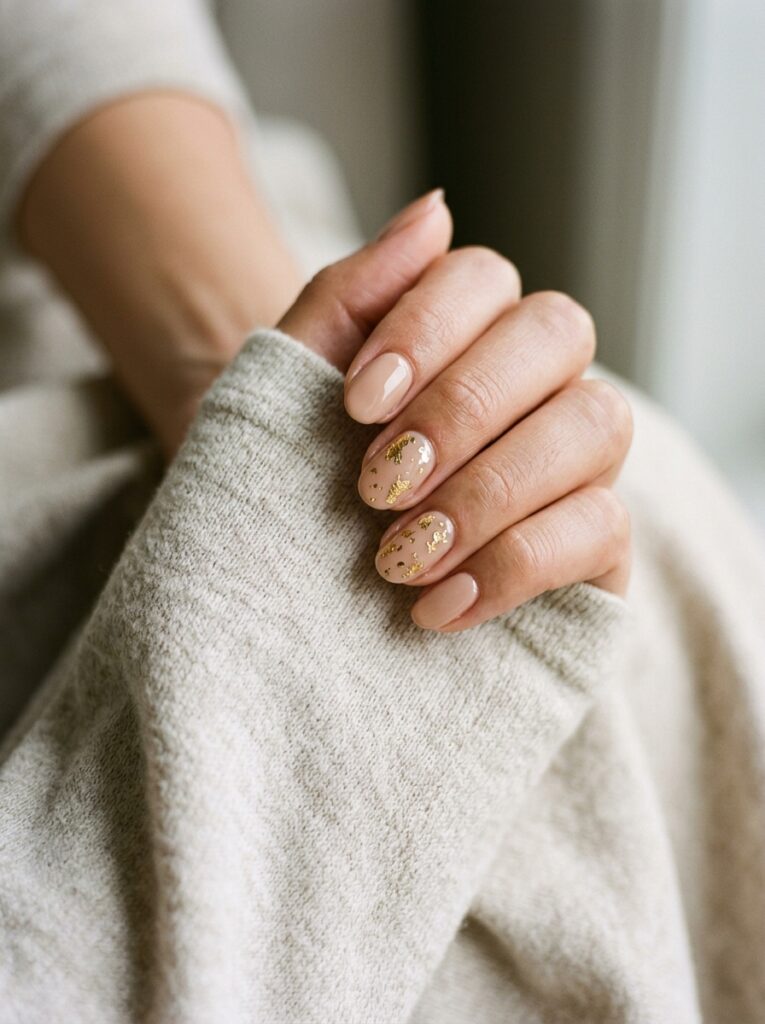
Nude and gold nails feel polished without looking overdone. Choose a nude shade that works well with your skin tone. Then add small pieces of gold foil in uneven shapes.
The foil does not need to look perfectly placed. The irregular details are part of the design.
This style suits short and medium nails. It also matches formal clothing, neutral outfits, and warm-toned makeup.
Use one foil accent nail for a simple manicure. Add foil to every nail if you want more shine. A thin gold French tip can also create a clean finish.
Pastel Ombre Birthday Nails
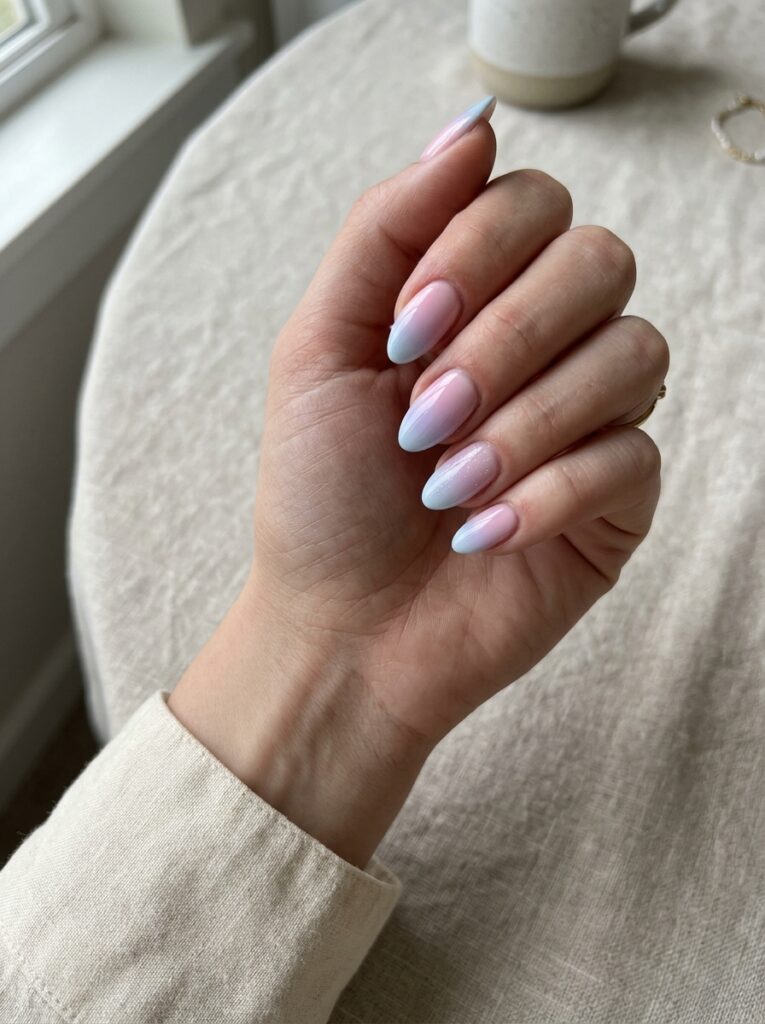
Pastel ombre nails blend soft colors into a smooth gradient. Pink, lilac, peach, yellow, and baby blue are popular choices.
Limit the design to two or three colors. Too many shades may make the gradient look messy.
This manicure works well for spring birthdays, summer parties, garden events, and pastel dresses. It looks soft on almond nails and playful on square nails.
Use the same color blend on every nail for a clean set. You can also use a different pastel shade on each finger. Add a glossy top coat to keep the colors bright.
Pink Aura Birthday Nails
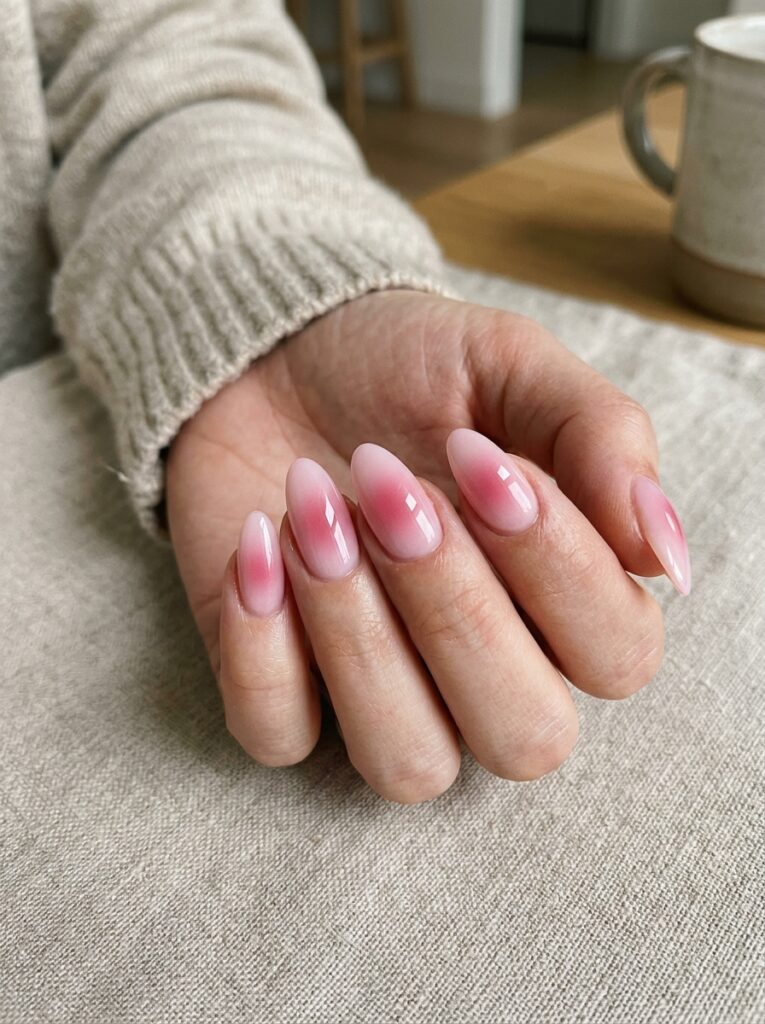
Pink aura nails use a soft airbrushed circle of color in the center of each nail. The effect feels dreamy, modern, and slightly different from a regular gradient.
Start with a nude or pale pink base. Add a deeper pink shade in the center, then blend the edges until they look soft.
Light pink creates a gentle style. Neon pink gives the set a stronger party feel. You can also add tiny stars, crystals, or chrome details.
Aura nails look best on almond and oval shapes, but they can also work on short nails. Pair them with pink, white, silver, or pastel outfits.
Red Birthday Nails With Heart Detail
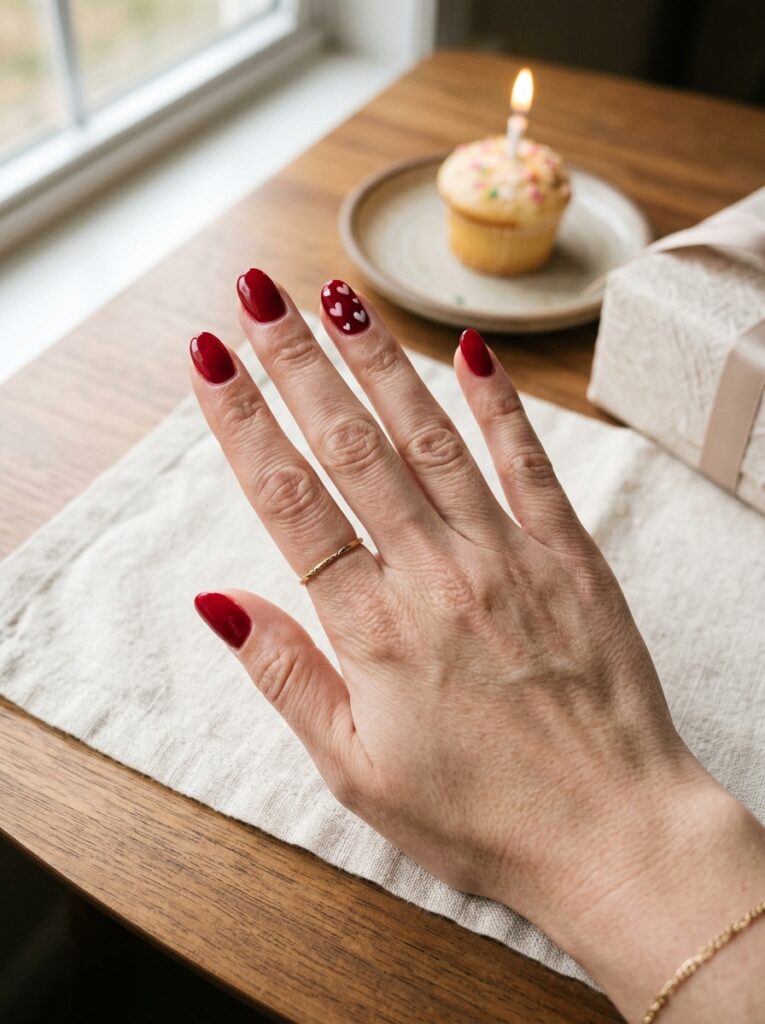
Red nails are bold, classic, and easy to wear at any time of year. Small heart details make them feel more playful and personal for a birthday.
Choose bright cherry red for a lively look. Deep crimson creates a richer finish. Add tiny white, pink, or gold hearts to one or two nails.
This style works well for date-night birthdays, winter parties, and red or black outfits. It can also match romantic makeup and gold jewelry.
Micro hearts keep the manicure subtle. Larger hearts, glitter, or gems can make the design more fun and noticeable.
Rose Gold Birthday Nails
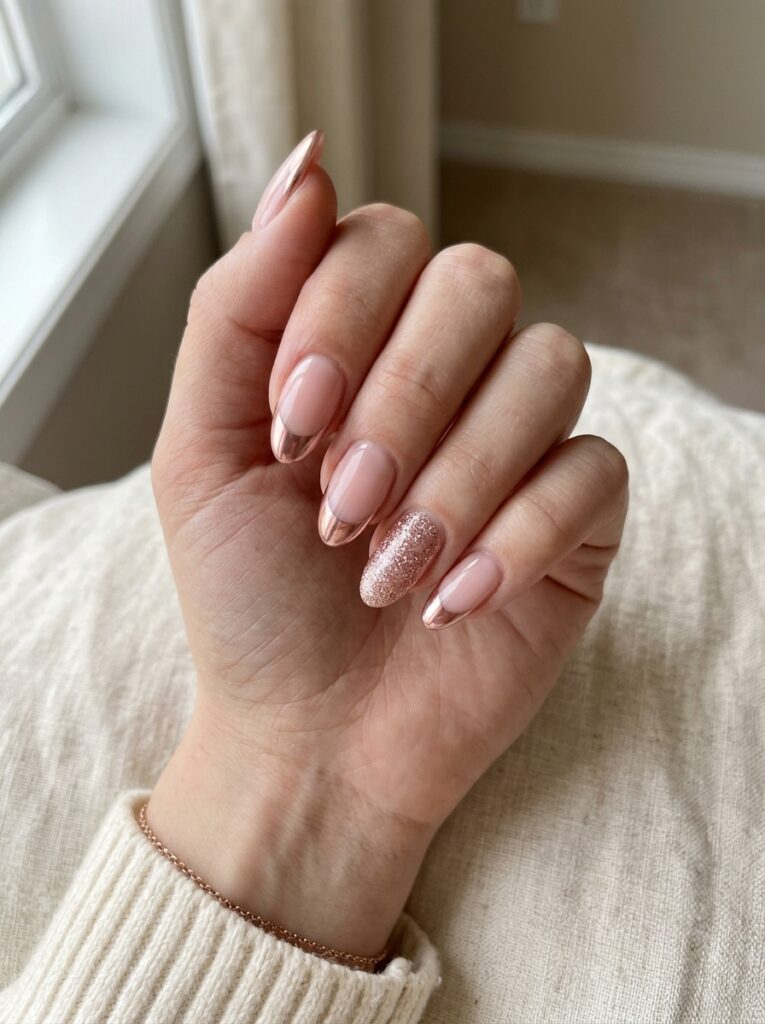
Rose gold nails mix soft pink with metallic shine. They feel glamorous, but they are often easier to wear than bright yellow gold.
You can use rose gold chrome, foil, glitter, or thin metallic lines. A sheer pink base keeps the design light and balanced.
This style pairs well with blush, cream, brown, and white outfits. It also matches rose gold jewelry and warm makeup.
For a simple version, use rose gold French tips. For more sparkle, combine full glitter accent nails with pink chrome and small crystals.
Short Minimalist Birthday Nails
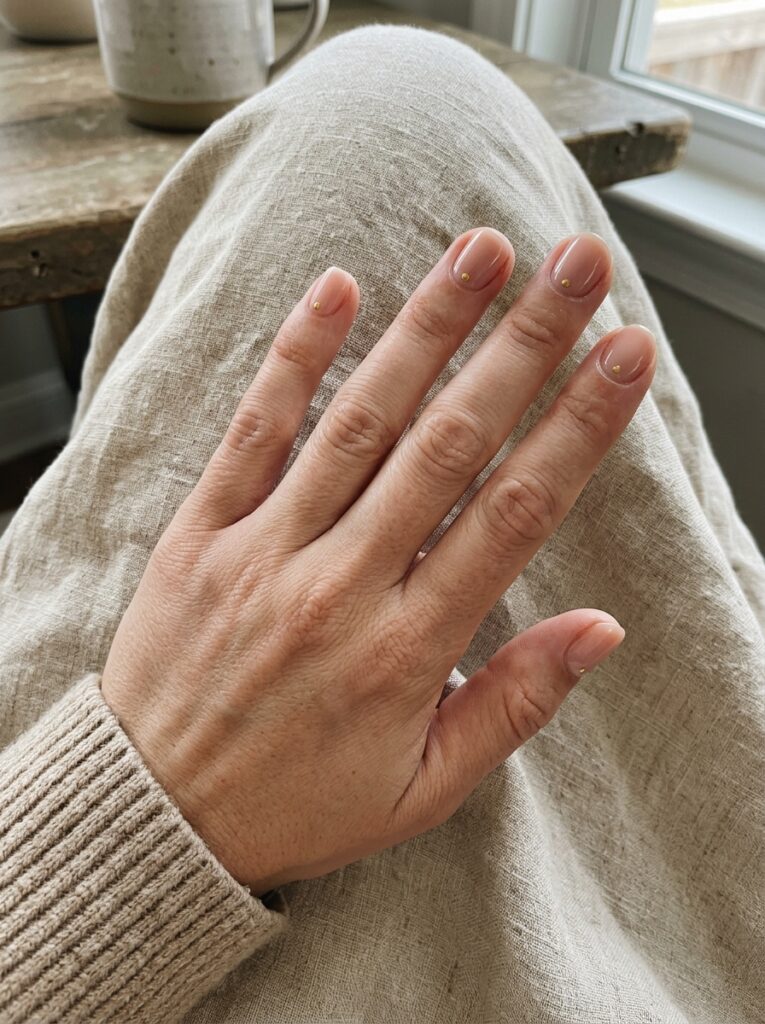
You do not need long extensions to create special birthday nails. Short natural nails can look polished with small, well-placed details.
Start with a clear, nude, pink, or milky base. Add tiny stars, hearts, dots, metallic lines, or micro French tips.
This option is useful if you work with your hands or prefer low-maintenance nails. It is also easier to recreate at home.
Choose one small design and repeat it across the set. Too many details can overwhelm short nails. A single crystal or gold dot on each nail may be enough.
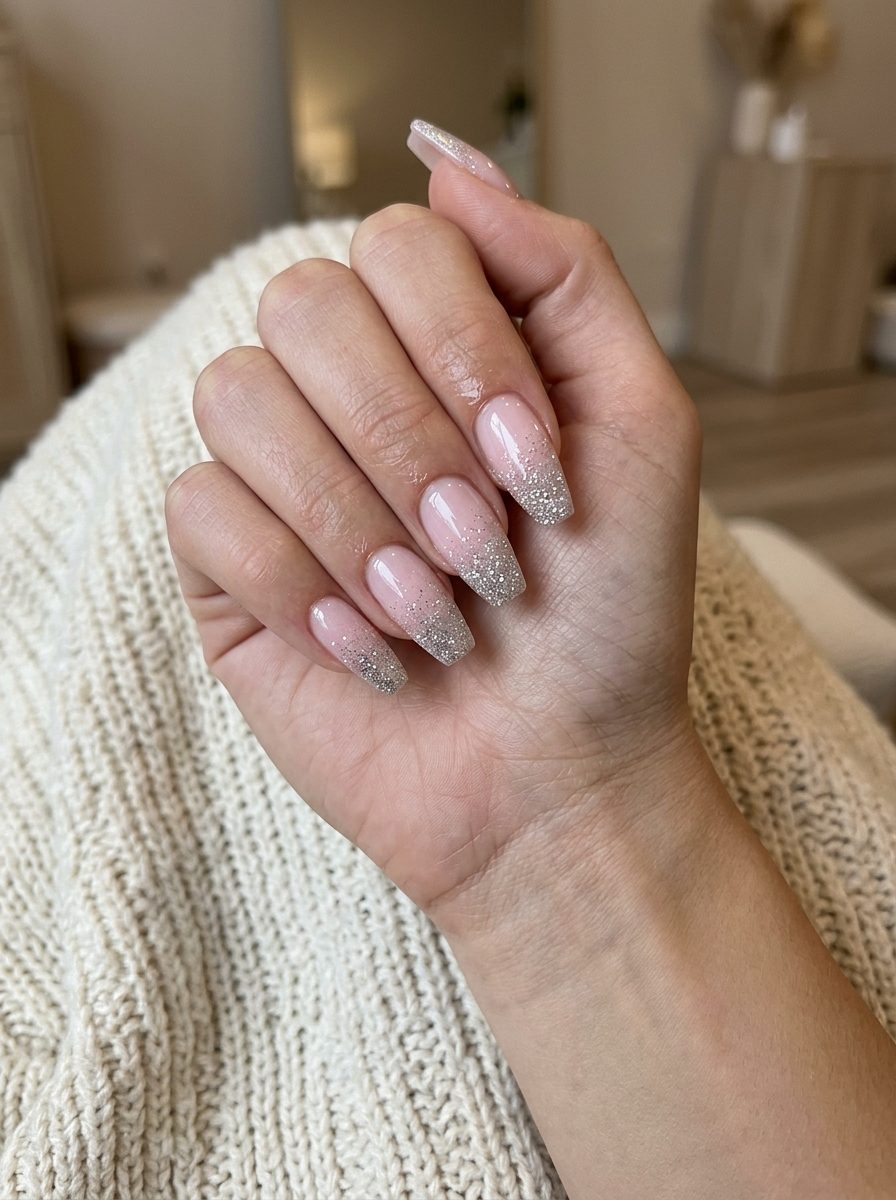
Silver Glitter Birthday Nails
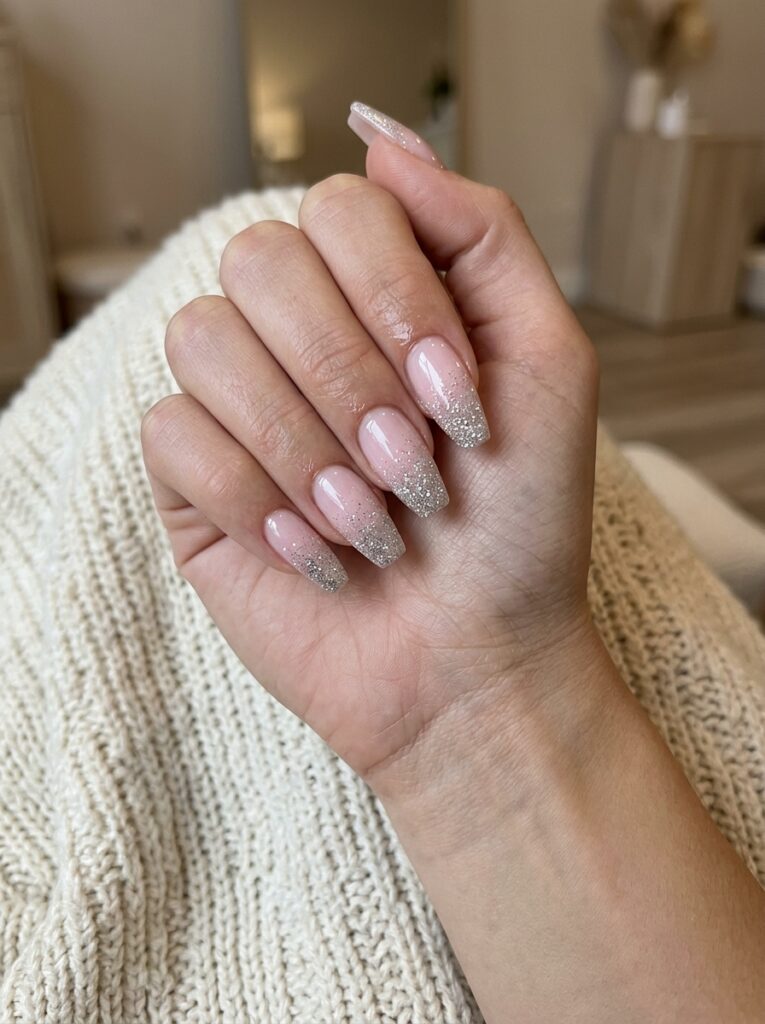
Silver glitter nails are made for parties. They reflect light, look great in photos, and pair well with cool-toned jewelry.
You can cover every nail with silver glitter, but that may feel too strong for some people. A glitter gradient offers a softer option. Place more glitter near the tip or cuticle, then fade it across the nail.
Use clear, white, grey, black, or pale blue as the base. Silver looks especially good with black dresses, icy colors, and crystal accessories.
Short glitter tips feel clean and modern. Full glitter coffin nails create a bolder birthday look.
Zodiac Birthday Nails
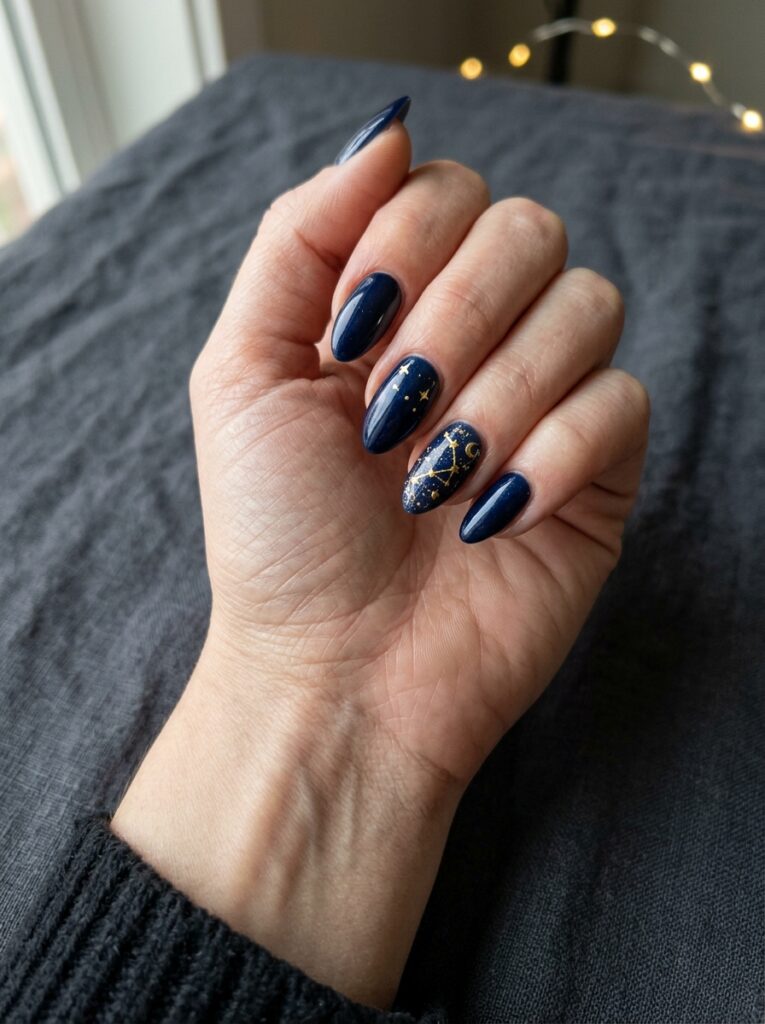
Zodiac nails are a personal choice because they connect the design to your birthday month. Add your zodiac symbol, constellation, birthstone color, moon details, or small stars.
Use one symbol on an accent nail and keep the other nails simple. This makes the design easier to see.
You can also choose a polish shade based on your birthstone. For example, use a jewel-toned color with small gold star details.
This design works well for astrology lovers and anyone who wants a manicure with personal meaning. It can be simple, bold, or fully customized.
How to Match Birthday Nails With Your Outfit
Your nails do not need to match your clothing exactly. In many cases, a contrasting color looks more polished and stands out better in photos.
Start with your jewelry. Gold chrome, rose gold, and warm nude shades work well with gold jewelry. Silver glitter, icy blue, and grey designs pair well with silver or crystal accessories.
Next, look at the amount of detail in your outfit. A sequined dress already has plenty of shine. Simple milky white or nude nails may create better balance. A plain black dress gives you more space for crystals, chrome, or bright nail art.
Use this quick guide:
| Outfit | Birthday Nail Suggestion |
| Black dress | Gold chrome or silver glitter |
| Pink dress | French tips, pearls, or rose gold |
| White outfit | Confetti, blue stars, or bright nails |
| Red dress | Nude gold foil or classic red |
| Sequined outfit | Milky white or simple nude nails |
| Floral dress | Pastel ombre or small flower details |
Your makeup also matters. Soft makeup pairs well with clean French tips, pearl nails, and nude foil designs. Strong eye makeup may look better with simpler nails.
Take a photo of your outfit, jewelry, and nail idea together before your appointment. This can help you spot colors that clash.
Gel, Acrylic, Press-On, or Natural Birthday Nails?
The design is only one part of the decision. You also need an option that fits your time, budget, preferred length, and daily routine.
| Nail Option | Best For | Main Benefit | Consideration |
| Gel | Medium-term wear | Smooth, glossy finish | Needs careful removal |
| Acrylic | Added length and bold art | Strong base for detailed designs | Requires maintenance |
| Press-ons | Last-minute plans | Fast and easy to change | Fit affects how well they stay |
| Natural polish | Simple DIY looks | Affordable and easy | May chip sooner |
Gel is a good choice when you want shine and plan to wear the manicure beyond your birthday. Acrylic works well for long coffin, almond, or square shapes. It can also support crystals and detailed nail art.
Press-ons are helpful when you do not have time for a salon visit. They come in many styles and can be removed after the event. Choose the correct size for each nail to improve the fit.
Regular polish is a practical choice for simple birthday nails. It is easy to apply at home, but you may need to fix small chips.
There is no single best option. Choose based on the design you want and how long you need it to last.
How to Make Your Birthday Nails Last Longer
A beautiful manicure is less useful when it chips or loses a decoration before the party begins.
Try to book detailed salon nails one to three days before your birthday. This gives you a fresh set while leaving time for small fixes.
Use cuticle oil around your nails each day. This keeps the skin from looking dry in close-up photos. Avoid placing oil over press-on glue because it may weaken the bond.
Wear gloves when cleaning or washing dishes. Harsh products and long contact with water can affect polish and decorations.
Do not use your nails to open cans, scrape labels, or press hard objects. This can cause cracks and chips.
For regular polish, apply another thin layer of top coat before the event. For press-ons, carry nail glue and one spare nail if possible.
Large gems and charms need extra care. Ask your nail technician how they were attached and what you should do if one comes loose.
Choose the Birthday Nails That Feel Like You
Birthday nails can be simple, colorful, elegant, or covered in sparkle. The best choice depends on your outfit, party plans, nail length, and daily routine.
You may prefer clean French tips for a dinner. You may want bright confetti for a fun party. Chrome, gems, zodiac details, and birthstone colors can make the manicure feel more personal.