
You do not need a salon appointment or a drawer full of fancy tools to make your nails look cute. Many simple nail designs take only a few minutes and use things you may already have at home.
The hard part is that nail art can look much easier online than it feels in real life. Your dots may look uneven. Your French tips may smudge. One nail may look great while the next one feels like a mess.
That is normal.
These easy nail art ideas are made for beginners. You will find simple looks that work on short nails, long nails, round nails, and square nails. Most of them need just two polish colors, a toothpick, a bobby pin, or a small nail brush.
Start with one accent nail if you feel nervous. You do not need perfect hands to make simple nail art at home look good.
What You Need for Simple Nail Designs at Home
Most simple nail designs need less than you think. A few basic items can help you make dots, lines, tiny flowers, and clean tips without spending much money.
Start with a base coat, two or three nail polish colors, and a clear top coat. A base coat helps your color go on more smoothly. A top coat helps your design stay shiny and last longer.
You can use a dotting tool, but you do not need one. A bobby pin makes neat dots. A toothpick works well for tiny hearts, stars, and flower petals. A thin paintbrush can help with lines and French tips.
Nail stickers, glitter polish, striping tape, and tiny gems are nice extras. They are helpful when you want your nails to look detailed without painting every little part yourself.
Try to keep your first few beginner nail designs simple. Pick one base color and one detail color. For example, pale pink and white, beige and black, or light blue and silver are easy pairings that look clean.
Simple Nail Designs With Dots and Lines
Dots and lines are great first designs because small mistakes are hard to notice. They are also fast, which makes them a good choice for your first at-home manicure.
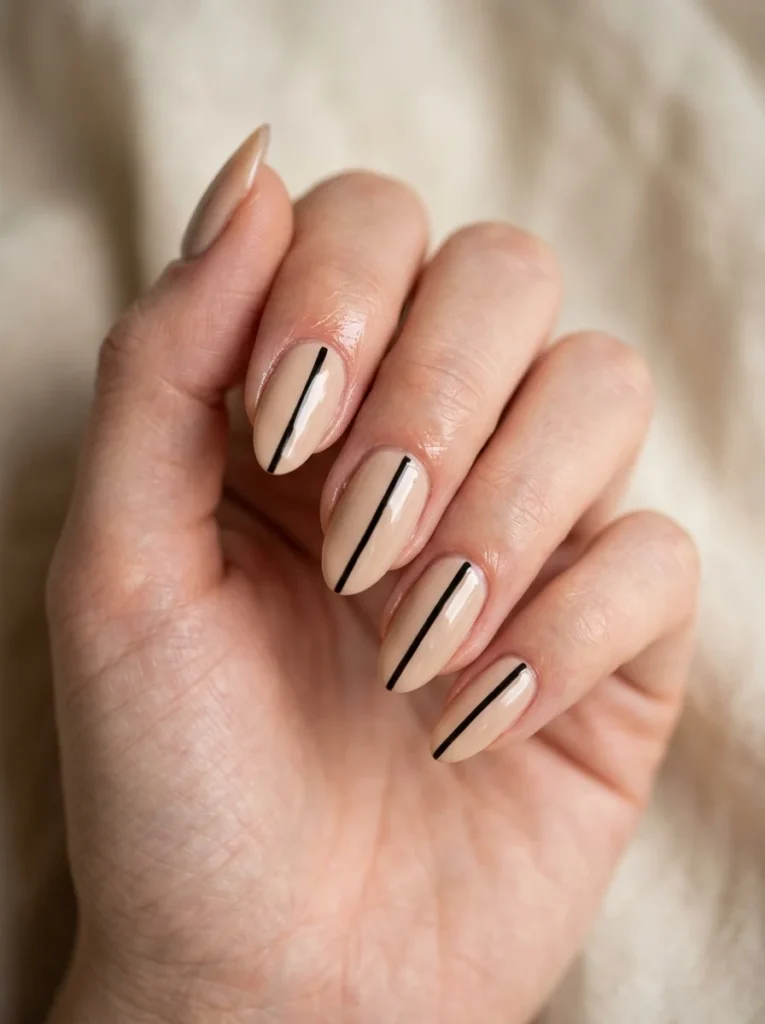
Vertical Stripe Nails
Difficulty: Easy
Tools needed: Thin brush or striping tape
Best colors: Beige and black, white and navy, or pale pink and red
Paint your nails with a light base shade. Use a thin brush to add one straight vertical line from the base to the tip.
Do not stress if the line is slightly off-center. That can still look stylish. You can also use striping tape for a cleaner finish.
Try this on every nail, or paint stripes only on your ring fingers. A black stripe over a beige base is a simple look that works in every season.
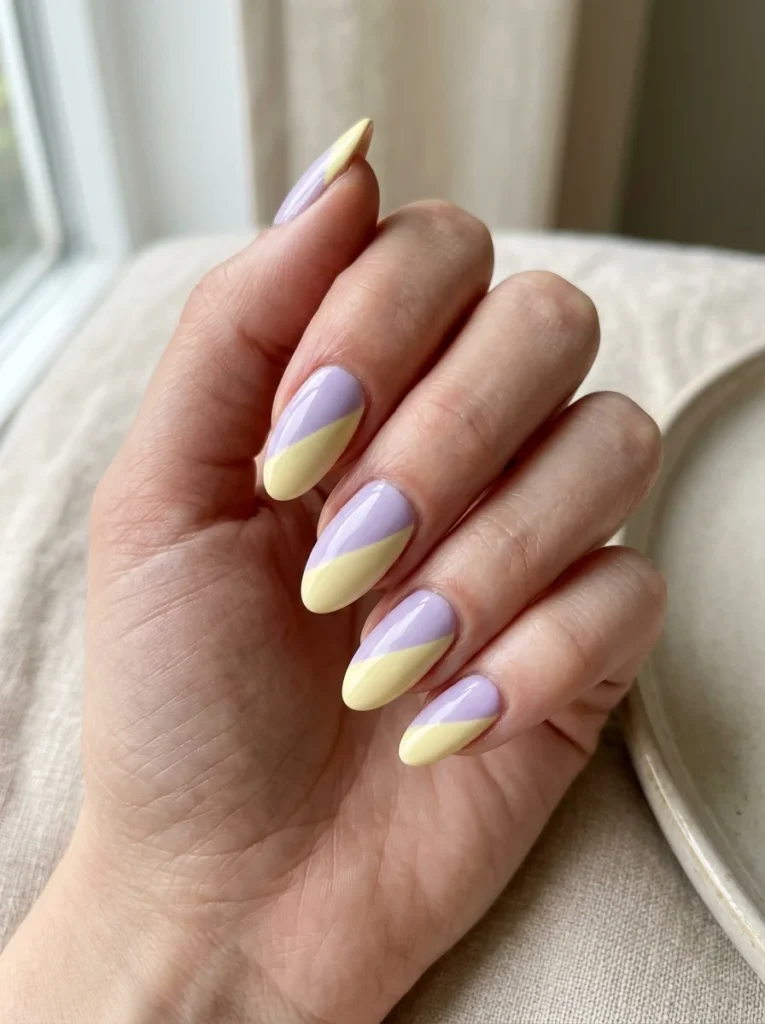
Two-Tone Color Block Nails
Difficulty: Easy
Tools needed: Thin brush or striping tape
Best colors: Lavender and pale yellow, pink and orange, or black and white
Color block nails use two shades on one nail. You can split the nail down the middle, across the middle, or at an angle.
Paint one half in your first color. Let it dry. Then paint the second half in a different shade.
A diagonal split is one of the easiest options because it does not need to look perfectly even. Lavender and pale yellow create a soft spring look. Black and white feel more bold and simple.
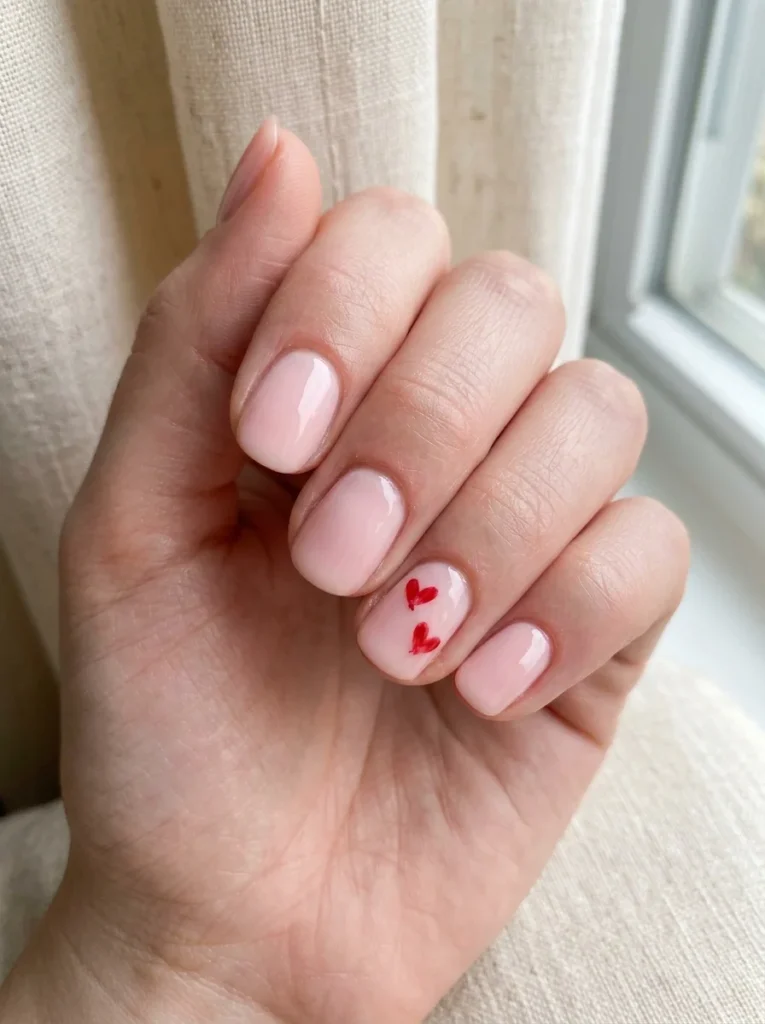
Tiny Heart Nails
Difficulty: Easy
Tools needed: Toothpick or dotting tool
Best colors: Red and pale pink, white and nude, or black and clear
Make two small dots close together. Drag the toothpick down from the middle of both dots to create the bottom point of the heart.
Paint hearts on one or two nails only. Keep your other nails in one solid shade.
Tiny red hearts on pale pink nails are a classic choice. White hearts over a nude base also look soft and clean.
Tiny Daisy Nails
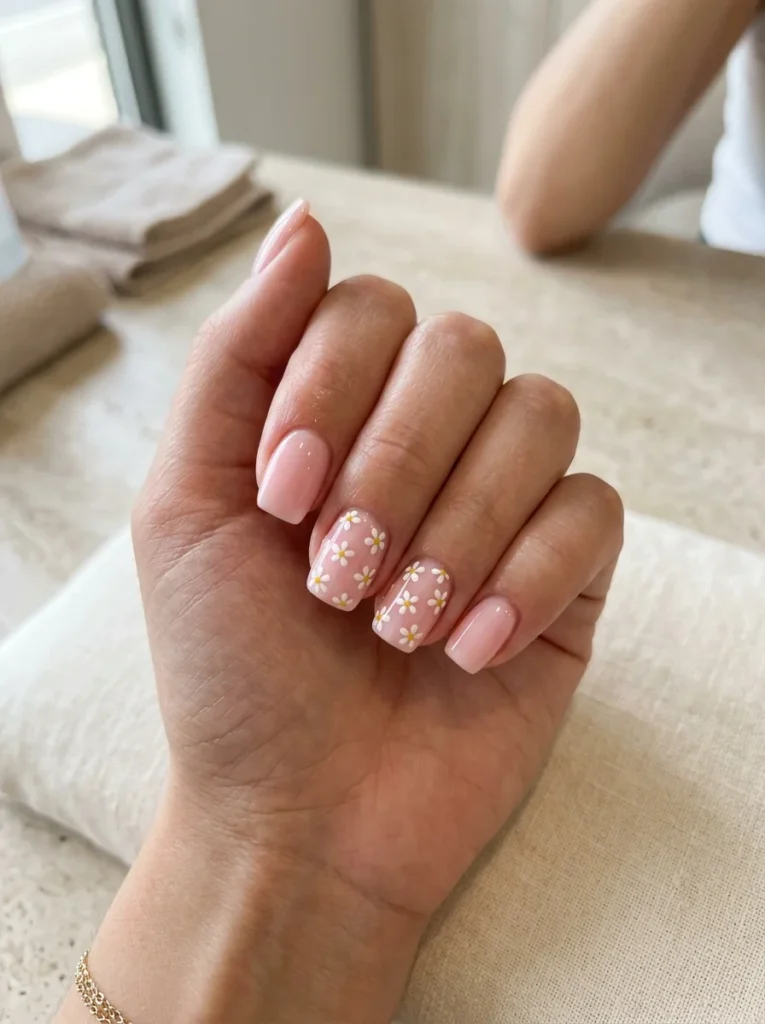
Difficulty: Easy
Tools needed: Toothpick or dotting tool
Best colors: White, yellow, and pale pink or light blue
Daisy nails look cute, but they are easier than they seem. Start with a soft base color. Make five tiny white dots in a circle, then add one yellow dot in the center.
You do not need daisies on every nail. Try them on your ring finger and middle finger, then leave the other nails plain.
If your flower petals look uneven, do not worry. Small daisies look better when they are not all exactly the same.
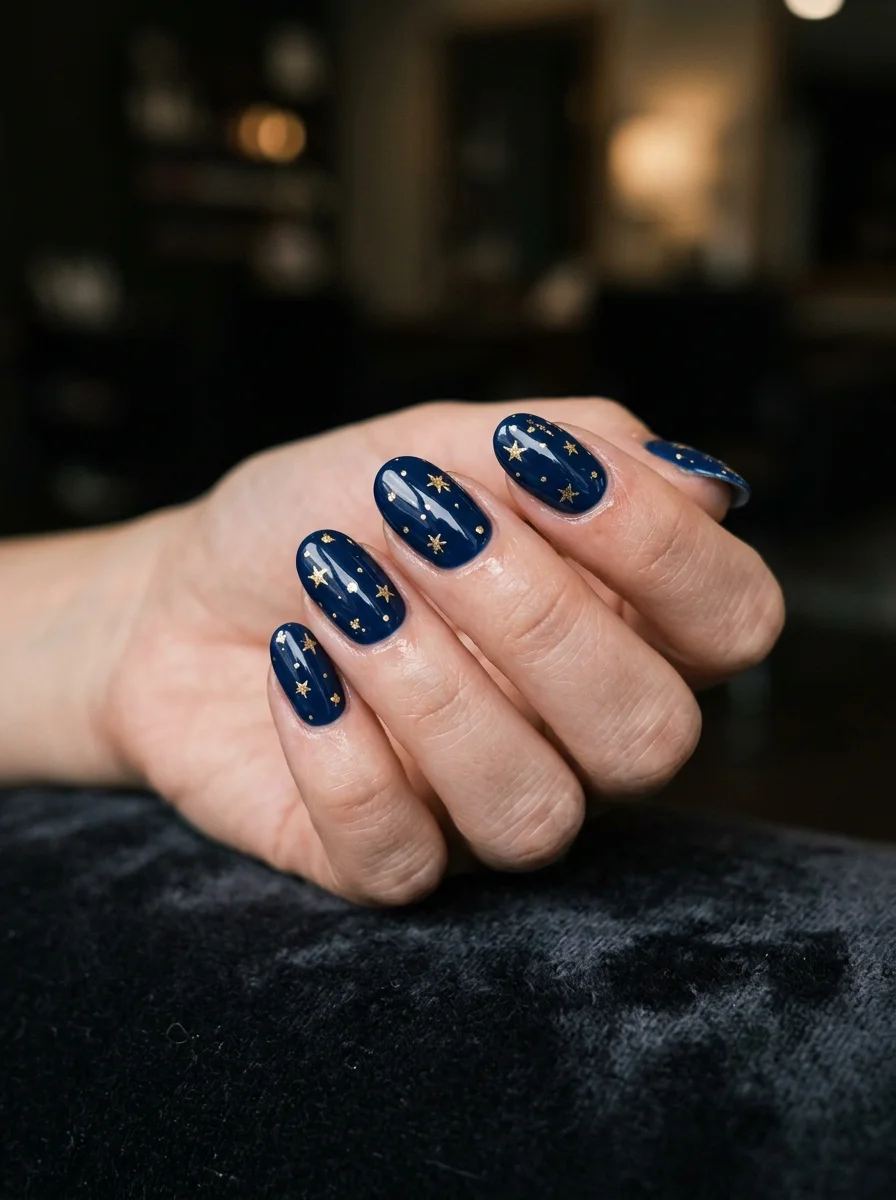
Starry Night Nails
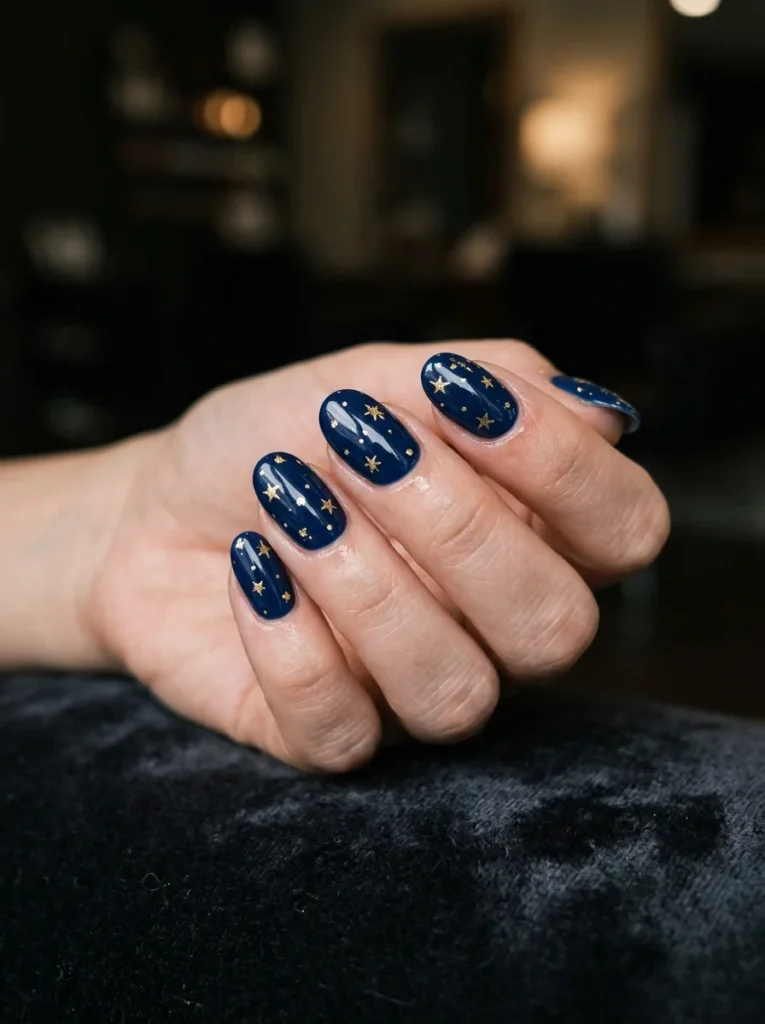
Difficulty: Easy
Tools needed: Toothpick or nail stickers
Best colors: Navy and gold, black and silver, or dark purple and white
Paint your nails with navy, dark purple, or black polish. Add tiny stars with a toothpick or use small star stickers.
You can make a simple star by drawing a tiny cross, then adding two short diagonal lines. It does not need to look perfect.
Gold polish looks great against navy. Silver stars over black nails give a clean night-sky look.
Small Flower Accent Nails
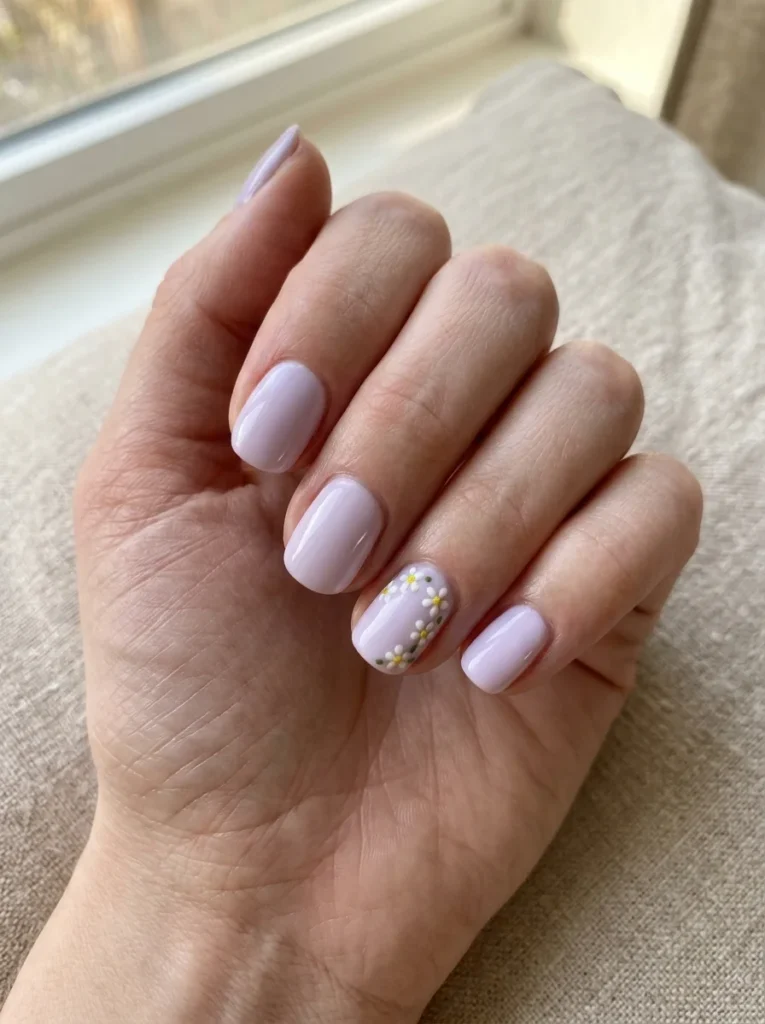
Difficulty: Easy
Tools needed: Bobby pin or dotting tool
Best colors: White and yellow, pink and white, or purple and gold
This is similar to daisy nails, but you can use any colors you like. Add five small dots in a circle, then place a contrasting dot in the middle.
Try flowers on your ring fingers only. Keep the rest of the nails pale pink, soft beige, or light lavender.
This design works well when you want cute simple nail designs without spending a lot of time painting tiny details.
Single Accent Dot Nails
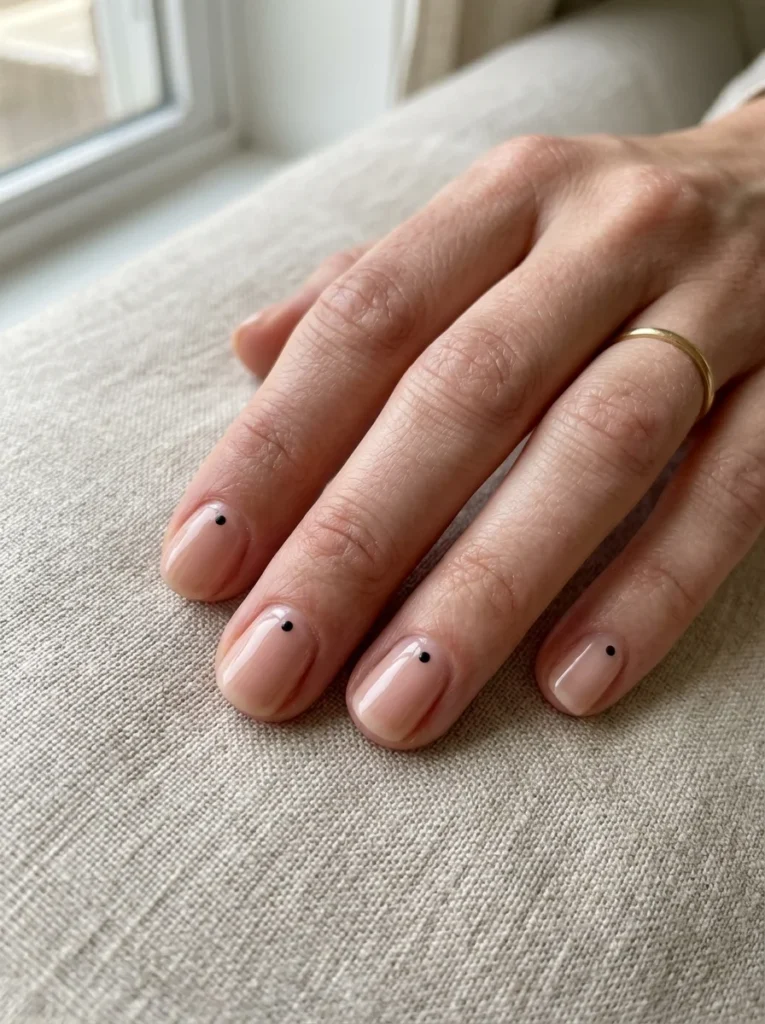
Difficulty: Very easy
Tools needed: Bobby pin
Best colors: Nude and black, clear and red, or beige and gold
This is one of the easiest beginner nail designs because it takes almost no time. Paint your nails with clear polish or a nude shade. Add one small dot near the cuticle on each nail.
Use the same dot color for every nail. Black gives a clean, modern look. Red feels cute and bold. Gold polish adds a small bit of shine.
This design is great for school, work, or days when you want something simple but not boring.
Simple Cloud Nails
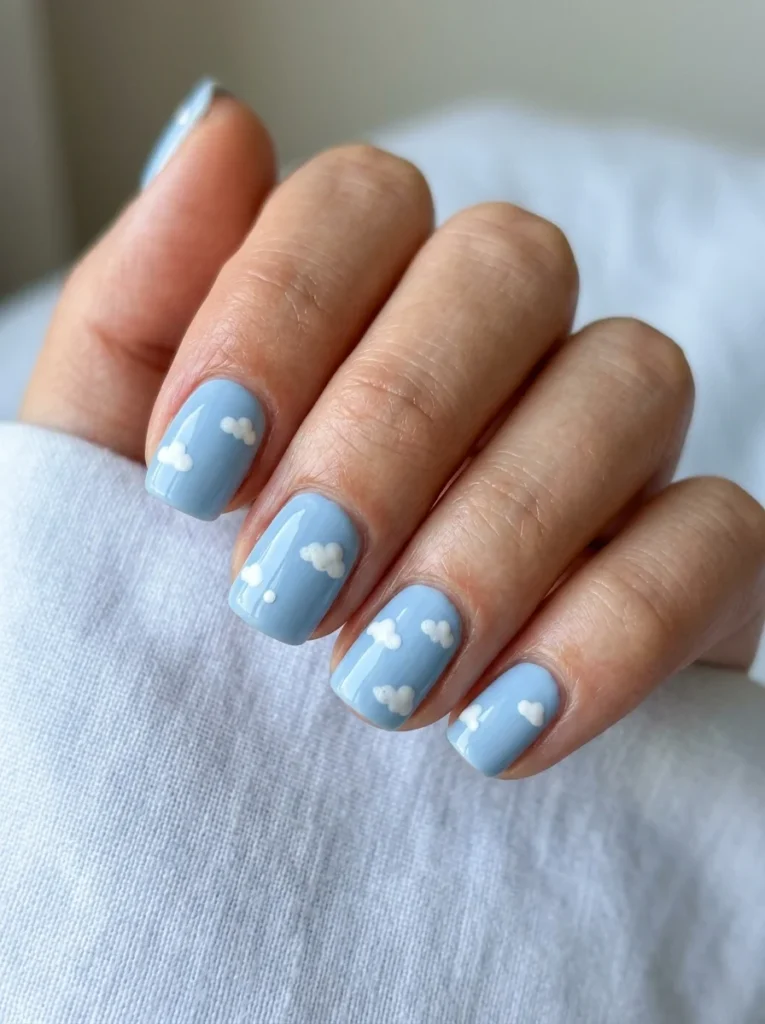
Difficulty: Easy
Tools needed: Dotting tool or bobby pin
Best colors: Light blue and white, pale pink and white, or lavender and white
Paint your nails sky blue or another soft color. Use white polish to make three small dots in a row, then add one or two dots on top.
The dots will form a fluffy cloud shape. Place one cloud near the tip or side of the nail.
Cloud nails look best when you leave some empty space. One or two clouds per nail are enough.
Side French Tips
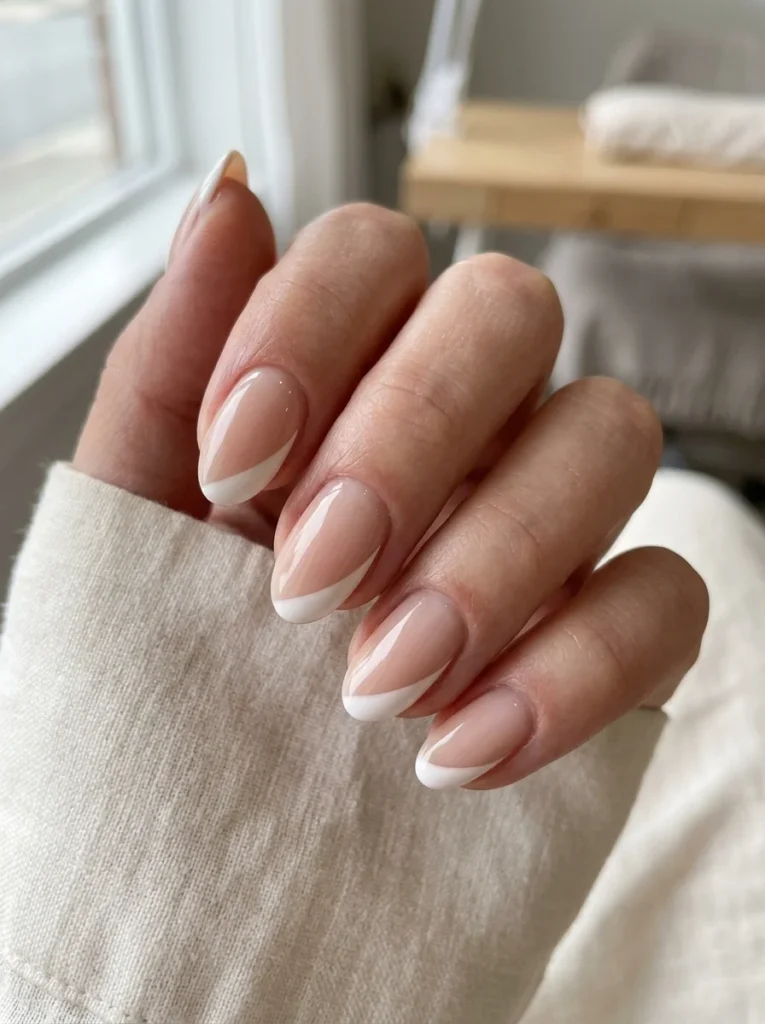
Difficulty: Easy
Tools needed: Thin brush
Best colors: White and nude, black and clear, or orange and pale pink
Instead of painting the full nail tip, add color to one side of the tip. The line can curve gently from one side of the nail to the other.
This is easier than a full French tip because you do not need to make both sides match perfectly. It also makes your nails look longer.
Try a white side tip on a nude base for a clean look. Use orange, pink, or bright blue when you want something more playful.
Rainbow French Tips
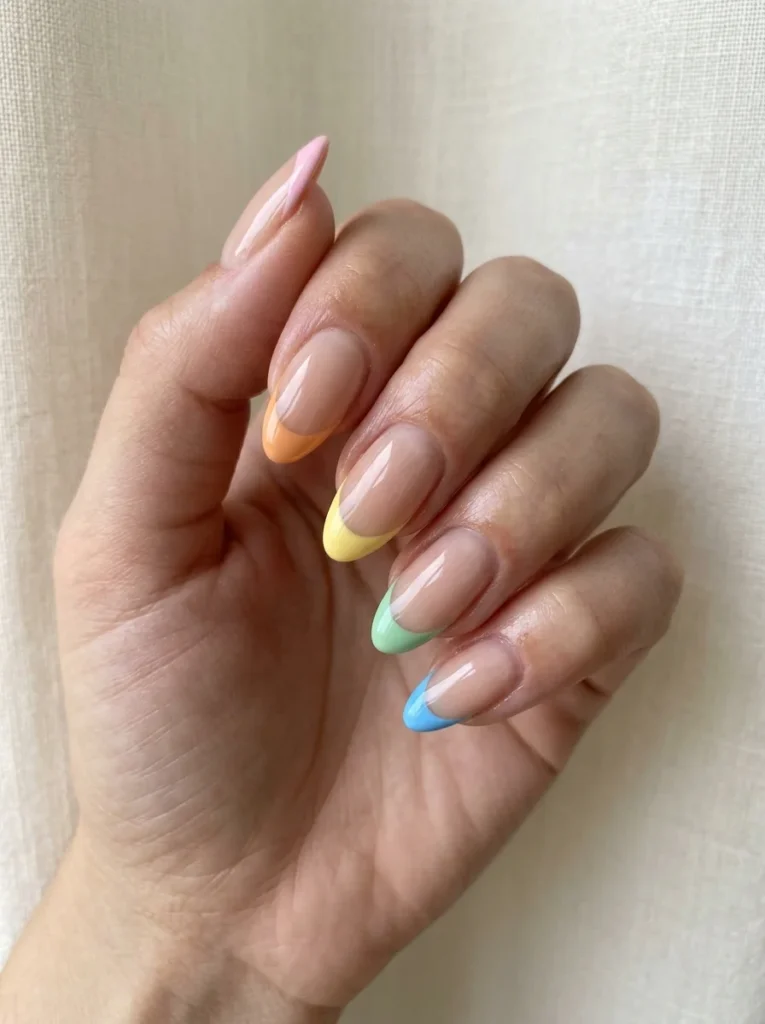
Difficulty: Medium
Tools needed: Thin brush and five polish colors
Best colors: Pink, orange, yellow, green, and blue
Rainbow tips are fun without being too hard. Paint each nail with a clear or nude base. Then use a different color on the tip of every nail.
You can use pink on your thumb, orange on your index finger, yellow on your middle finger, green on your ring finger, and blue on your pinky.
Keep each tip thin. This helps the colors stand out without making the nails look too busy.
Nude Nails With Tiny Dots
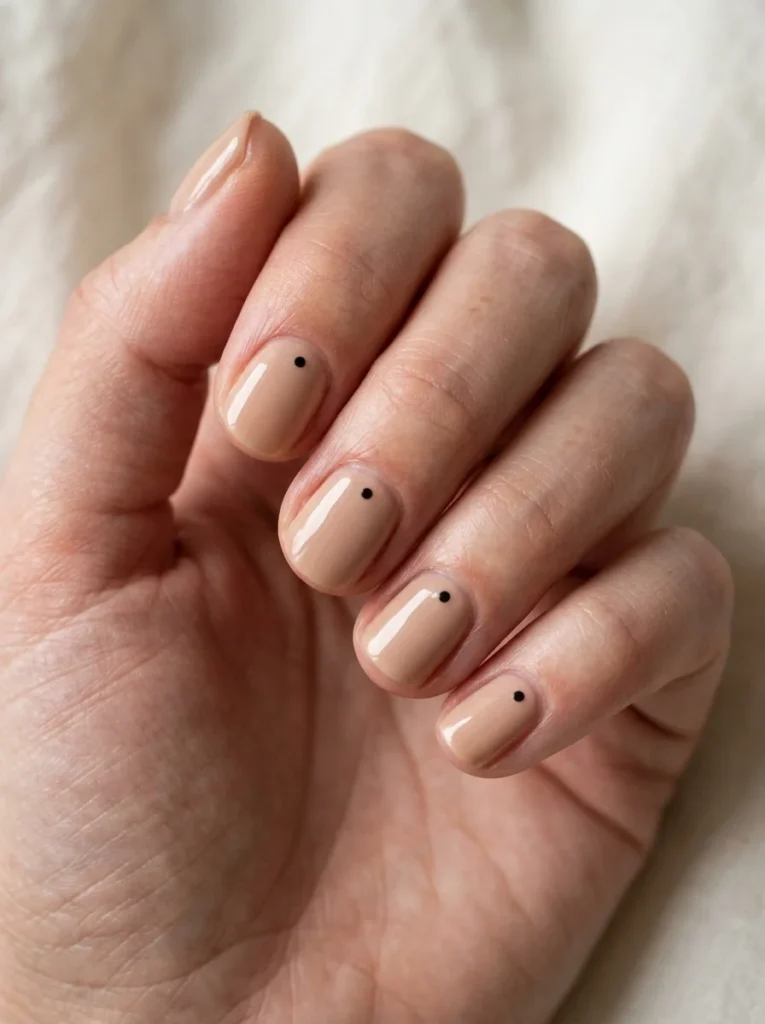
Difficulty: Very easy
Tools needed: Bobby pin
Best colors: Nude and black, beige and white, or pale pink and gold
This design is simple but still looks put together. Paint your nails nude, beige, or pale pink. Add one tiny dot near the cuticle or near the tip.
Use black for a clean look. Gold gives your nails a little shine. White looks soft and fresh.
This is one of the best short nail designs because it does not make your nails feel crowded.
Nail Sticker Accent Nails
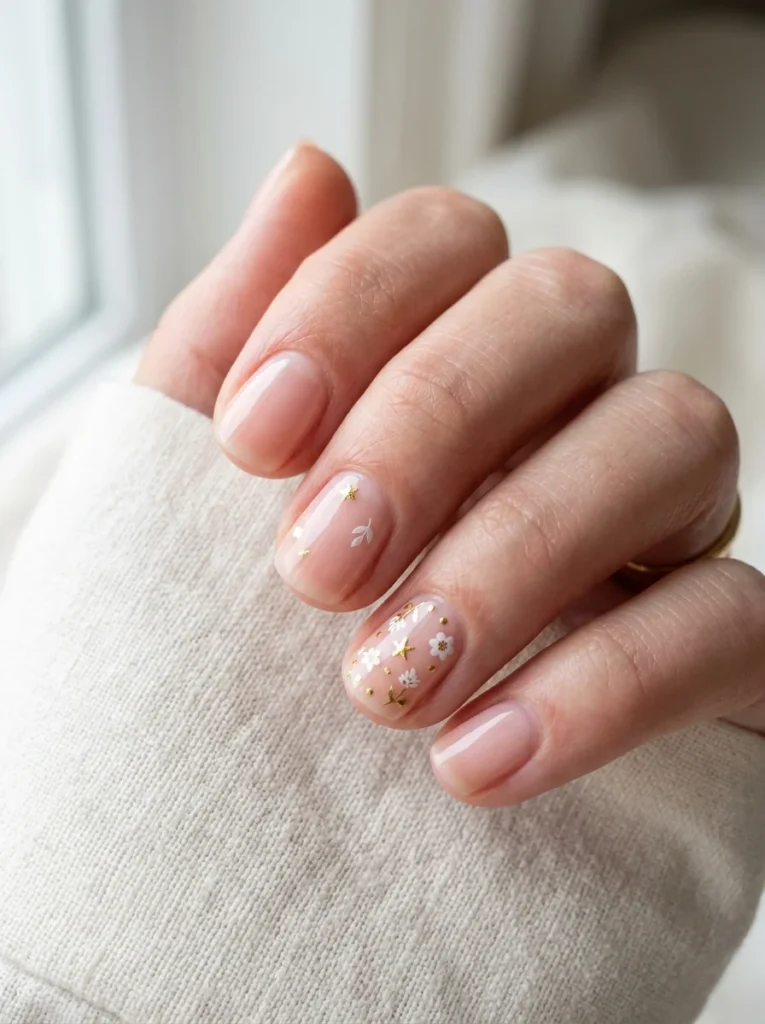
Difficulty: Very easy
Tools needed: Nail stickers and clear top coat
Best colors: Any base color you like
Nail stickers are a great choice when you want cute nails but do not feel like painting. Paint your nails with a base color, let it dry, then press a sticker onto one or two nails.
Try tiny flowers, stars, smiley faces, cherries, or hearts. Finish with a clear top coat so the edges stay smooth.
This is one of the fastest ways to create simple nail designs at home. It also works well when you only have a few minutes.
Minimal Side-Line Nails
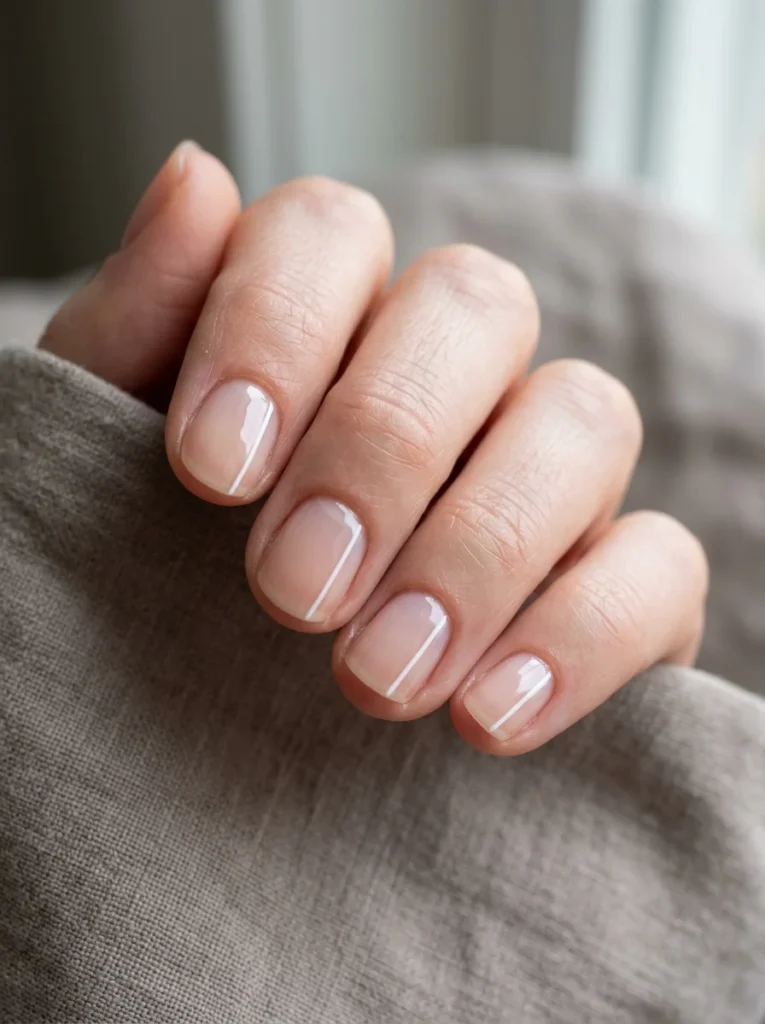
Difficulty: Easy
Tools needed: Thin brush or toothpick
Best colors: Clear and white, nude and brown, or pale lavender and silver
For this design, paint a short line along one side of each nail. You can start near the cuticle and stop halfway up the nail.
This small detail gives your manicure a neat, modern look. It also works well when your nails are short.
Use a clear or nude base to keep the lines noticeable. A white, silver, or dark brown line looks especially good against soft neutral colors.
Micro French Tips
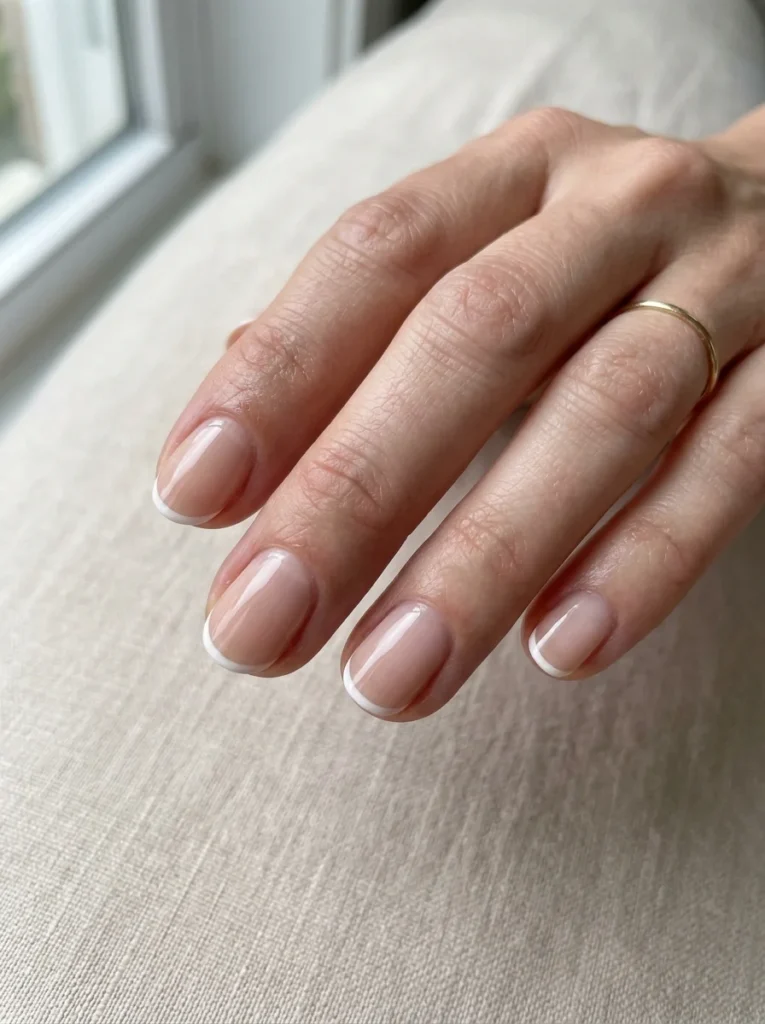
Difficulty: Easy
Tools needed: Thin brush
Best colors: Nude and white, pale pink and red, or beige and brown
A micro French tip is a thin line of color across the edge of your nail. Start with a clear, nude, or pale pink base. Then use a thin brush to paint a tiny line near the tip.
Keep the line narrow. Thick tips can make short nails look even shorter.
White tips are classic, but red, brown, dark green, and pastel blue also look great. Start with one hand first and let it dry before doing the other hand.
Leopard Print Accent Nail
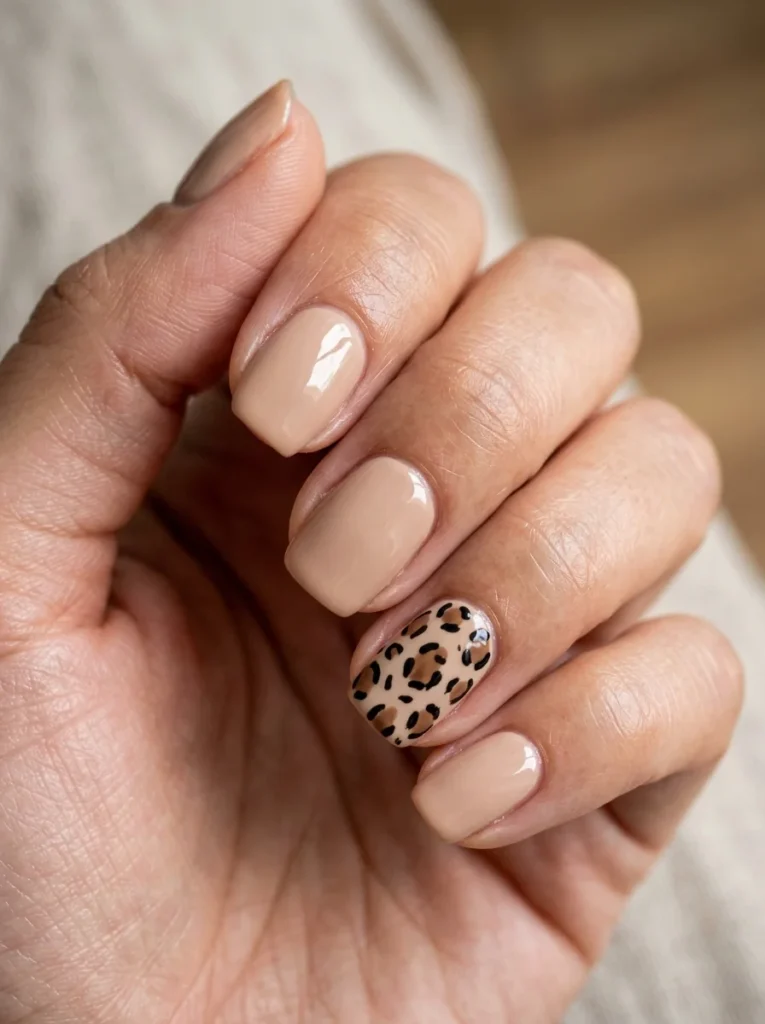
Difficulty: Easy
Tools needed: Toothpick
Best colors: Beige, brown, and black
Paint your nails beige, nude, or light brown. On one accent nail, add small brown spots. Then outline parts of each spot with tiny black marks.
Do not draw full circles. Leopard spots look better when they are open and uneven.
Keep leopard print on one nail per hand. Too many printed nails can make the look feel busy.
Half-Moon Nails
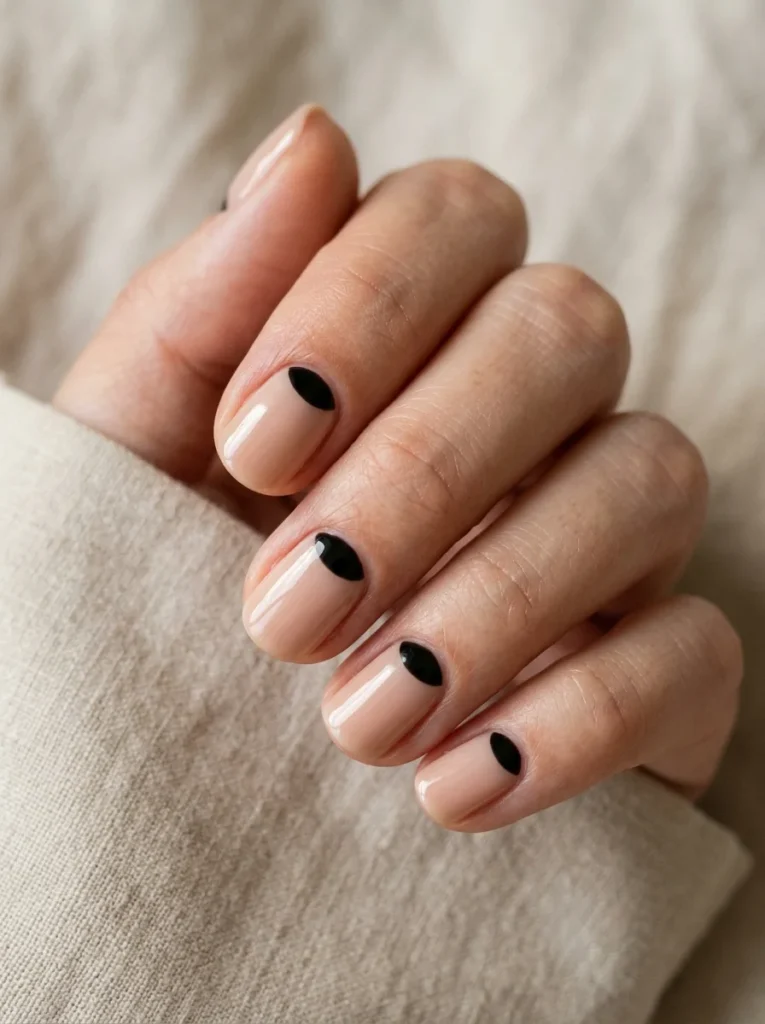
Difficulty: Easy
Tools needed: Small brush or round nail stickers
Best colors: Nude and black, pale pink and red, or beige and white
Half-moon nails put color near the bottom of the nail instead of the tip. Paint your main color first. Then make a small curved shape near the cuticle using a second color.
Round stickers can help you make a cleaner curve. Place one near your cuticle, paint around it, and remove it slowly once the polish starts to set.
A black half-moon on nude nails looks bold. Red and pale pink make a softer version.
Glitter Gradient Nails
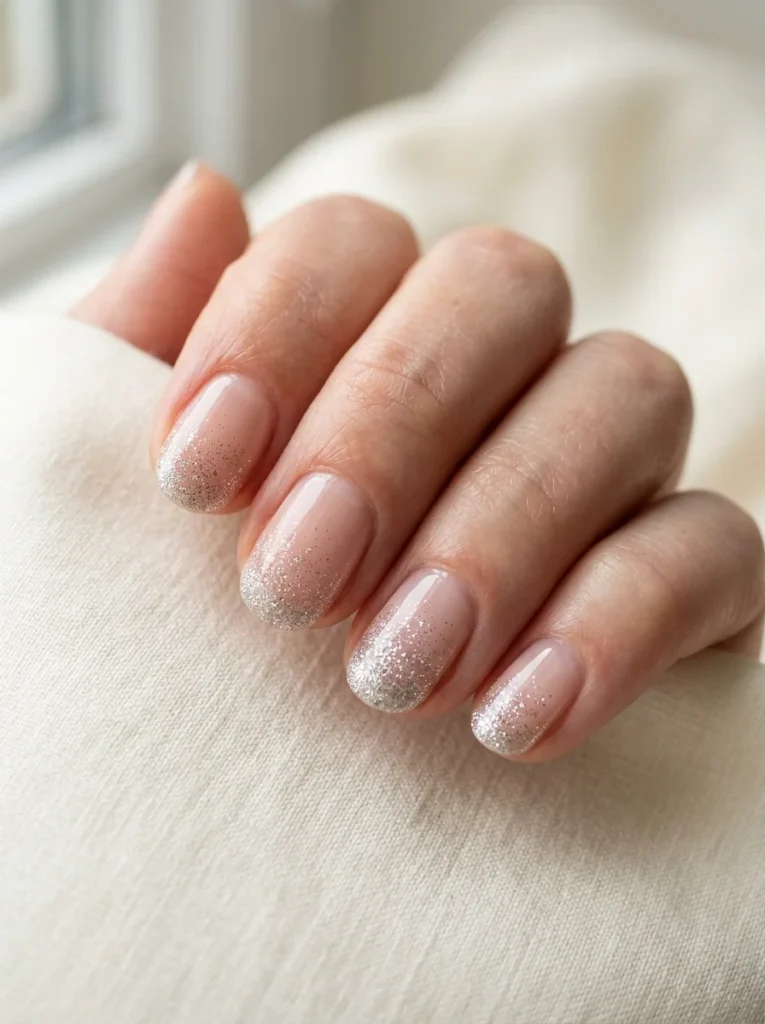
Difficulty: Very easy
Tools needed: Glitter polish
Best colors: Clear and silver, nude and gold, or pale pink and rose gold
Paint your base color first. Then add glitter polish at the tip of each nail. Use fewer coats as you move down the nail so the glitter fades softly.
You can also use a makeup sponge to dab glitter onto the tip. This creates a more blended finish.
Glitter gradient nails are great for parties, birthdays, or days when you want something quick.
Diagonal Corner Nails
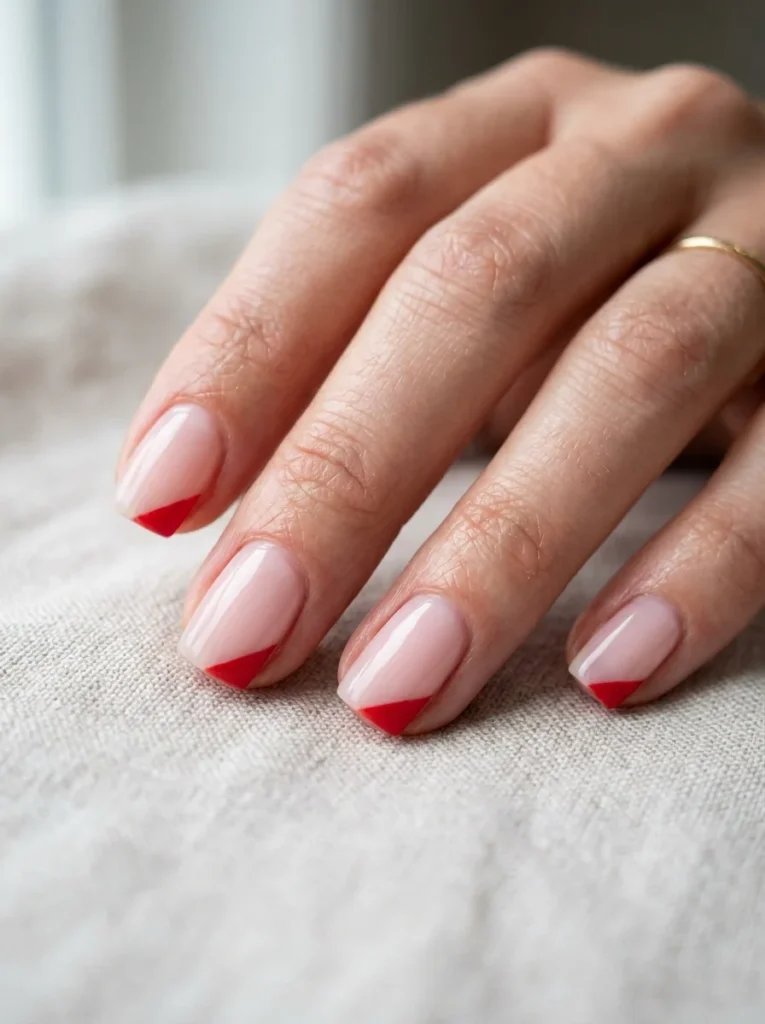
Difficulty: Easy
Tools needed: Thin brush or striping tape
Best colors: Pale pink and red, lavender and yellow, or beige and brown
Paint your nails with a light base color. Add a small triangle of color at one corner near the tip.
You can use striping tape to make the edges cleaner. Let the first color dry before adding the triangle.
This design looks good with pastel colors, but dark brown over beige can also feel simple and stylish.
Classic Polka Dot Nails
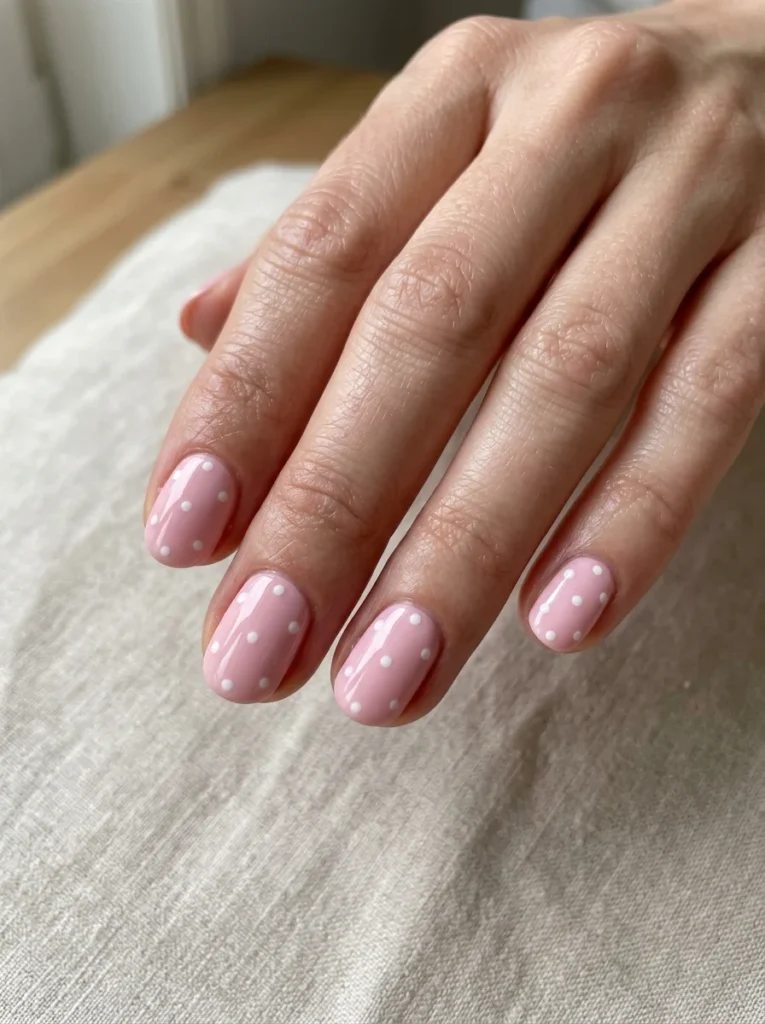
Difficulty: Easy
Tools needed: Bobby pin or dotting tool
Best colors: White and pink, black and beige, or white and light blue
Paint your nails with one solid base color. Dip the rounded end of a bobby pin into your second polish color. Press small dots across each nail.
Keep the dots spread out instead of putting them in perfect rows. That makes the design look more relaxed and hides uneven spots.
For short nails, use fewer dots. Three to five dots on each nail can look better than filling every empty space.
Checkerboard Accent Nails
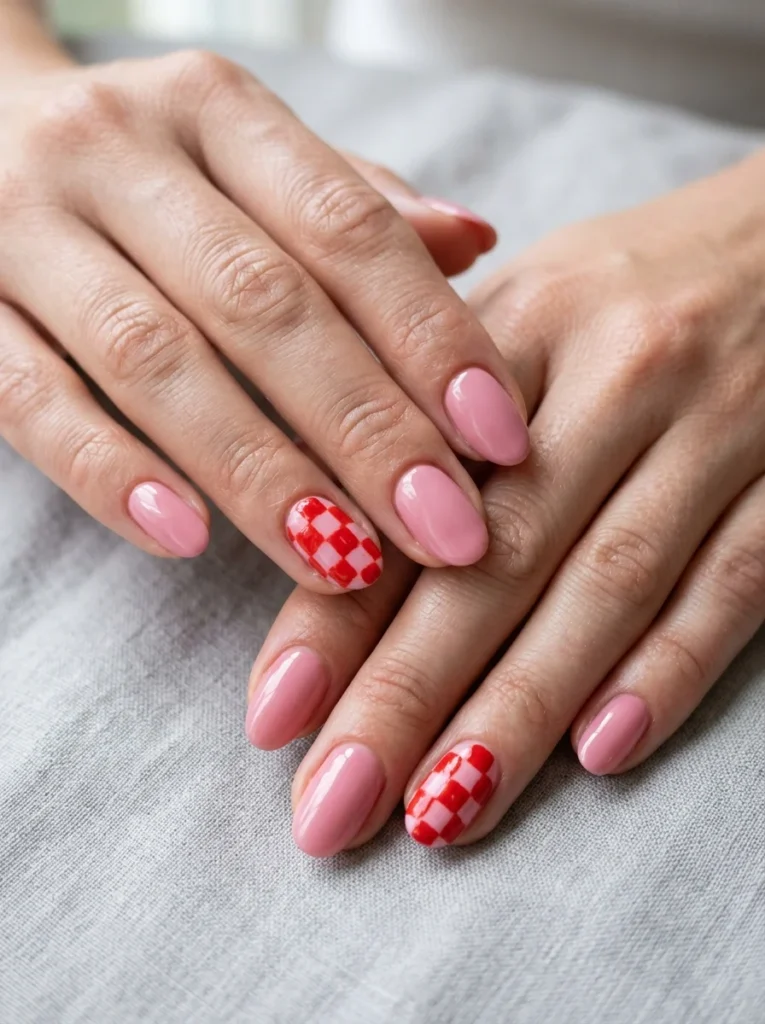
Difficulty: Medium
Tools needed: Thin brush
Best colors: Black and white, pink and red, or green and cream
Checkerboard nails look harder than they are. Start with one base color. Then add small squares in the second color across one accent nail.
Do not try to make every square the same size. Small uneven squares can still look fun and handmade.
Use this design on one or two nails only. Black and white is the classic version, but pink and red can look cute for a brighter manicure.
Prep Your Nails Before Trying Easy Nail Art
Even the easiest nail design looks better on smooth, clean nails. A little prep can stop your polish from looking bumpy or chipping too fast.
First, remove old polish. Check around the edges of your nails too. Leftover polish can make new color look uneven.
Next, file your nails into one shape. Short round nails are great for dots, tiny flowers, and simple French tips. Almond nails give you more room for stripes and abstract shapes.
Push your cuticles back gently after washing your hands or using cuticle oil. Do not cut too much skin around your nails. That area can get sore fast.
Apply a thin layer of base coat. Then paint your first color in thin layers. Thick polish takes longer to dry and can bubble or smear.
Give every layer a little time to dry before adding your design. This small step saves you from dragging color across the nail by accident. Once your nails are dry, you are ready to try easy nail art ideas that do not need perfect lines.
How to Make Simple Nail Designs Last Longer
A cute design can chip fast without a few simple finishing steps. The good news is that you do not need much extra work to help your manicure last.
Always use a thin top coat after your design is fully dry. Cover the full nail and lightly swipe across the tip. This helps protect the edge of the polish.
Try to avoid hot water right after painting your nails. Wear gloves when washing dishes or cleaning. Water and strong soap can make polish lift sooner.
Add another thin top coat after two or three days if your nails still look good. This can bring back shine and help protect small details like dots, flowers, and lines.
Use cuticle oil at night or rub a little hand cream around your nails. Dry skin can make your manicure look rough, even when the polish still looks fine.
Do not pick at chipped polish. Use a matching shade to touch up a small spot, then seal it with top coat.
Simple Nail Designs Can Start With One Small Detail
You do not need advanced tools, perfect lines, or hours of free time to make your nails look nice. A few dots, a tiny heart, a thin French tip, glitter, or one sticker can change a plain manicure.
Start with the design that feels easiest. Try one accent nail first. Then test new colors and small details as you get more comfortable.
Save these ideas for your next at-home manicure and choose one simple design to try this week. With a little practice, simple nail designs can become one of your favorite ways to add color and fun to your day.