
Beautiful nails should not require costly tools, advanced skills, or a long salon visit. These easy nail art ideas help you create a fresh manicure with supplies you may already have at home.
Many online nail designs look simple until you try to copy them. The lines may come out uneven. The polish may smudge. You may also find that the design needs tools you do not own.
The good news is that beginner nail art does not need to be perfect. Simple shapes, thin lines, dots, stickers, and soft color changes can create a stylish result.
These easy nail designs for beginners include options made with bobby pins, toothpicks, tape, makeup sponges, and nail stickers. Pick one design, test it on an accent nail, and build your skills from there.
What You Need for These Easy Nail Art Ideas
You can create most of these easy nail art ideas with regular polish and a few household items. Professional nail tools can help, but they are not required.
Start with a base coat, two or three nail polish colors, and a clear top coat. You will also need nail polish remover and a small cleanup brush or cotton swab.
A bobby pin can replace a dotting tool. Use the rounded tip to make dots, flower petals, and small circles. A toothpick works well for tiny hearts, stars, and thin details.
A clean makeup sponge can create a soft gradient. Thin tape can help you paint straight lines, color blocks, and French tips. Round reinforcement stickers work well for half-moon designs.
Before you begin, remove old polish and wash your hands. Make sure each nail is clean and dry. Oil, hand cream, and water can stop polish from sticking well.
Apply one thin layer of base coat. This helps protect your natural nails and gives the color a smoother surface.
| Nail Art Tool | Household Alternative | Best Use |
| Dotting tool | Bobby pin | Dots and flowers |
| Nail sponge | Makeup sponge | Gradients |
| Striping brush | Thin art brush | Lines and swirls |
| Nail guide | Thin tape | French tips |
| Cleanup brush | Small angled brush | Cleaning nail edges |
Abstract Swirl Nails
Difficulty: Easy
Time: 15 to 20 minutes
Best for: Medium and long nails
Tools: Thin nail art brush
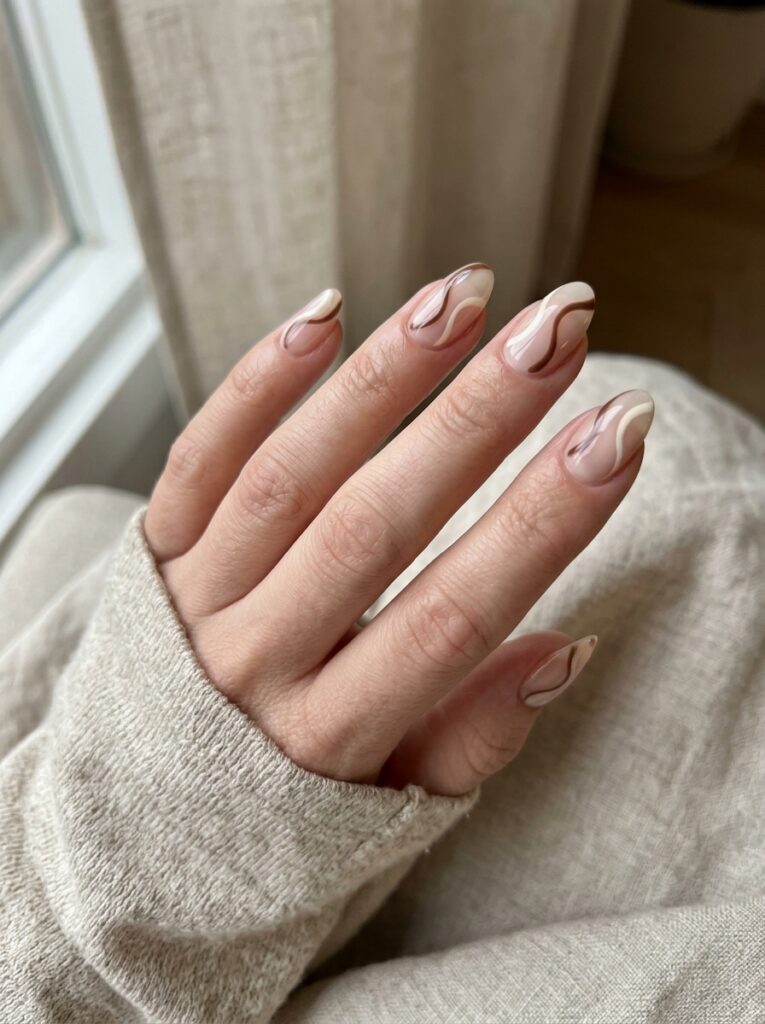
Abstract swirls are useful when you want a trendy design without perfect shapes.
Apply a clear or neutral base. Use a thin brush to paint one or two curved lines across each nail.
Keep your hand relaxed. The lines can bend, cross, or move in different directions.
Try brown and cream for a warm neutral design. Pink and orange create a bright look. Blue and white feel clean, while green and lilac add a soft color contrast.
Do not try to make every nail identical. The freeform style makes small differences look planned.
Start with one color if two shades feel difficult. You can add more detail after the first line dries.
Colorful Confetti Nails
Difficulty: Very easy
Time: 10 to 15 minutes
Best for: Short and medium nails
Tools: Bobby pin or toothpick
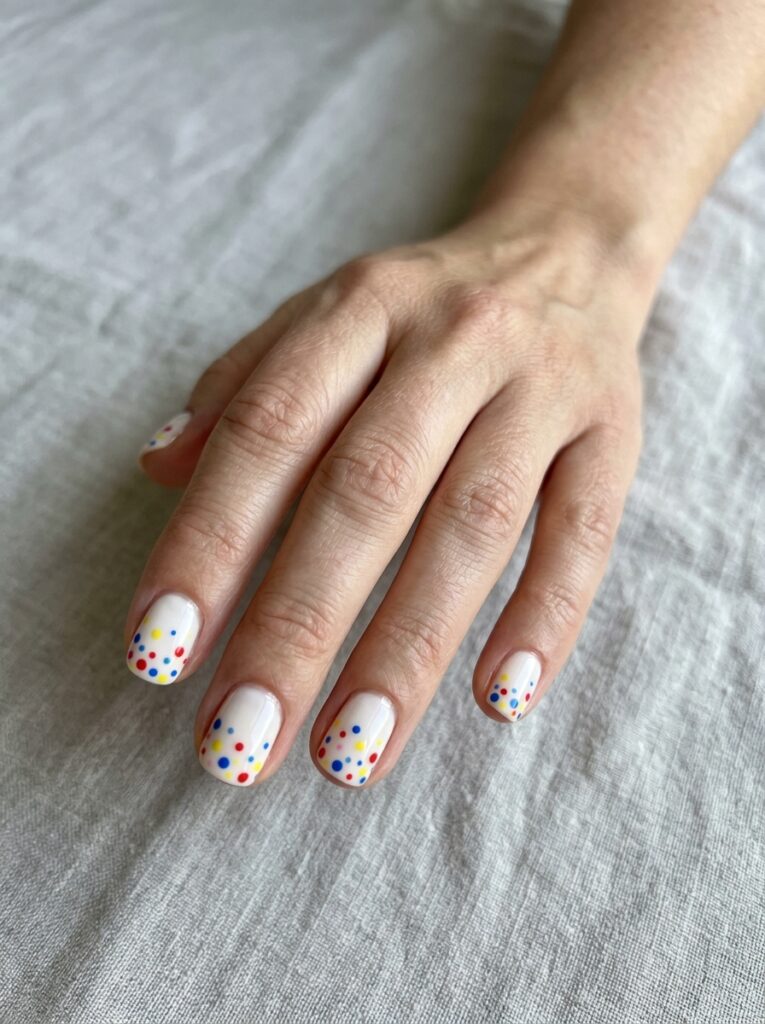
Confetti nails look playful and do not require exact spacing.
Start with a white, clear, or nude base. Add tiny dots in three or four colors.
Keep most of the dots near the tip or around the cuticle. Leave some open space so the design does not look crowded.
Mix small and large dots for a more natural pattern.
Bright red, blue, and yellow create a cheerful design. Pastel dots feel softer. Metallic confetti works well for parties.
You can also use neon colors for a summer manicure.
Do not try to copy the exact pattern on every nail. Small changes make the design more interesting.
Easy French Tip Nails
Difficulty: Easy
Time: About 15 minutes
Best for: Short, medium, and long nails
Tools: Nail guides or tape
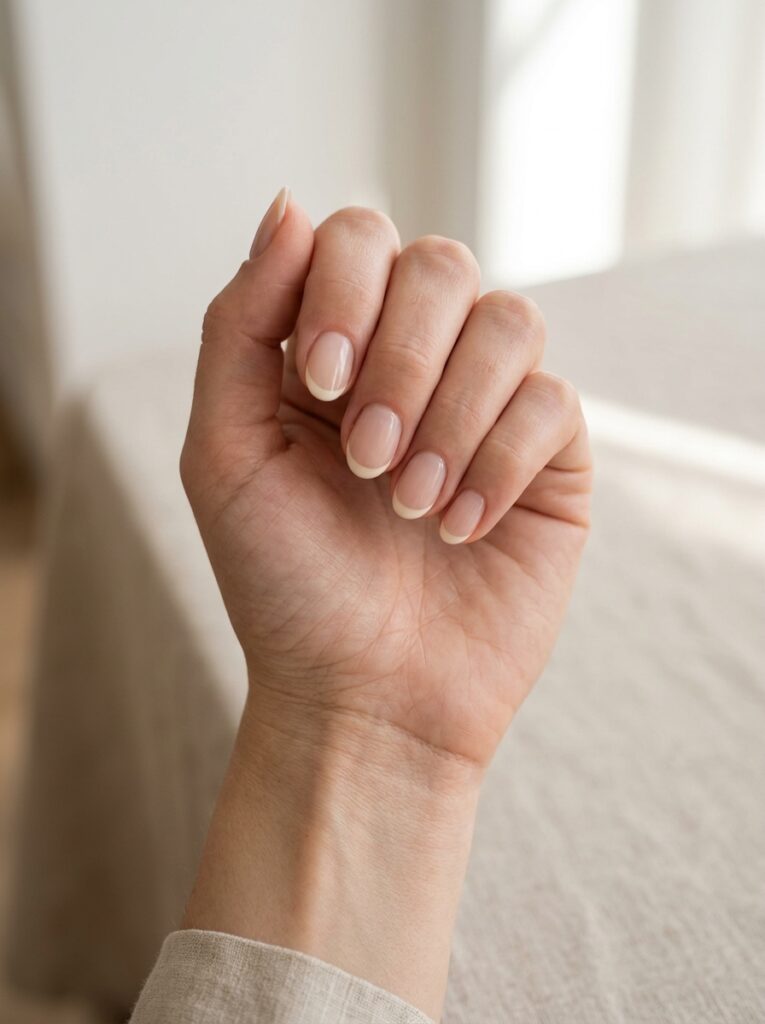
French tips look polished, but you do not need a perfect freehand line to create them.
Apply a sheer nude or pale pink base. Wait until it feels dry and does not dent when touched near the edge.
Place a nail guide or a thin piece of tape below the tip. Paint the exposed part with white or another color.
Remove the guide while the tip polish is still slightly wet. Pull it away slowly to keep the edge clean.
Classic white tips suit almost any event. Pastel tips feel softer, while black micro tips create a sharper look.
Keep the line thin on short nails. A micro French tip can make the nail appear longer.
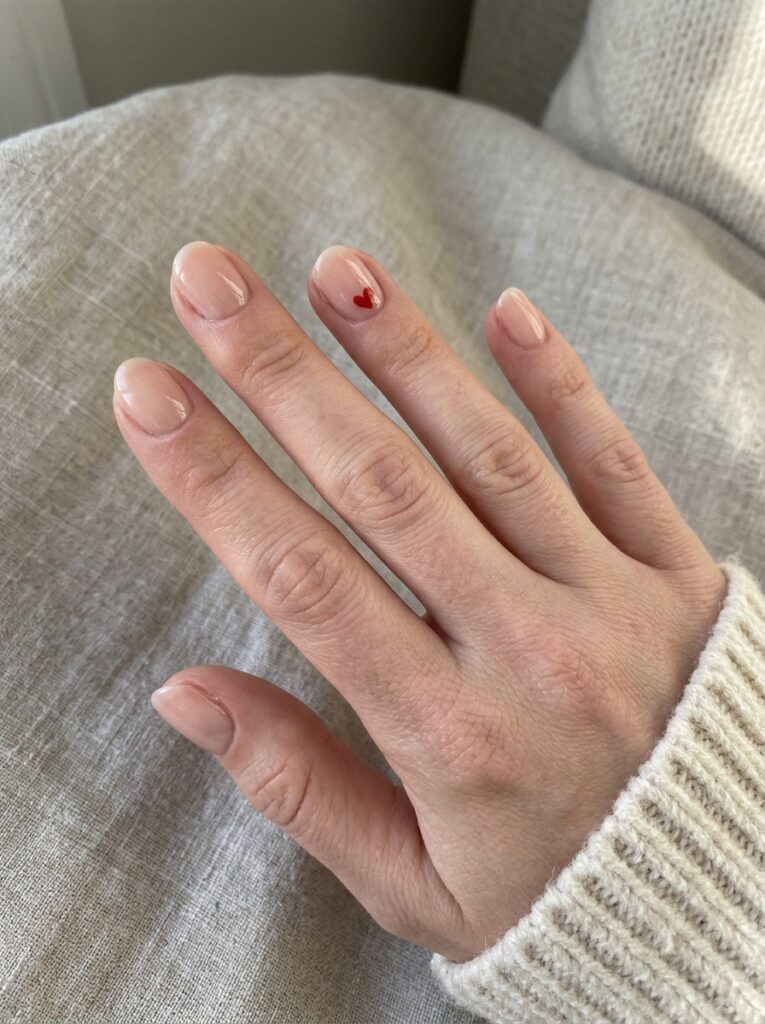
Heart Accent Nails
Difficulty: Easy
Time: 10 to 15 minutes
Best for: All nail lengths
Tools: Toothpick or small dotting tool
Small hearts are easier to paint than they appear.
Start by placing two small dots next to each other. Use a toothpick to drag both dots downward until they meet at one point.
Keep the hearts small while you practice. Tiny shapes are easier to control and dry faster.
Try red hearts over nude polish, pink hearts on white nails, or black hearts over pale pink.
Place one heart near the cuticle or in the outer corner. This feels more relaxed than trying to center every shape.
You can add hearts to all nails or use them on one accent nail. Finish with top coat after the design has dried.
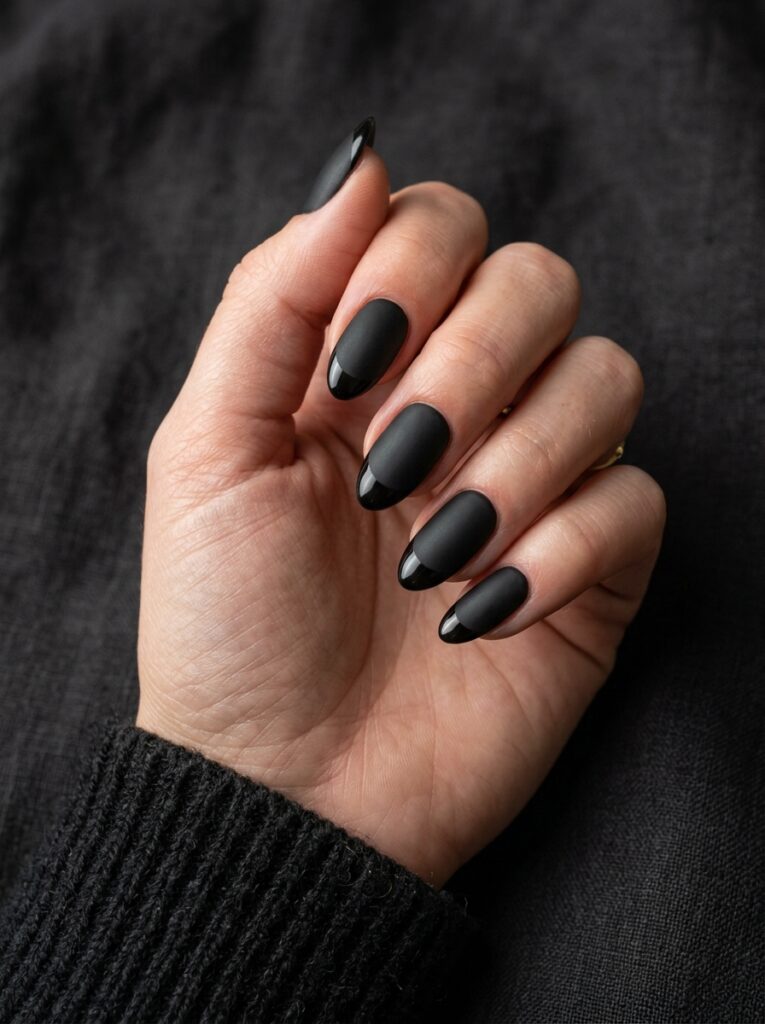
Matte Nails With Glossy Tips
Difficulty: Easy
Time: About 15 minutes
Best for: Medium and long nails
Tools: Matte and glossy top coat
This design uses one polish color but creates contrast through texture.
Apply your chosen nail color and let it dry. Cover the full nail with matte top coat.
Once the matte layer is dry, paint regular glossy top coat across the tips. Use tape when you want a sharper line.
Matte black with shiny black tips creates a bold look. Burgundy and navy also work well.
The contrast is subtle in low light and clearer when the nails catch light.
This simple matte nail design looks polished without detailed painting or extra colors.
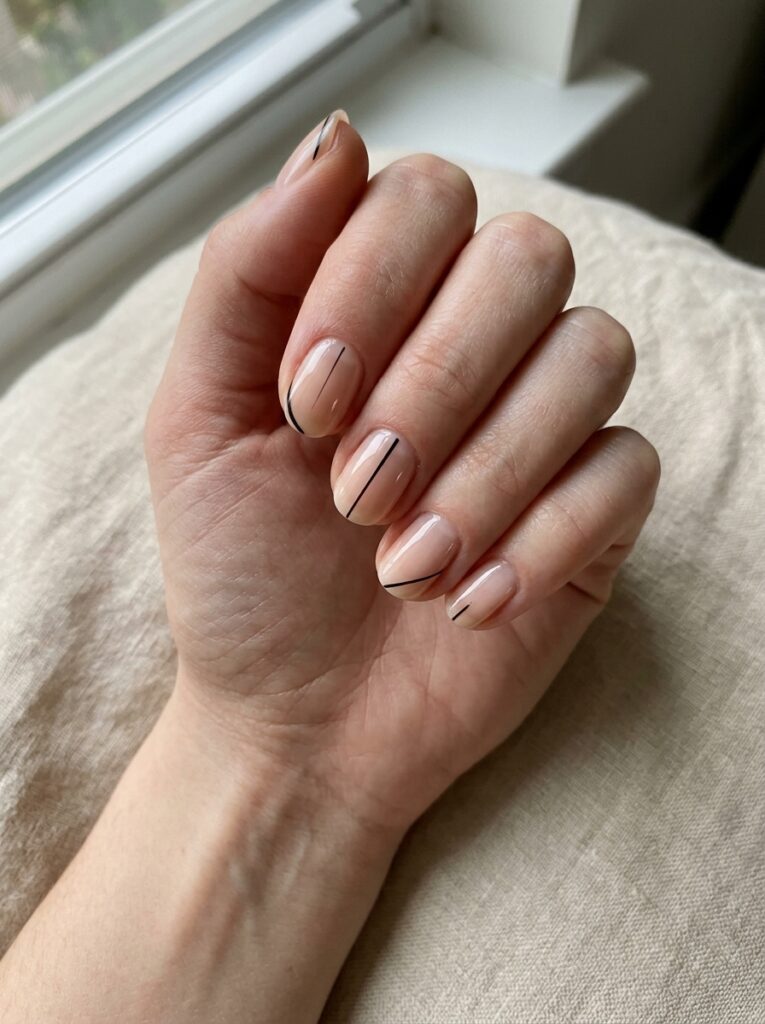
Minimalist Line Nail Art
Difficulty: Easy
Time: 10 to 15 minutes
Best for: Short and medium nails
Tools: Thin brush or striping tape
Minimalist lines can make a plain manicure look fresh without adding too much detail.
Start with a nude, clear, or pale base color. Let it dry fully. Paint one thin vertical, diagonal, or curved line on each nail.
You can use a fine brush for a hand-painted look. Striping tape gives you a straighter edge.
Try black lines on nude nails, gold lines over pale pink, or white diagonal lines over clear polish.
Do not place every line in the same spot. An off-center design is easier for beginners because small differences look intentional.
These easy nail designs for beginners work well when you want something simple for work, school, or daily wear.
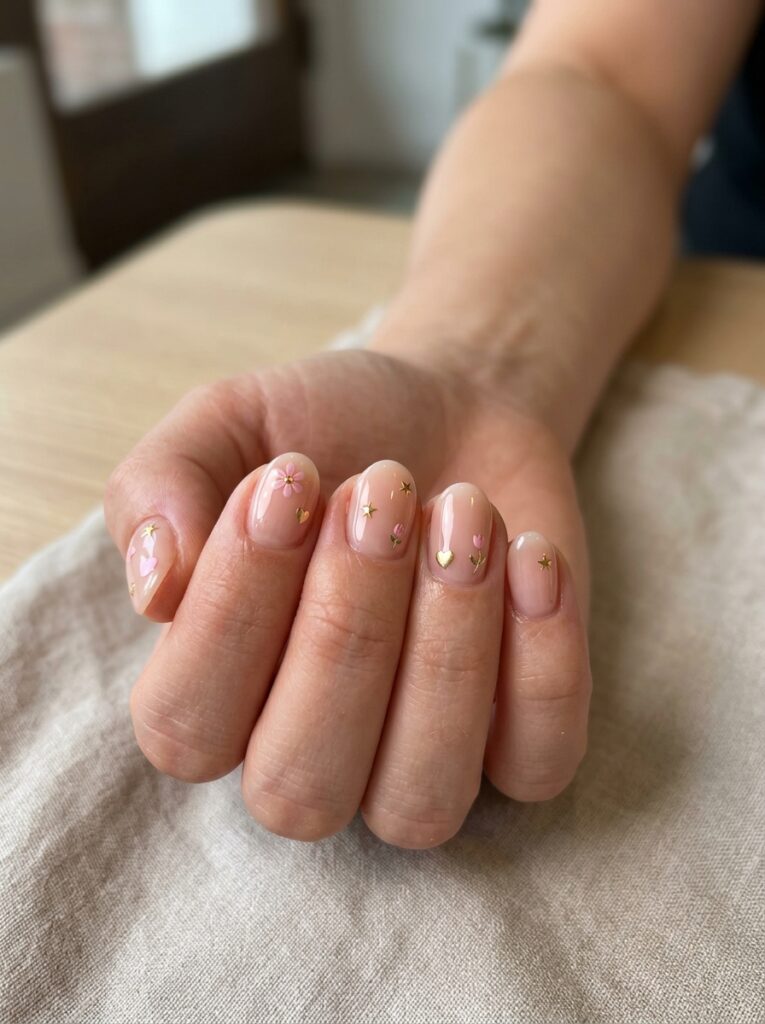
Nail Sticker Mix-and-Match Desig
Difficulty: Very easy
Time: About 10 minutes
Best for: All nail lengths
Tools: Nail stickers and tweezers
Nail stickers give you detailed results without hand painting.
Apply your base color and wait until it is fully dry. Use tweezers to lift each sticker from the sheet.
Place small flowers, hearts, stars, fruit, or abstract shapes across the nails. Mix different designs, but use similar colors to keep the manicure balanced.
Tiny flower stickers look soft over nude polish. Gold stars stand out against dark colors. Fruit stickers create a playful summer style.
Press every sticker flat, especially around the edges.
Cover the full nail with clear top coat. Pay extra attention to the sticker edges so they do not lift.
Pastel Rainbow Tips
Difficulty: Easy
Time: 15 to 20 minutes
Best for: Short and medium nails
Tools: Thin brush or nail guides
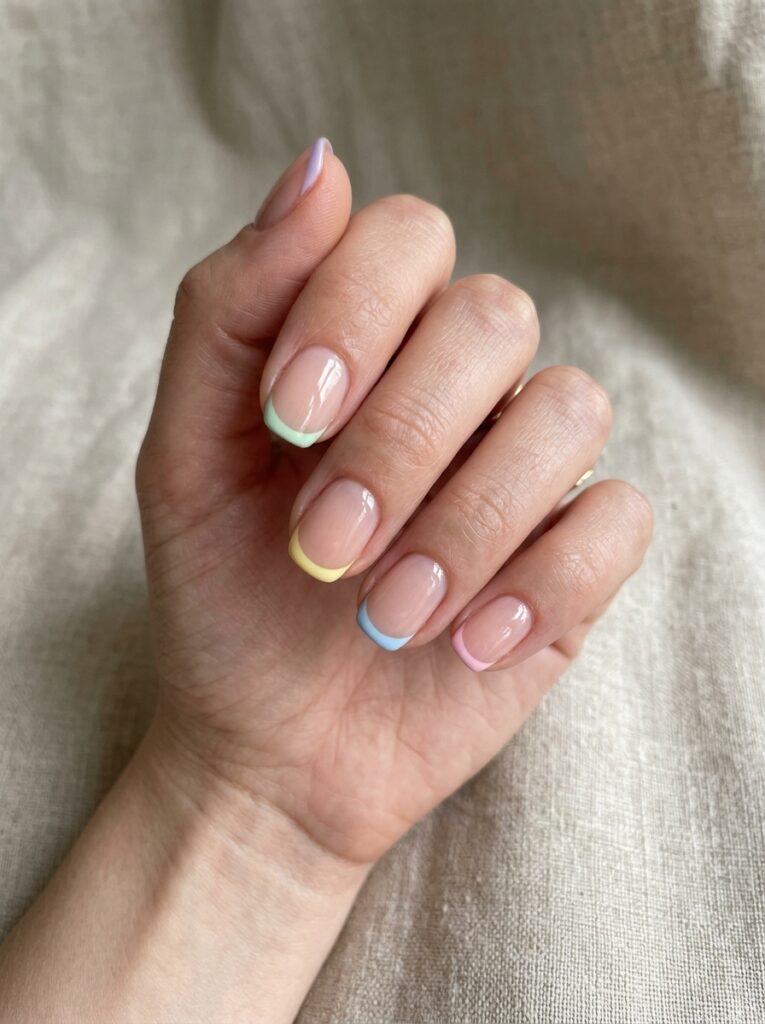
Pastel rainbow tips add color without covering the whole nail.
Start with a clear, nude, or soft pink base. Choose three to five pastel shades, such as lavender, mint green, pale yellow, baby blue, and light pink.
Paint a different color across each nail tip. Keep the tips thin for a cleaner finish.
You can use guides if you want straight edges. A thin brush works better when you prefer a soft curved tip.
Choose colors with a similar softness. One very dark shade may look out of place beside pale colors.
These colorful French tips work well for spring, summer, birthdays, and casual events.
Simple Polka Dot Nails
Difficulty: Very easy
Time: About 10 minutes
Best for: All nail lengths
Tools: Bobby pin or toothpick
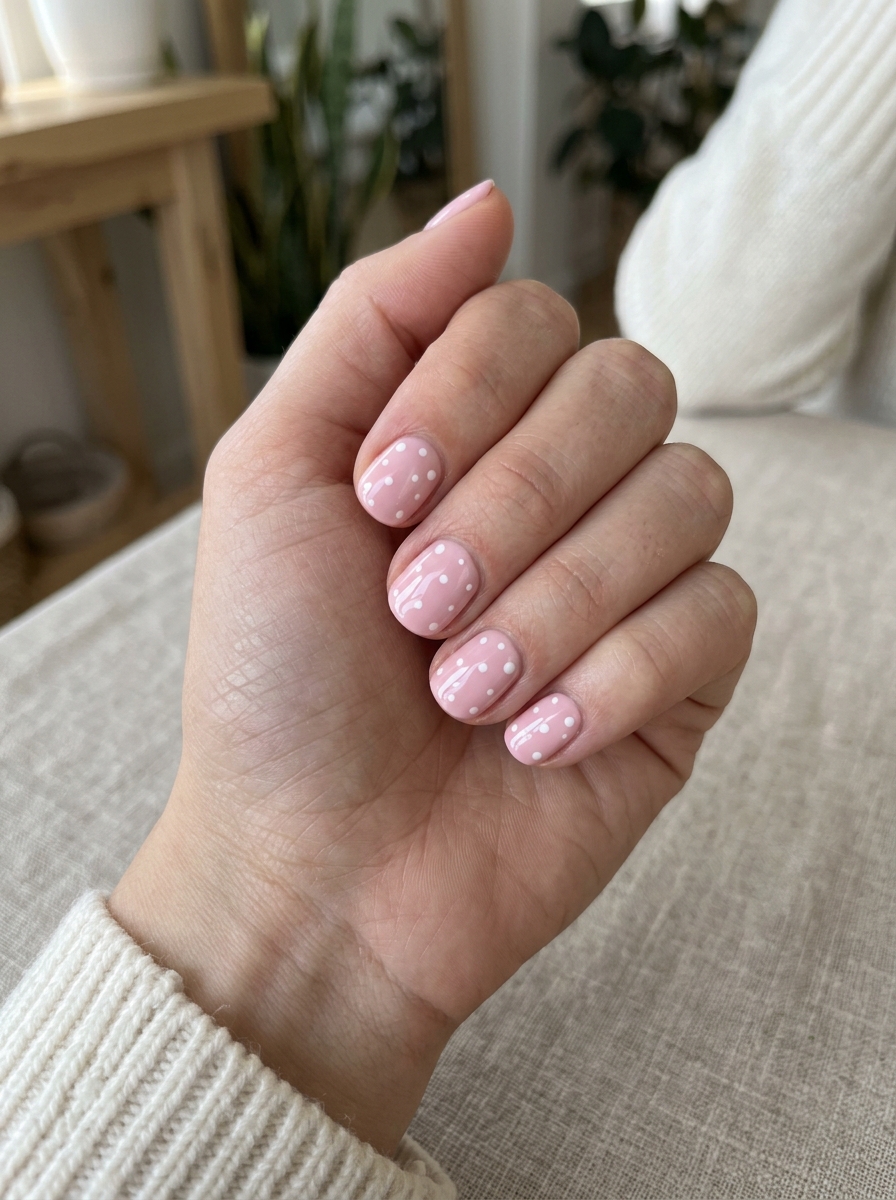
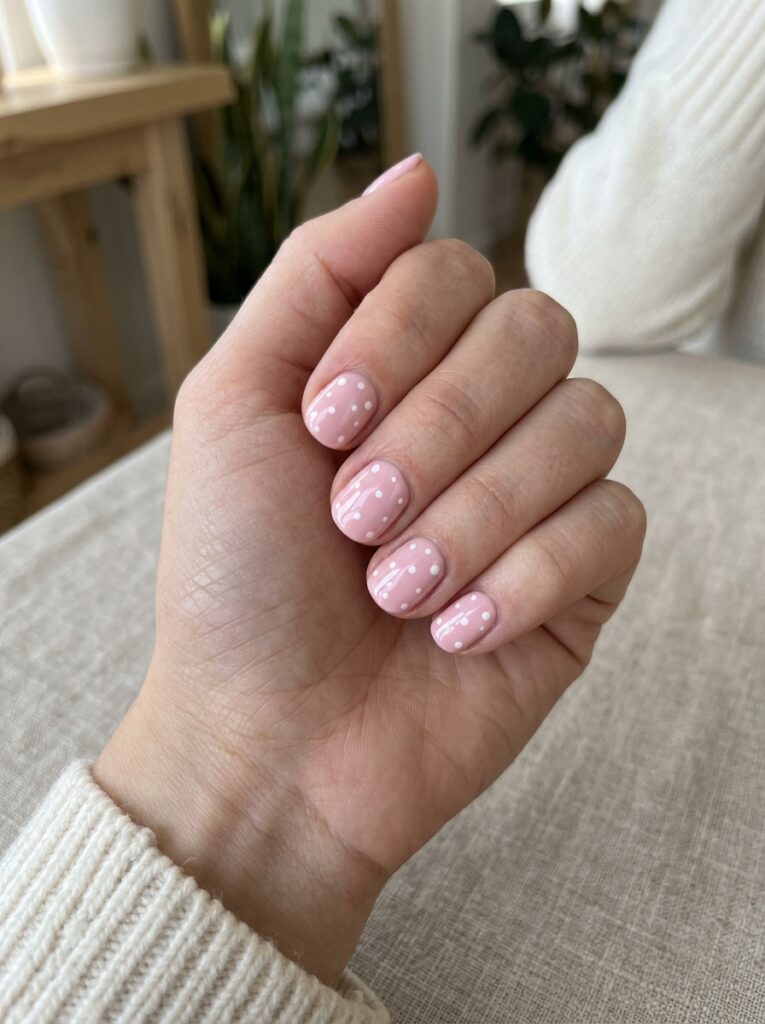
Polka dots are one of the easiest patterns to create at home. They also look neat even when the dots are not perfectly even.
Apply one or two thin coats of your base color. Let the polish dry before adding the dots.
Place a small amount of a second polish color on foil or a plastic lid. Dip the rounded end of a bobby pin into the polish. Gently press it onto the nail.
Use white dots over pastel pink for a soft look. Black dots over nude polish create a clean, modern style. You can also add several bright colors to one accent nail.
For a more detailed finish, mix large and small dots. This makes uneven spacing look planned.
Sponge Gradient Nails
Difficulty: Beginner plus
Time: About 20 minutes
Best for: Medium and long nails
Tools: Makeup sponge
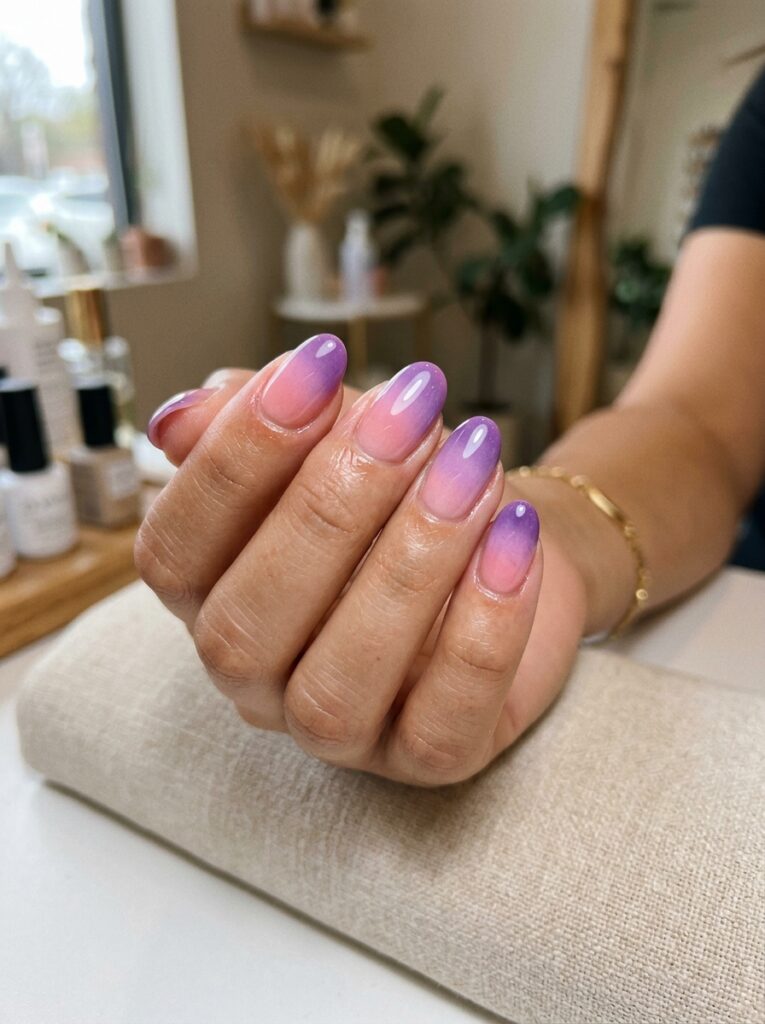
Sponge gradient nails create a soft blend between two or three colors.
Apply the lightest shade as your base. Let it dry.
Paint narrow stripes of your chosen colors onto a clean makeup sponge. Press the sponge gently onto the nail.
Repeat the dabbing step until the colors look smooth. Use thin layers instead of pressing on too much polish at once.
Try pink fading into purple, blue fading into white, or peach blending into yellow.
Gradient designs can leave polish on the skin. Apply a little petroleum jelly around each nail before you begin. This makes cleanup easier.
Use a small brush dipped in remover to clean the edges before adding top coat.
Tiny Star Nail Art
Difficulty: Easy
Time: About 15 minutes
Best for: Medium and long nails
Tools: Toothpick, thin brush, or stickers
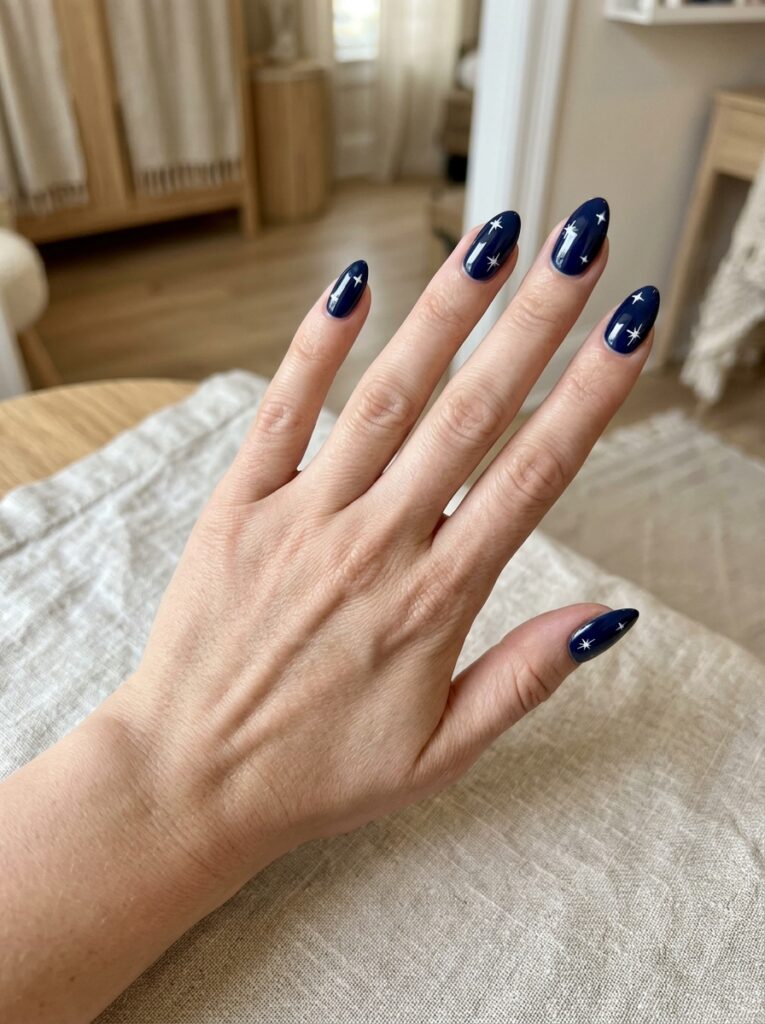
Tiny stars create a simple celestial design.
Use a dark base for a night-sky look. Navy, black, and deep purple all work well. A nude base creates a softer result.
Draw one small vertical line and cross it with a horizontal line. Add two shorter diagonal lines between them.
Keep each star small. One or two stars per nail are enough.
Try white stars on navy, gold stars on black, or silver stars on nude polish.
Hand-painted stars do not need to match. Use star stickers when drawing thin lines feels difficult.
Press stickers flat and seal them with top coat to stop the edges from lifting.
Two-Tone Diagonal Nails
Difficulty: Easy
Time: 15 to 20 minutes
Best for: Medium and long nails
Tools: Tape
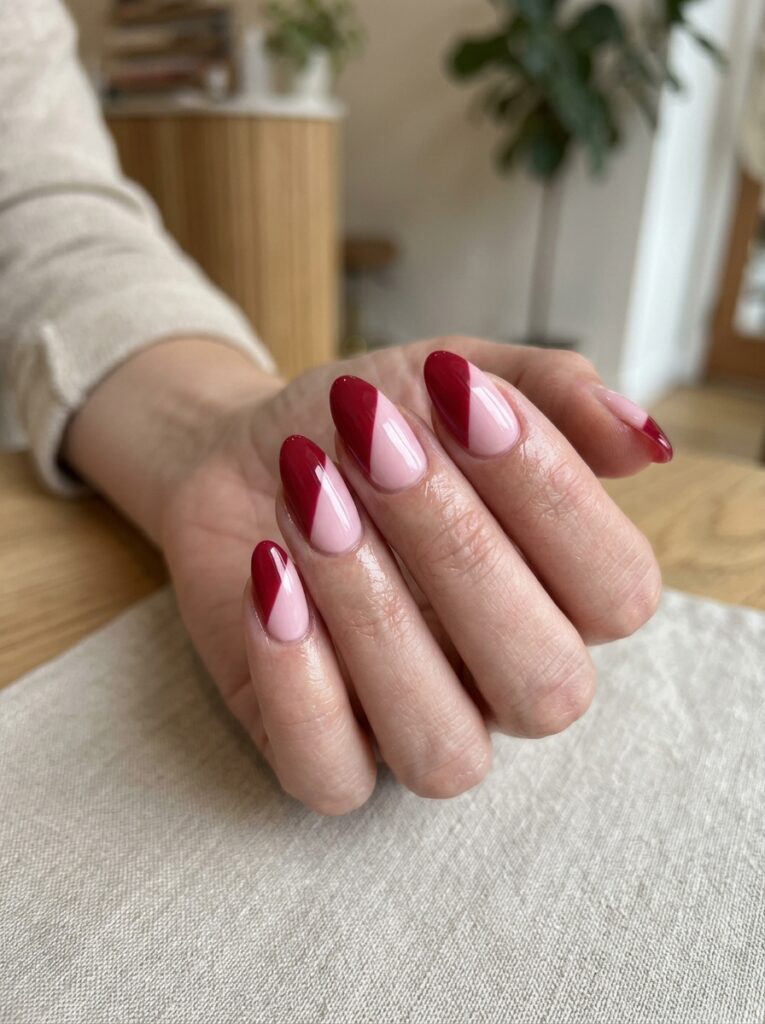
Two-tone diagonal nails create a clear pattern with very little painting skill.
Apply the lighter color across the whole nail. Let it dry fully. This step matters because tape can pull up soft polish.
Place a small strip of tape diagonally across the nail. Press the edges down gently.
Paint the exposed side with your second color. Remove the tape before the new polish fully dries.
Try pink with red, beige with brown, blue with white, or lilac with deep purple.
Use colors with strong contrast when you want the line to stand out. Choose two shades from the same color family for a softer look.
Half-Moon Nail Design
Difficulty: Easy
Time: 15 to 20 minutes
Best for: All nail lengths
Tools: Round reinforcement stickers
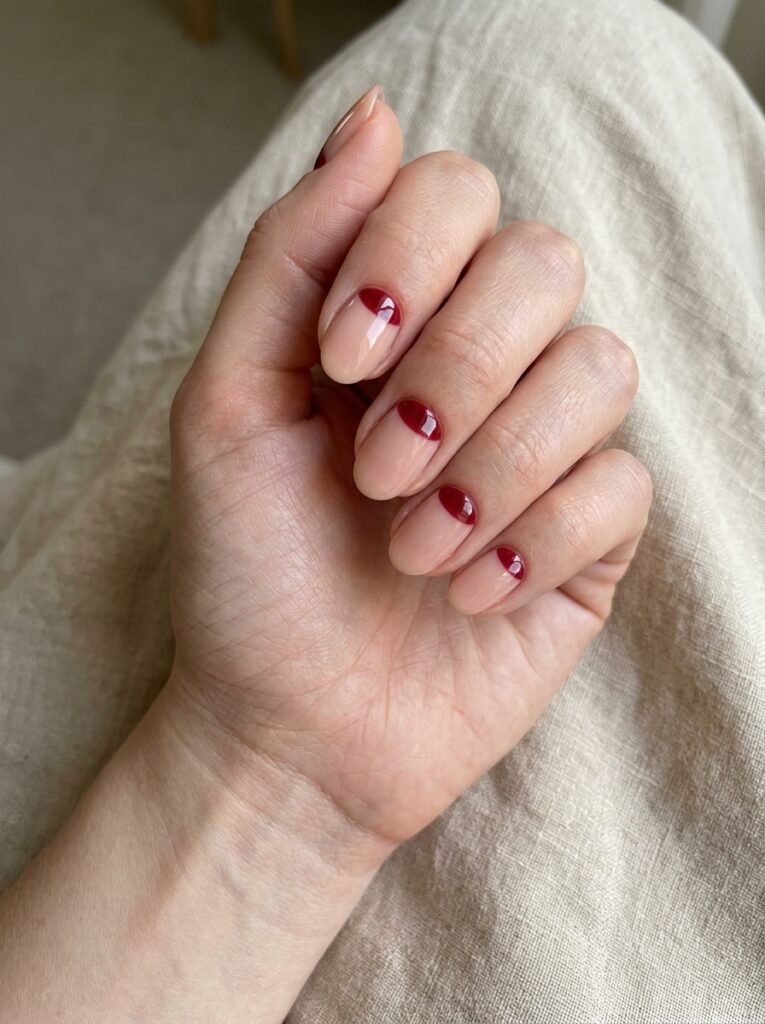
Half-moon nails leave a curved shape near the cuticle. The design feels clean and may still look neat as your nails grow.
Paint the whole nail with your first shade. Let it dry fully.
Place a round reinforcement sticker near the base of the nail. Part of the sticker should cover the cuticle area.
Paint the open section with your second color. Remove the sticker before the polish becomes fully dry.
Try nude with red, white with navy, gold with black, or pink with burgundy.
Press the sticker down along the edges before painting. This helps stop polish from leaking under it.
Cute Daisy Nail Art
Difficulty: Easy
Time: About 15 minutes
Best for: Short and medium nails
Tools: Dotting tool or bobby pin
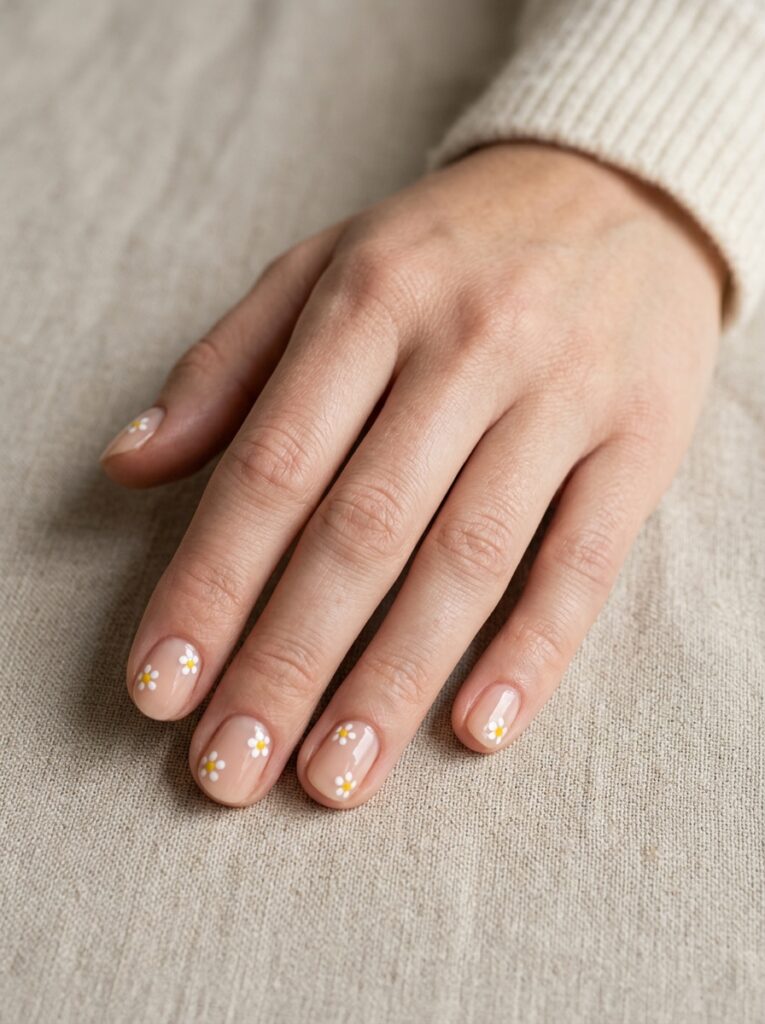
Daisy nail art looks detailed, but each flower is made from simple dots.
Apply a clear, nude, or pastel base. Let it dry before adding the flowers.
Use a bobby pin to place five small dots in a circle. These dots form the petals. Add one smaller dot in the center with a different color.
White petals with yellow centers create a classic daisy. Pink flowers look soft on nude polish. Blue flowers can stand out against pale yellow.
You can place one flower near the corner of each nail. Another option is to decorate only one or two accent nails.
The petals do not need to match. Slightly uneven shapes can make the flowers look more natural.
Glitter Accent Nails
Difficulty: Very easy
Time: About 10 minutes
Best for: All nail lengths
Tools: Glitter polish
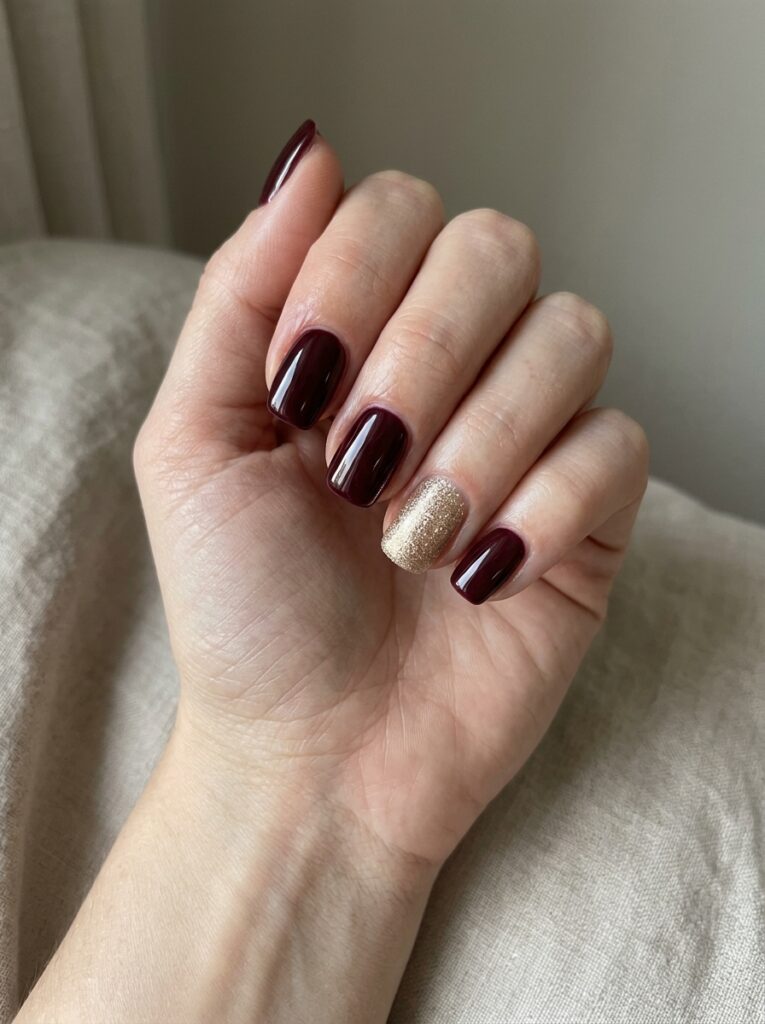
A glitter accent nail is one of the fastest ways to make a simple manicure feel special.
Paint all nails with one main color. Add glitter polish to one nail on each hand. The ring finger is a common choice, but you can use any nail.
Apply glitter in thin layers. One thick layer may dry slowly and feel rough.
Gold glitter looks rich beside burgundy. Silver glitter pairs well with navy. Rose-gold glitter creates a softer look with blush pink.
Add a clear top coat to smooth the glitter and help it stay in place.
Glitter can also cover a small smudge or uneven patch, which makes it useful for quick nail art ideas.
Quick Guide to Choosing a Design
| Nail Design | Difficulty | Time Needed | Main Tool |
| Polka dots | Very easy | 10 minutes | Bobby pin |
| French tips | Easy | 15 minutes | Tape or guide |
| Daisy nails | Easy | 15 minutes | Dotting tool |
| Gradient nails | Beginner plus | 20 minutes | Makeup sponge |
| Nail stickers | Very easy | 10 minutes | Tweezers |
| Abstract swirls | Easy | 15 minutes | Thin brush |
How to Make Simple Nail Designs Look Neater
The difference between a messy manicure and a clean one often comes down to preparation and polish control.
Start with clean nails. Remove oil, lotion, and old polish before applying your base coat.
Use thin polish layers. Thick coats take longer to dry and may create dents, bubbles, or smudges.
Rest both hands on a flat surface while painting small details. This gives your fingers more support.
When creating dots or lines, move the nail when possible instead of moving your whole painting hand. For example, roll the finger slightly under the brush to create a smoother curve.
Keep a small angled brush nearby. Dip it into nail polish remover and use it to clean the skin around each nail.
Wait until the design feels dry before adding top coat. A wet design may drag across the nail.
Apply top coat with a light touch. Let the brush float over the design instead of pressing down.
These steps can make easy nail designs for beginners look much cleaner.
Common problem: Your dots look uneven.
Quick fix: Add two or three smaller dots nearby. The mixed pattern will make the size difference look planned.
Beginner tip: Practice hearts, lines, and flowers on a plastic sheet before painting your nails.
How to Choose the Right Easy Nail Design
The easiest design for you depends on your nail length, available time, and comfort with small details.
Choose polka dots, glitter, or stickers when you want the fastest option. These designs require very little control.
Try French tips, hearts, or daisies when you feel ready to work with small shapes.
Gradients and swirls may take more practice, but they are still beginner-friendly. Small mistakes often blend into the final design.
Short nails suit micro French tips, small dots, hearts, stars, and half-moons. These patterns do not need much space.
Long nails offer more room for swirls, gradients, and diagonal color blocks.
Think about where you plan to wear the manicure. Nude shades, thin lines, and classic French tips suit work and everyday use. Glitter, stars, and bold colors work well for events.
Pastel flowers and rainbow tips are good choices for spring and summer.
| Skill Level | Best Designs |
| Very easy | Glitter, stickers, and polka dots |
| Beginner | French tips, hearts, and daisies |
| Beginner plus | Gradients, swirls, and two-tone nails |
Start with the simplest version of a design. Add more colors or details once the main method feels comfortable.
Common Beginner Nail Art Mistakes to Avoid
Most beginner nail art mistakes happen because the polish is too thick or the layers are not fully dry.
Applying Thick Layers
Thick polish may look faster, but it takes longer to dry.
Fix: Apply two thin coats instead of one heavy coat.
Using Tape Over Soft Polish
Tape can pull up the base color when it has not dried fully.
Fix: Wait until the polish feels firm and does not dent before adding tape.
Loading Too Much Polish Onto a Tool
A large drop can spread and ruin a small dot, heart, or flower.
Fix: Place polish on foil. Dip only the tip of your bobby pin or toothpick.
Adding Top Coat Too Soon
Top coat can drag wet details and blur the design.
Fix: Give the pattern enough time to dry. Apply top coat with light pressure.
Starting With a Design That Is Too Detailed
A complex design can feel frustrating when you are still learning polish control.
Fix: Start with dots, stickers, or one accent nail.
Skipping Nail Preparation
Polish may chip faster when the nail surface has oil or hand cream on it.
Fix: Clean each nail with remover before applying the base coat.
Taking a little extra time between steps usually saves you from fixing smudged polish later.
Try These Easy Nail Art Ideas at Home
Creating attractive nail art becomes easier when you begin with basic tools and simple shapes.
Dots, French tips, flowers, hearts, gradients, and stickers can all work for beginners. You can also change the colors to match the season, your outfit, or an event.
Do not worry if your first design is not perfect. Start with one accent nail and practice the method before completing the full manicure.
Choose the idea that matches your skill level and the supplies you already own. Save these easy nail art ideas for your next at-home manicure, and begin with the design that feels simplest and most fun.