Gel nail designs can look simple in photos but feel much harder when you try them at home. The lines may look uneven. The gel may spread near your cuticles. You may also find that a design looks great on long nails but does not work on your short nails.
The good news is that beautiful gel nails do not need detailed art or a large set of tools. Many easy gel nail ideas use basic shapes, soft colors, and small accents. A dot, thin tip, tiny flower, or glitter nail can make a plain manicure feel more special.
These gel nail ideas for beginners work well at home or as inspiration for your next salon visit. Start with the designs that match your skill level. You can always add more detail later.
What You Need for Easy Gel Nails at Home
You do not need a full nail studio to create easy gel nails at home. A small beginner kit is enough for most of the designs in this guide.
Your basic kit should include:
- An LED or UV nail lamp
- Gel base coat
- Two or three gel colors
- Gel top coat
- Nail file
- Nail buffer
- Cuticle pusher
- Lint-free wipes
- Gel removal supplies
These products help you prepare, paint, cure, and protect your manicure.
A base coat helps the gel stick to the nail. It also creates a smoother surface for your color. A top coat adds shine and helps protect your design from scratches.
You may also want a few simple nail-art tools:
- Fine liner brush
- Dotting tool
- Cleanup brush
- Nail tape
- Small nail stickers
- Tweezers
- Chrome powder
- Cat-eye magnet
A dotting tool is useful for flowers, hearts, and polka dots. A fine brush helps with tips, lines, and swirls. Nail stickers are a good choice when you want detailed art without painting it by hand.
Apply gel in thin coats. Thick layers may wrinkle, feel soft, or cure unevenly.
Keep uncured gel away from your skin. Clean any spills before placing your hand under the lamp. Always follow the curing time listed on your gel product.
You do not need every tool at once. A dotting tool, thin brush, and a few gel colors are enough for many simple designs.
Alternating Color Gel Nails
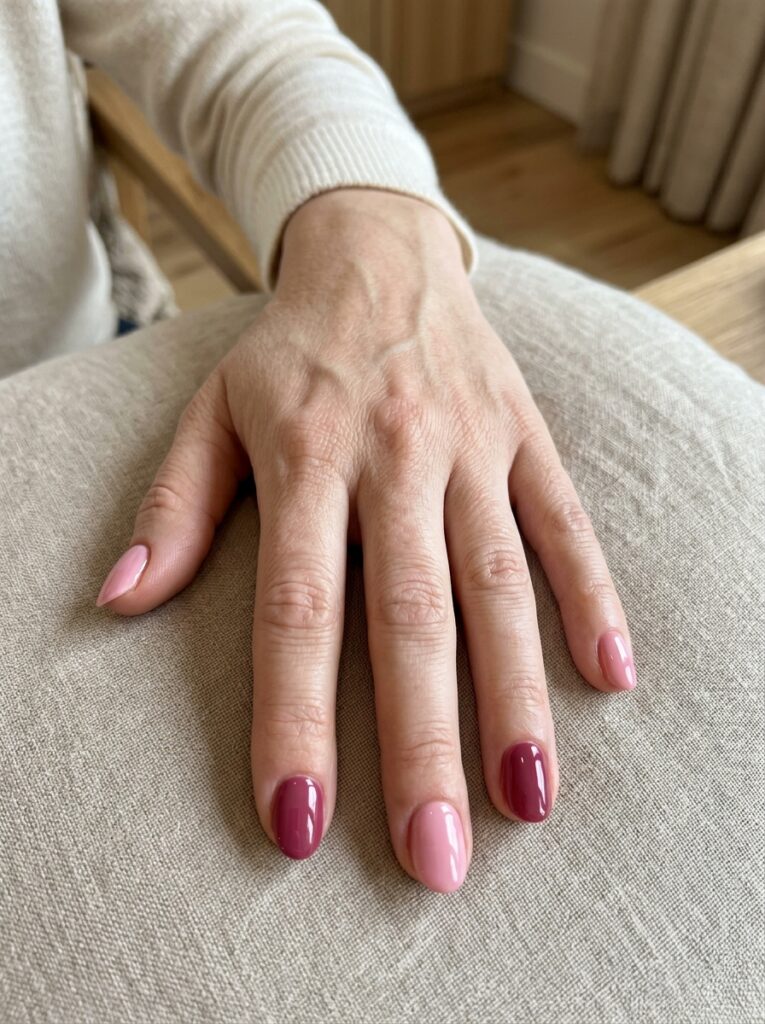
You do not need nail-art tools for an alternating color manicure.
Choose two gel colors and switch between them from finger to finger. You can also use five shades from the same color family.
Try light pink and berry for a soft look. Beige and chocolate brown work well for a neutral manicure. Blue shades create a fresh summer style.
Keep the nail shape and finish the same so the colors feel connected.
This is one of the best gel nail ideas for beginners because you only need to paint each nail with a solid color.
Difficulty: Very easy
Best nail shape: Any shape
Tools: None
Best colors: Pink and berry or beige and brown
Easy variation: Arrange five shades from light to dark
Cat-Eye Gel Accent Nail
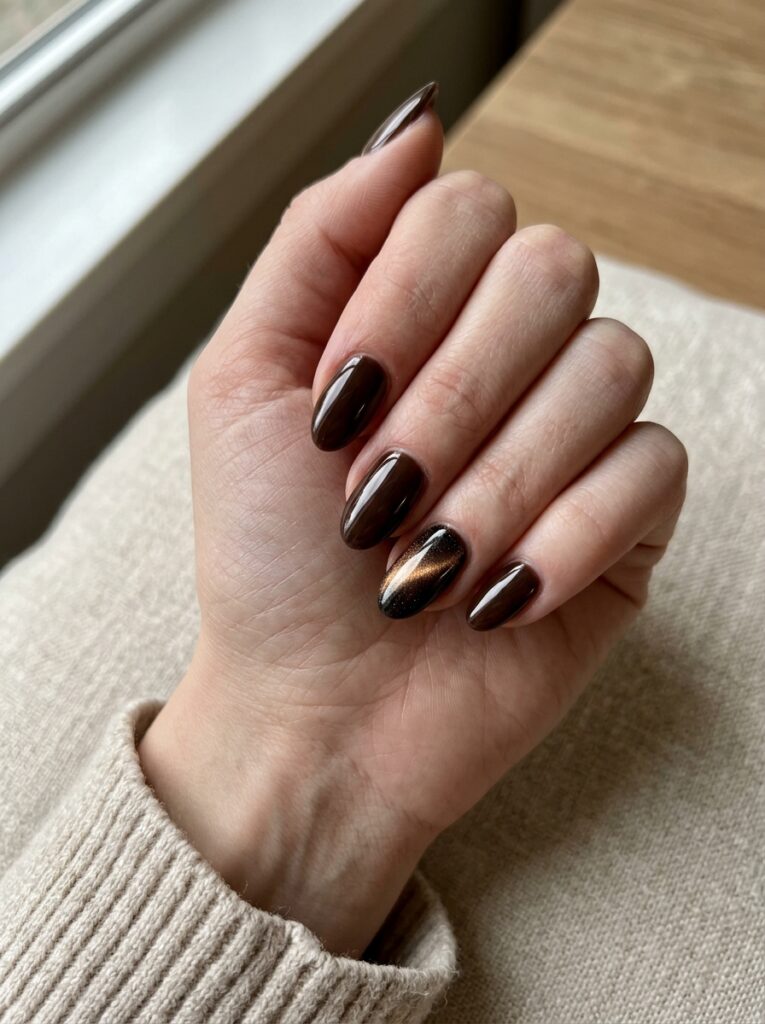
Cat-eye gel uses magnetic shimmer to create a glowing line or soft wave.
Apply the magnetic gel to one or two nails. Hold the magnet above the wet gel before curing it.
Move the magnet slowly until the shimmer sits where you want it. Then cure the gel before the effect spreads.
Pair the cat-eye nail with a matching solid color. Try deep brown with bronze shimmer, blue with silver, or rose with pink shimmer.
This design looks detailed, but the magnet does most of the work.
Difficulty: Easy
Best nail shape: Almond, oval, or square
Tools: Cat-eye magnet
Best colors: Brown, rose, blue, or silver
Easy variation: Use cat-eye gel on the ring fingers
Easy Swirl Gel Nails
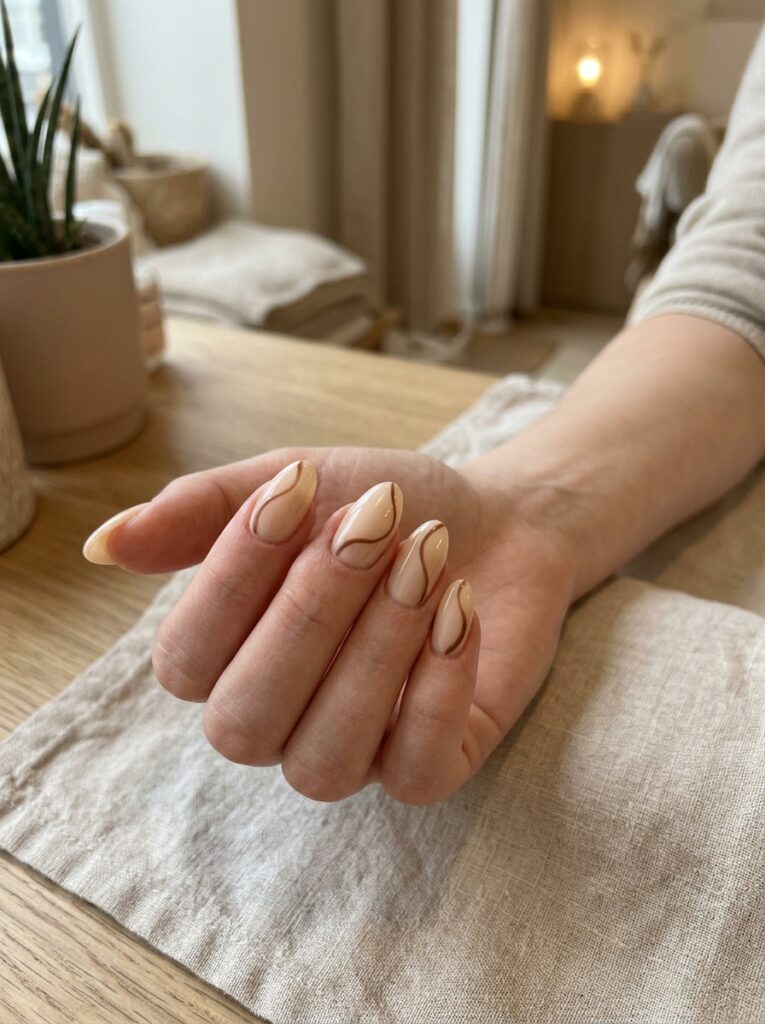
Swirls look detailed, but the shapes can be loose and uneven.
Apply a neutral gel base. Use a thin brush to paint one or two curved lines along the side of the nail.
Do not load the brush with too much gel. A large drop can spread before you finish the shape.
Try pink with red swirls, cream with brown lines, or pale blue with white. Keep the swirls thin so the base color can still show.
You can paint the design on every nail or use it as an accent.
Difficulty: Easy to moderate
Best nail shape: Almond or oval
Tools: Fine liner brush
Best colors: Cream and brown or pink and red
Easy variation: Paint one curved line instead of two
Gel Nail Stickers Over a Neutral Base
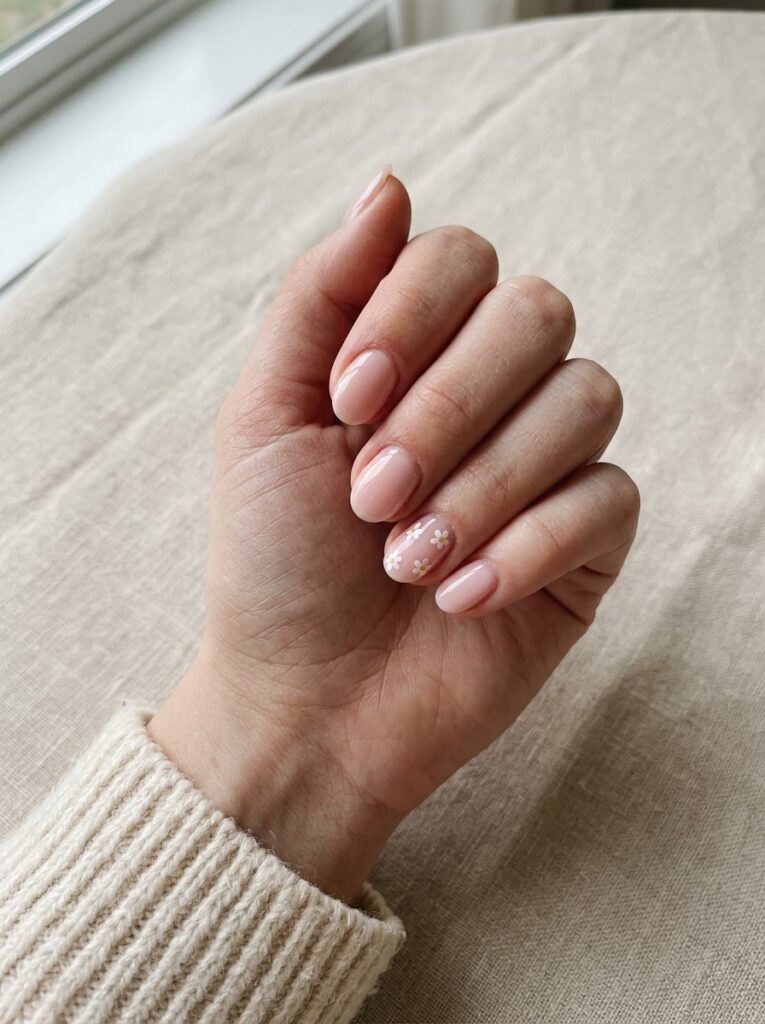
Nail stickers are helpful when you want detailed art without painting by hand.
Start with a nude, pale pink, or milky gel base. Cure the color and let the nail cool.
Use tweezers to place small flowers, stars, hearts, or abstract shapes. Keep each sticker away from the sidewalls and cuticle.
Press the edges down before adding top coat. Use two thin top-coat layers when the sticker feels raised.
This style works well for beginners and anyone who struggles with fine brushwork.
Difficulty: Very easy
Best nail shape: Any shape
Tools: Stickers and tweezers
Best colors: Nude, pink, or milky white
Easy variation: Use stickers on two accent nails
Glitter Accent Nail
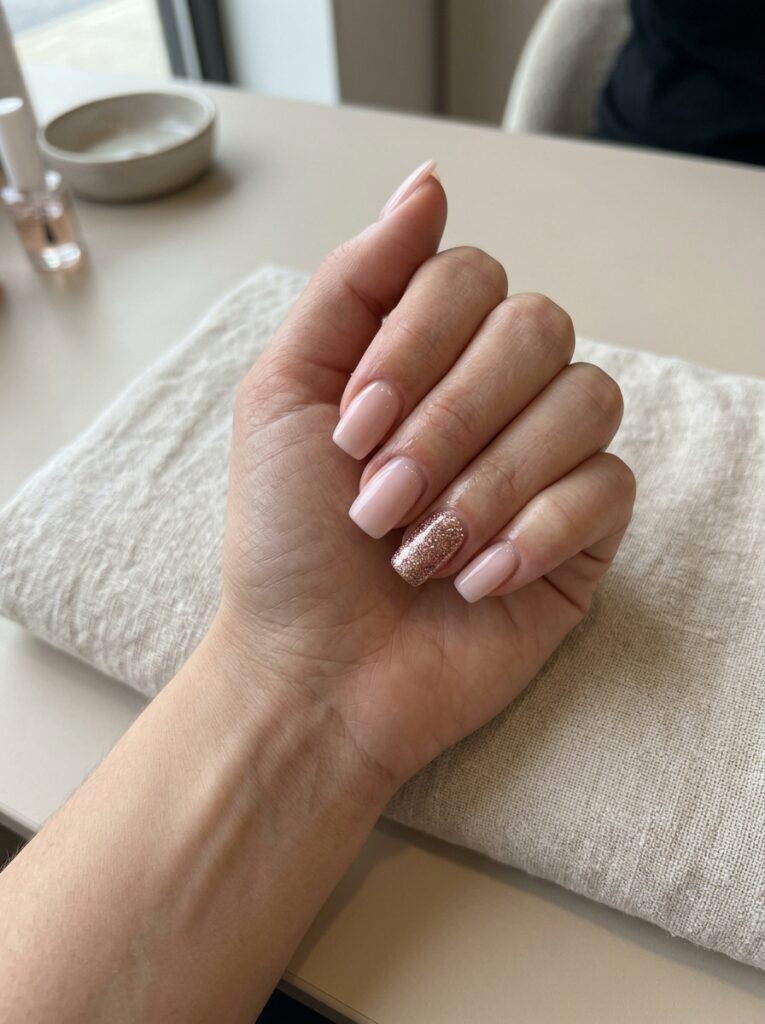
A glitter accent nail is one of the fastest ways to make a plain manicure feel complete.
Paint most of your nails with one solid gel color. Use glitter gel on the ring finger or thumb.
This design works because only one nail needs extra attention. It also lets you use glitter without making the full manicure feel too bright.
Try pale blue with silver glitter, blush pink with rose gold, or beige with champagne glitter.
Add an extra layer of top coat when the glitter feels rough.
Difficulty: Very easy
Best nail shape: Any shape
Tools: None
Best colors: Pink with rose gold or blue with silver
Easy variation: Add glitter to two nails
Glitter French Tips
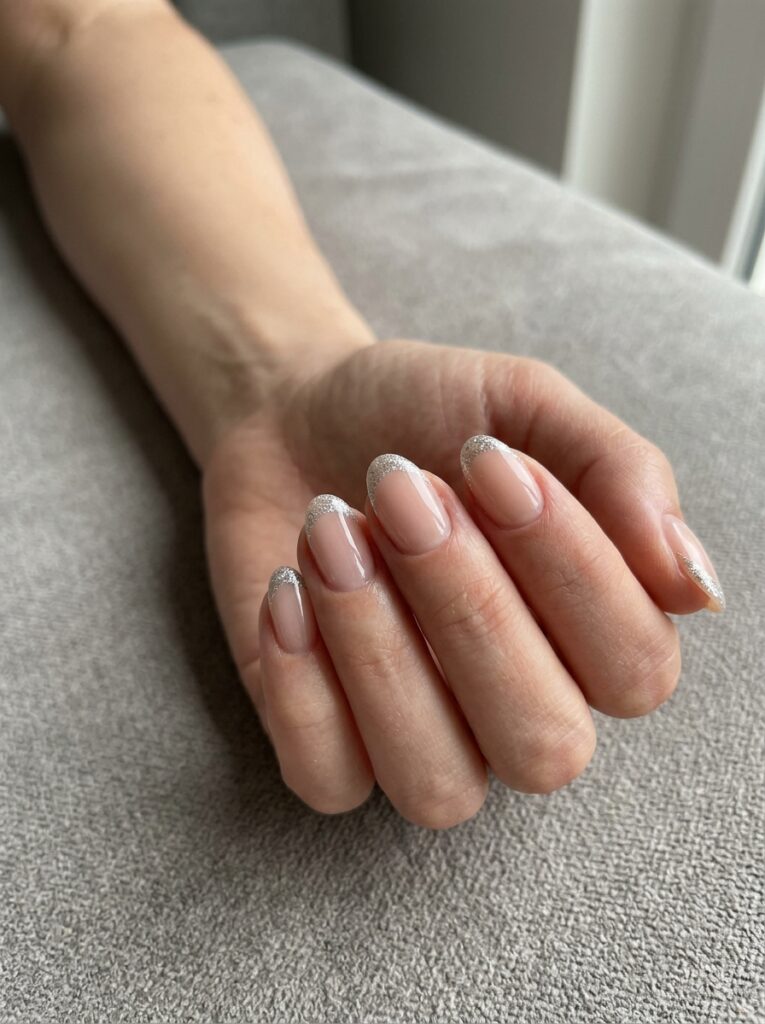
Glitter French tips are easier than solid French tips because sparkle can hide small bumps and uneven edges.
Start with a clear, nude, or sheer pink base. Use a thin brush to place glitter gel across the tips.
Fine glitter is best for short nails. Chunky glitter may cover too much of the nail.
Choose silver glitter if you like cool colors. Gold and champagne pair well with warm nude shades.
Keep the glitter line narrow for a soft look. Make it thicker for a party manicure.
Difficulty: Easy
Best nail shape: Square, oval, or almond
Tools: Fine brush
Best colors: Nude with silver or champagne glitter
Easy variation: Use glitter on the side of each tip
Gold Foil Accent Nails
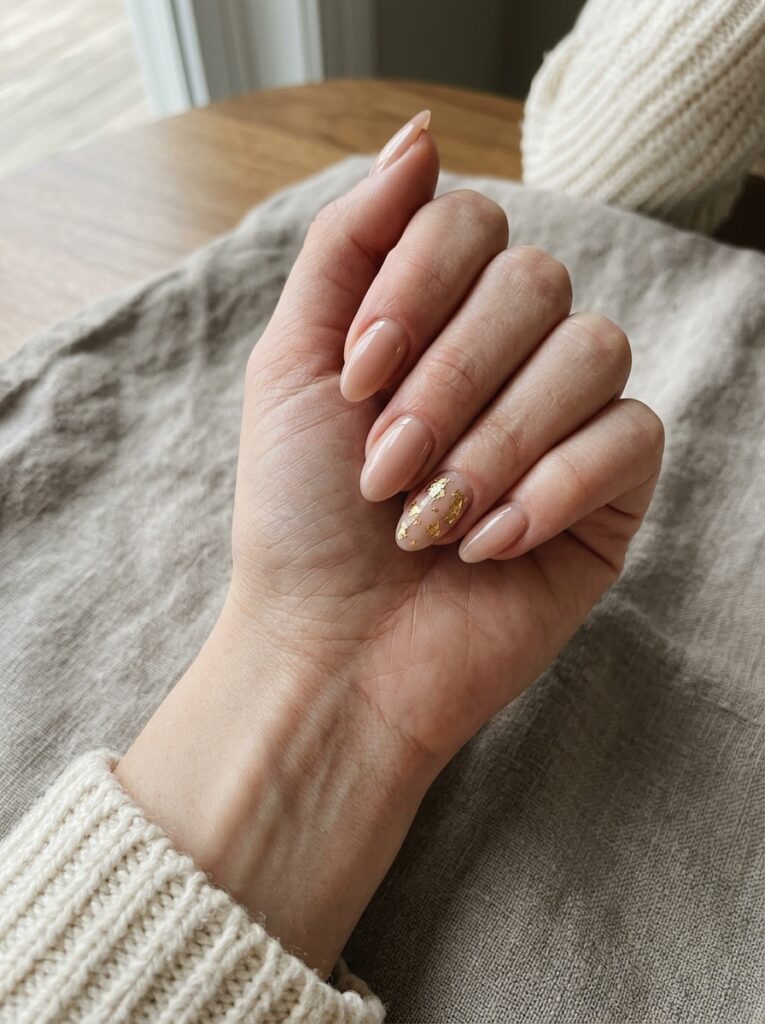
Gold foil can make a simple manicure look more polished.
Apply your gel base color and cure it. Place small foil pieces over a tacky layer or foil gel, based on the product directions.
Use tweezers to control the pieces. Do not cover the full nail. A few small flakes often look better than one large sheet.
Gold foil pairs well with nude, burgundy, black, and milky white.
Seal the foil with top coat. Make sure the edges feel smooth before curing.
Difficulty: Easy
Best nail shape: Almond, oval, or square
Tools: Tweezers
Best colors: Burgundy with gold or nude with gold
Easy variation: Add foil to one accent nail
Matte and Glossy Gel Nails
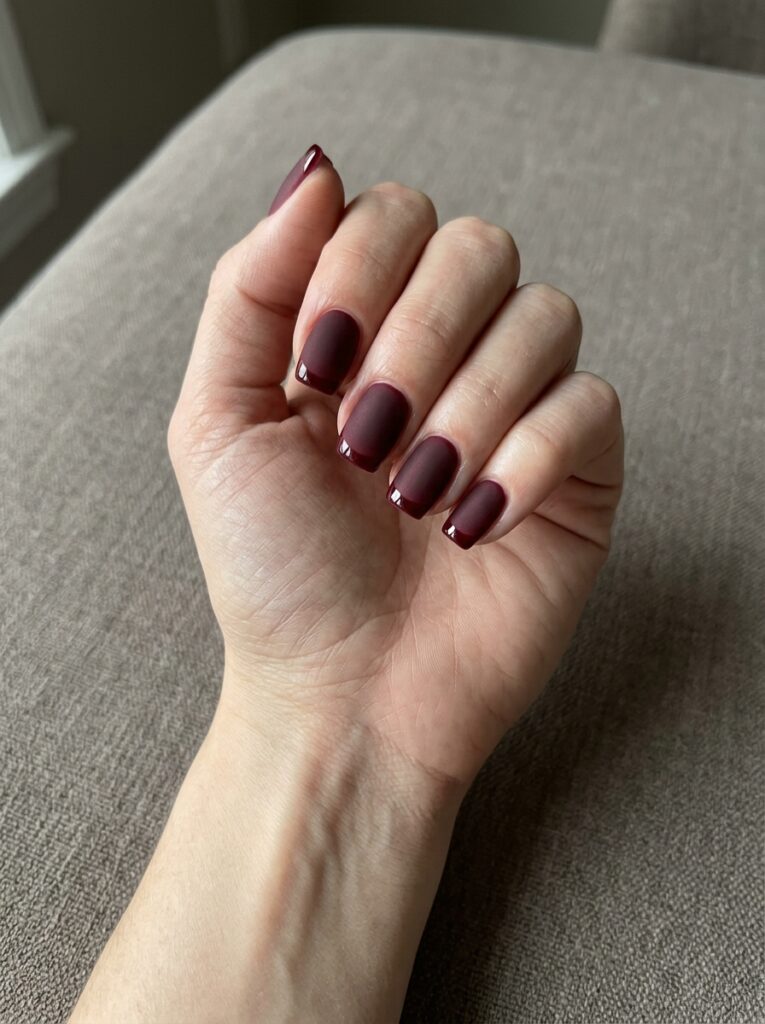
You can create contrast without using several colors.
Paint your nails with one gel shade. Add a matte top coat and cure it. Then use a glossy top coat to paint tips, dots, or thin lines.
The design may look subtle in soft light. It becomes more visible when the nails move.
Black, burgundy, navy, and dark brown show the finish difference clearly. Nude shades create a softer result.
This idea works well when you want simple gel nail designs with a modern feel.
Difficulty: Easy
Best nail shape: Square or almond
Tools: Fine brush
Best colors: Black, burgundy, navy, or nude
Easy variation: Add glossy French tips over matte nails
Micro French Tips
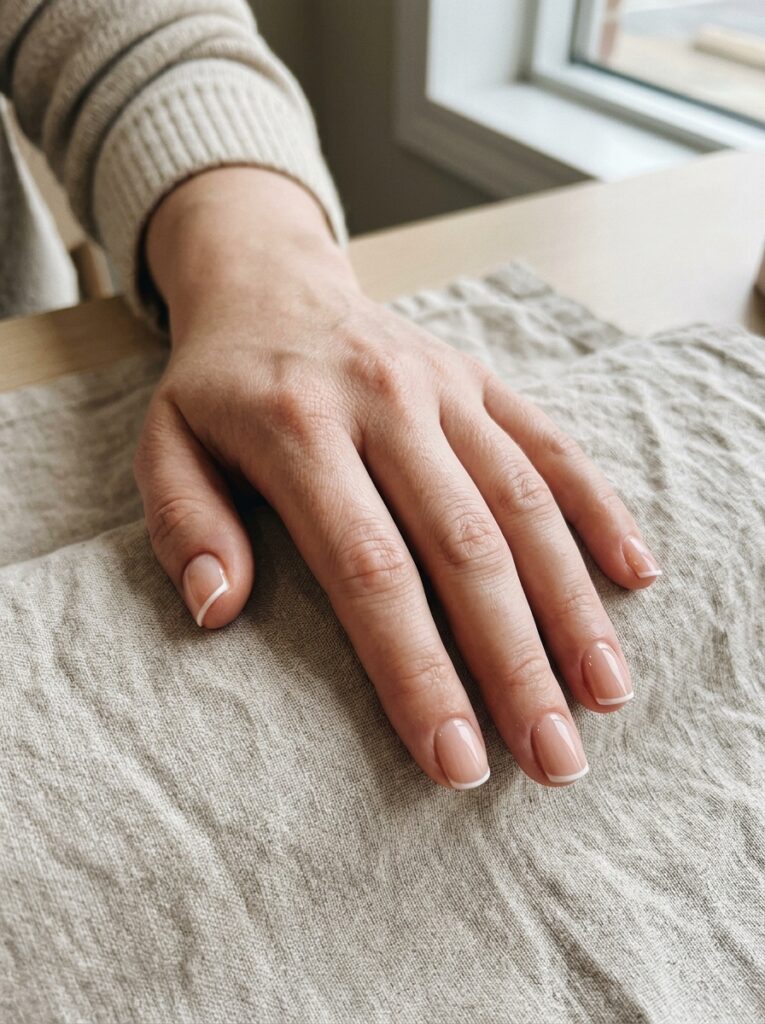
Micro French tips use a very thin line across the end of the nail. This gives you the clean look of a French manicure without a thick white tip.
Start with a nude or sheer pink base. Use a fine liner brush to paint a narrow line along the free edge.
Rest both elbows on a table while painting. This can help keep your hand steady.
White tips look classic. Black, red, pastel blue, or soft pink tips feel more modern.
Micro French tips work especially well on short nails because the thin line does not cover too much space.
Difficulty: Easy
Best nail shape: Short square, oval, or almond
Tools: Fine liner brush
Best colors: Nude with white or pink tips
Easy variation: Use a different tip color on each nail
Micro-Flower Gel Nails
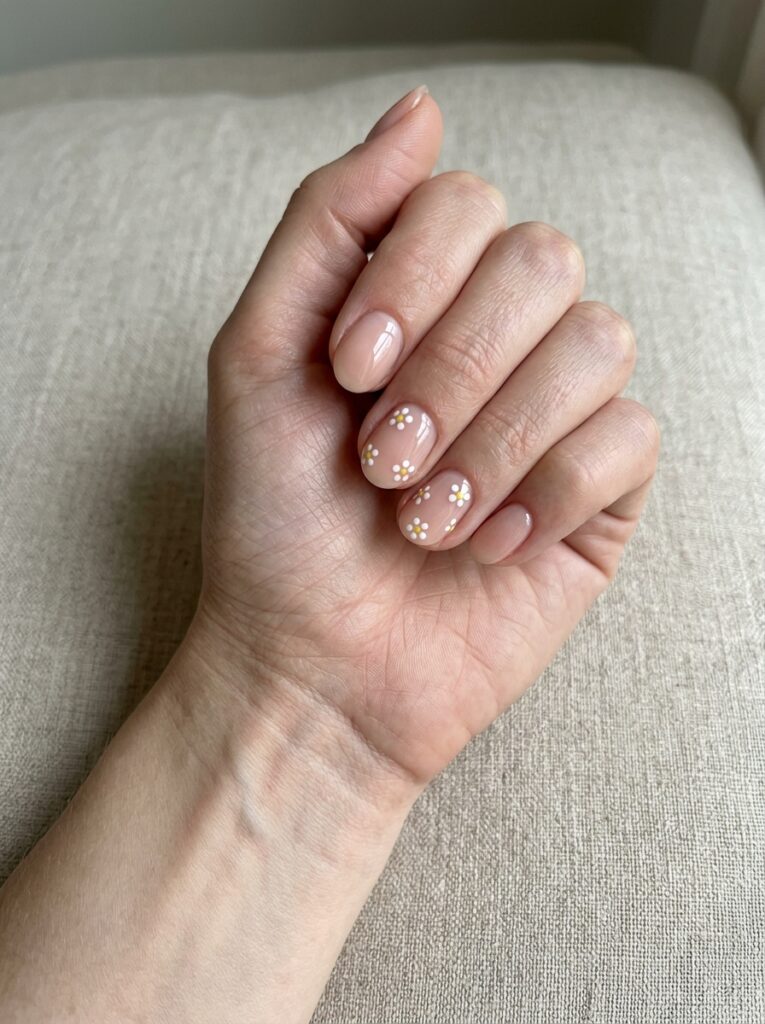
Tiny flowers are made from simple dots.
Start with a sheer pink, nude, or milky base. Add five small dots in a circle. Place a smaller dot in the middle to finish the flower.
White petals with a yellow center create a soft spring look. Pastel flowers work well for warm weather. Brighter shades can make the same design feel more playful.
Add flowers to two or three nails instead of covering the full manicure.
Space them in different areas so the pattern does not feel too stiff.
Difficulty: Easy
Best nail shape: Oval, almond, or short square
Tools: Small dotting tool
Best colors: Nude with white or pastel flowers
Easy variation: Add one flower per nail
Milky White Gel Nails
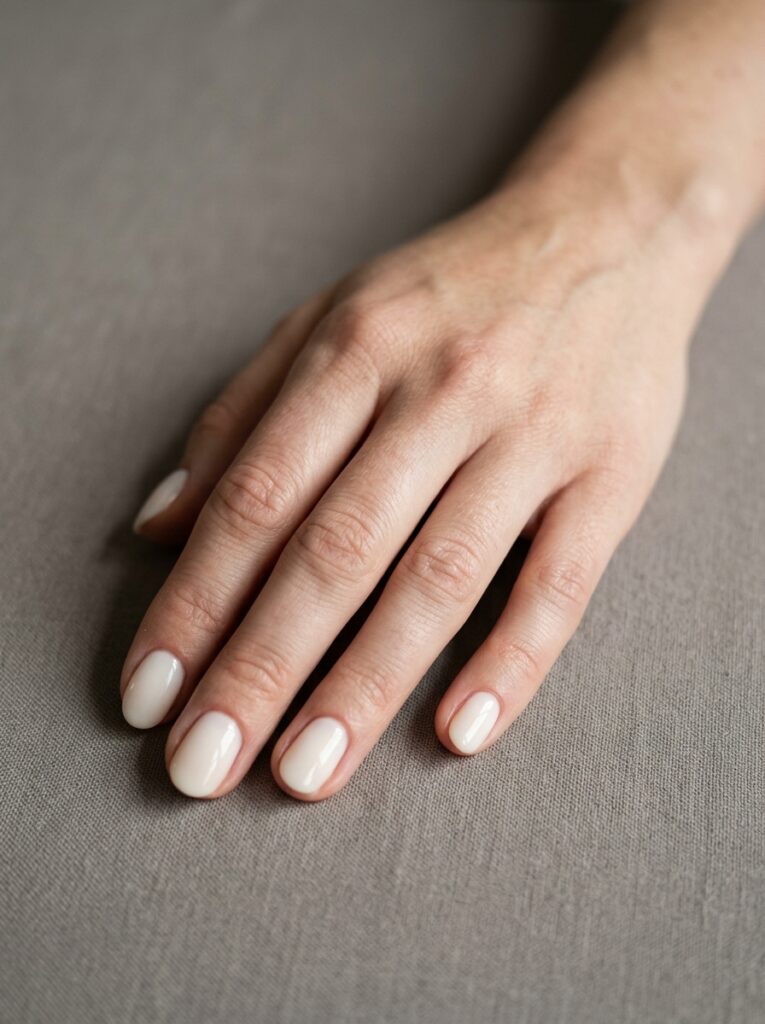
Bright white gel can look streaky when it is not applied evenly. Milky white is softer and easier to wear.
Use two or three thin coats instead of one thick coat. Let each layer cure fully before adding the next one.
Milky white gel nails look polished without needing any extra art. They suit short square nails, oval nails, and almond shapes.
You can also add a fine shimmer top coat for a soft glow. Keep the shimmer light so the manicure still looks simple.
Difficulty: Very easy
Best nail shape: Any nail shape
Tools: None
Best colors: Milky white or soft ivory
Easy variation: Add pearl shimmer
Minimalist Line Nails
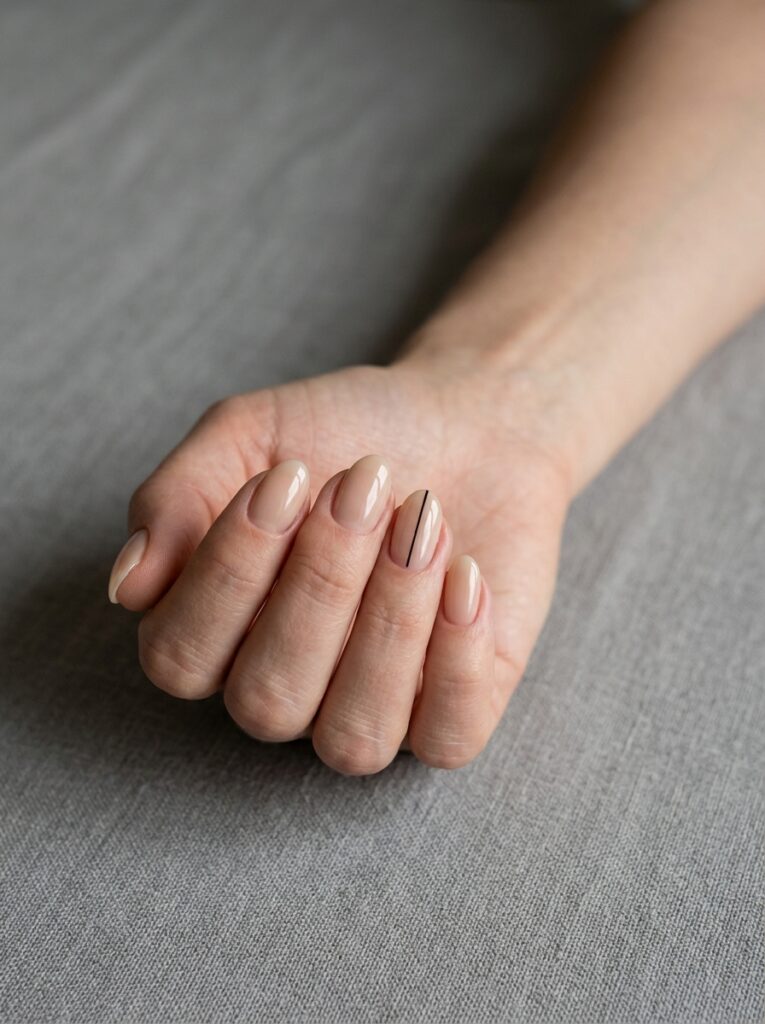
Simple lines can make a nude manicure look modern.
Start with a sheer pink, beige, or milky base. Use a fine liner brush to draw one vertical, curved, or diagonal line.
Black lines create strong contrast. White lines feel softer. Brown lines work well with warm nude gel.
You do not need to make every line match. Small differences can make the design feel more natural.
Place the line art on two accent nails when painting all ten nails feels too difficult.
Difficulty: Easy
Best nail shape: Almond, oval, or square
Tools: Fine liner brush
Best colors: Nude with black, white, or brown
Easy variation: Add one line to each ring finger
Pastel Rainbow Nails
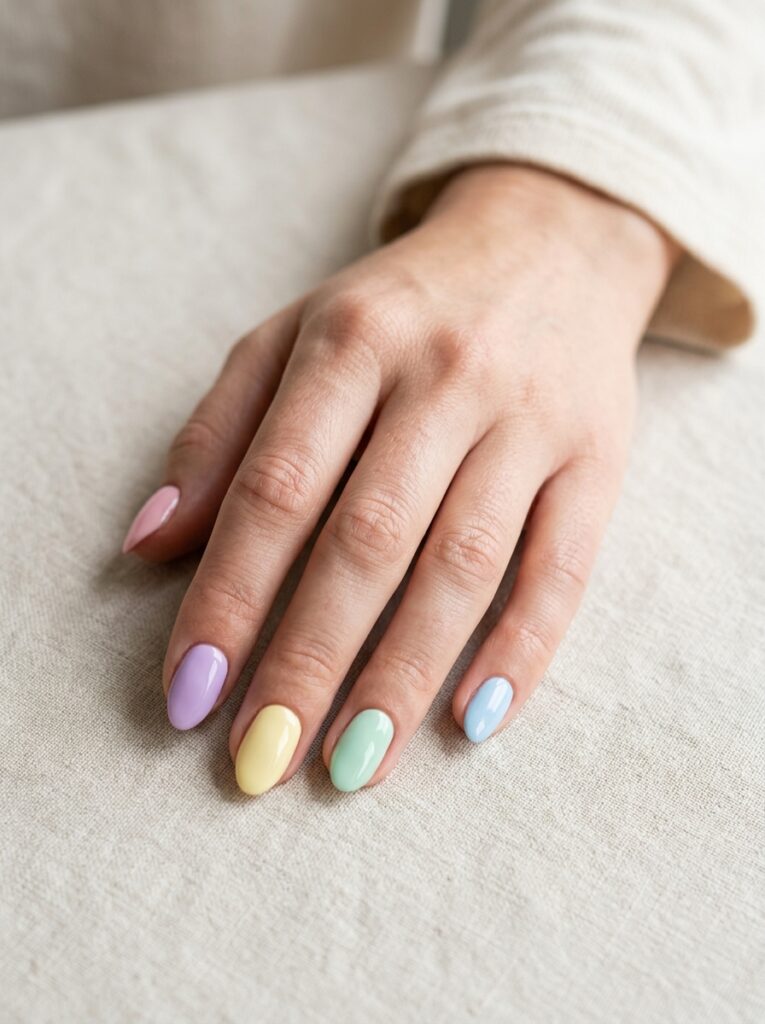
Pastel rainbow nails add color without looking too bright.
Paint each nail with a different soft shade. Pink, lavender, pale yellow, mint, and baby blue make a balanced set.
Choose colors with a similar level of brightness. One very dark shade may make the manicure feel uneven.
Keep the finish glossy and avoid extra art. The color mix is enough on its own.
For a calmer version, use only three pastel colors and repeat them across both hands.
Difficulty: Very easy
Best nail shape: Short square, oval, or almond
Tools: None
Best colors: Pink, lavender, yellow, mint, and blue
Easy variation: Use three colors instead of five
Polka-Dot Gel Nails
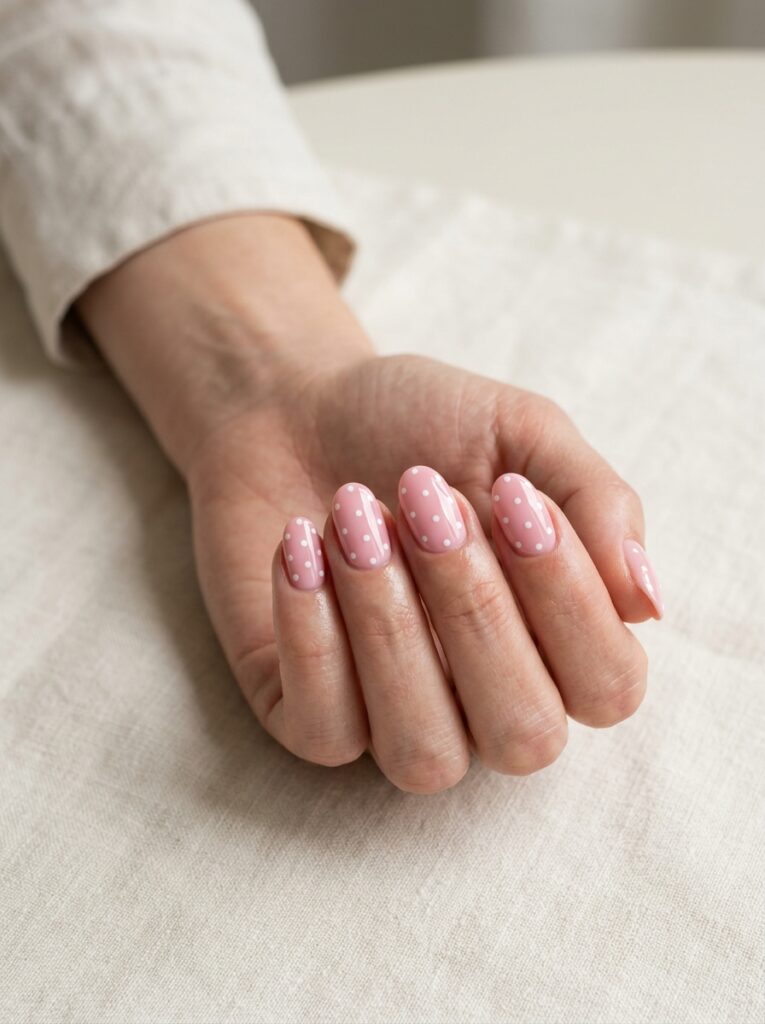
Polka dots give you more detail without the need for brush control.
Start with a solid gel base. Once it cures, use a dotting tool to add evenly spaced dots.
Use one dot size for a neat pattern. Mix small and medium dots when you want a playful look.
Pink and white feel soft and feminine. Nude and black look more modern. Pastel dots work well for spring and summer.
Leave enough space between the dots. Too many can make short nails look crowded.
Difficulty: Easy
Best nail shape: Short square or oval
Tools: Dotting tool
Best colors: Pink and white or nude and black
Easy variation: Add dots to one or two nails
Sheer Pink Gel Nails
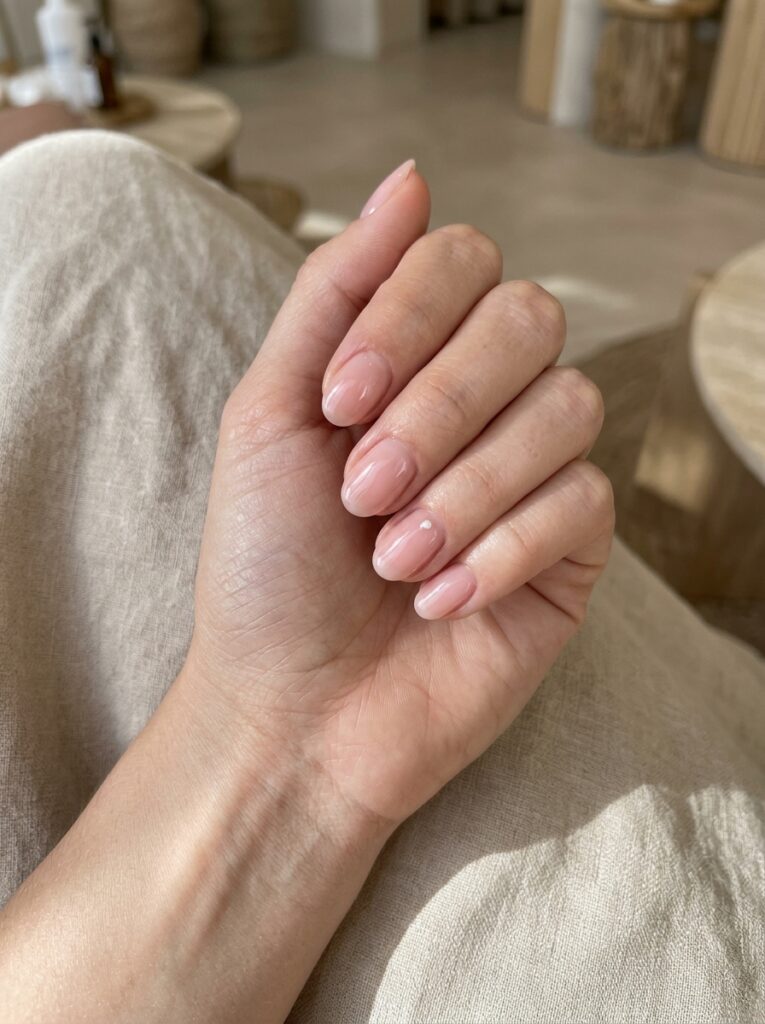
Sheer pink gel nails look clean, soft, and natural. They are also one of the easiest choices for beginners.
Apply one thin coat for a clear pink finish. Add a second or third coat when you want a softer, milkier look. Finish with a glossy top coat.
Sheer pink works well on short oval, squoval, and almond nails. The transparent color can also make small mistakes less easy to notice.
For a simple accent, add one tiny white dot near the cuticle of each ring finger.
Difficulty: Very easy
Best nail shape: Oval, squoval, or almond
Tools: None
Best colors: Sheer blush pink or pale rose
Easy variation: Add a pearl top coat
Side French Gel Nails
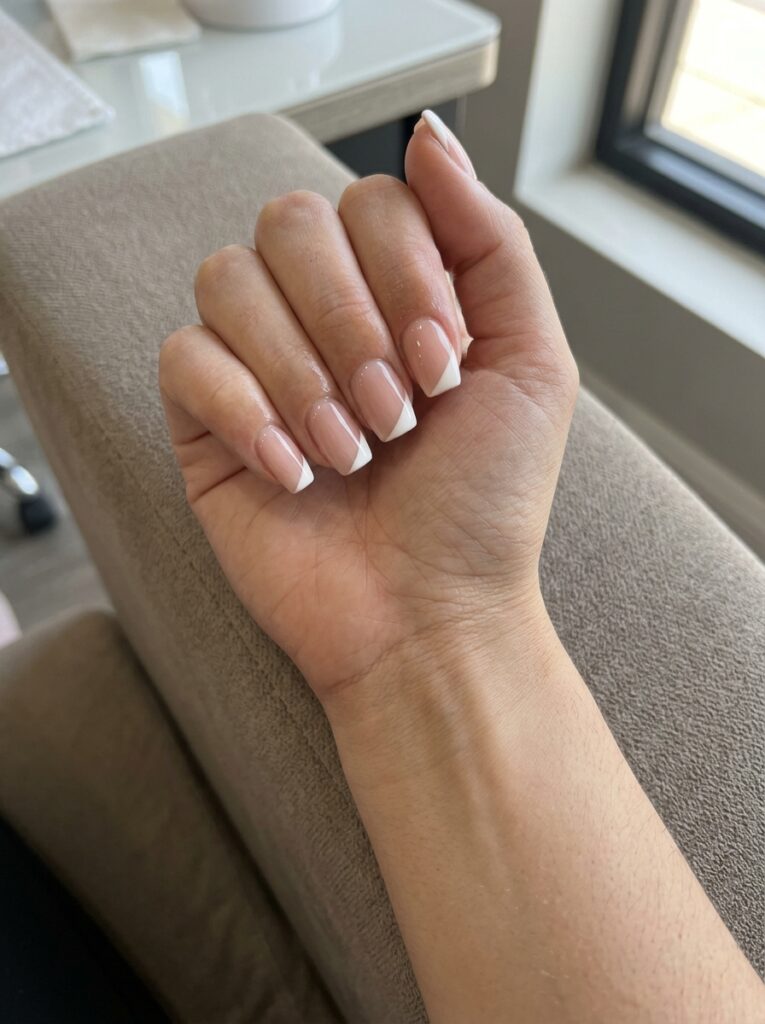
A side French design places the color on one corner of the nail instead of across the full tip.
Start with a sheer or nude base. Paint a diagonal section from one side of the tip. The line does not need to form a perfect curve, which makes this style easier for beginners.
You can use one color or add a second thin line for more detail. Try white and gold, pink and red, or beige and brown.
Alternate the direction on each nail to create a balanced look.
Difficulty: Easy
Best nail shape: Square or almond
Tools: Fine brush
Best colors: Nude with white, red, or brown
Easy variation: Add a thin glitter line
Simple Chrome Accent
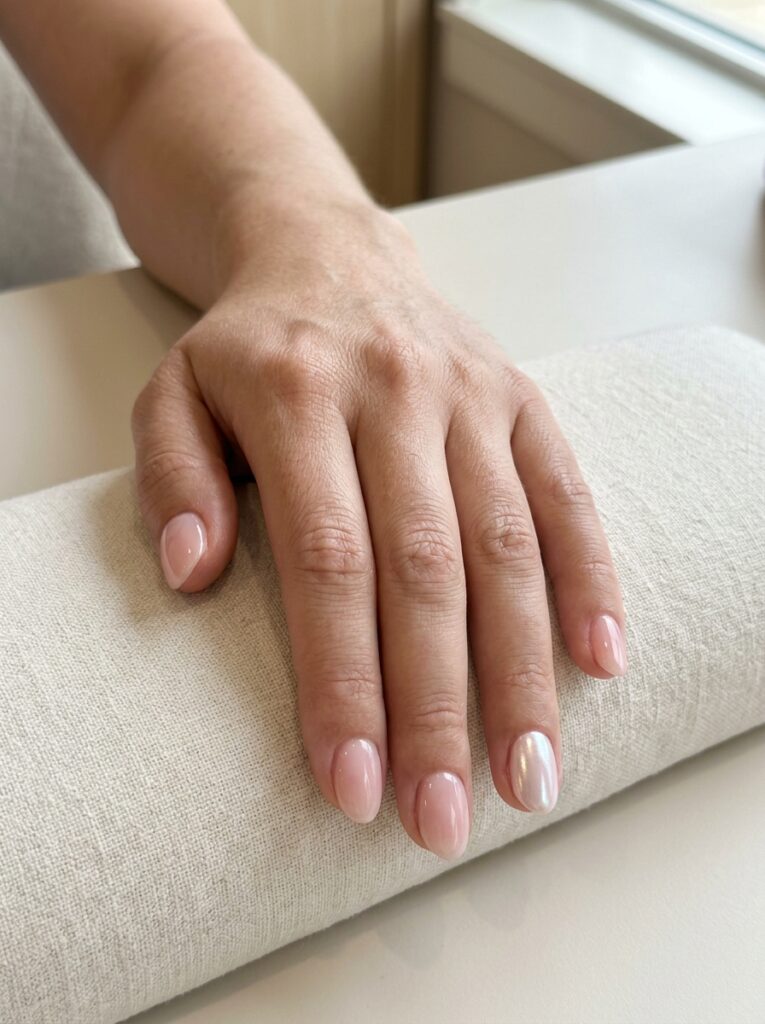
Chrome powder adds shine without the need for painted nail art.
Start with a gel color and cure it. Apply a no-wipe top coat if your chrome product needs one. Rub the powder over the nail with a sponge applicator.
Pearl chrome creates a soft glazed finish. Silver chrome looks bolder.
Try chrome on one or two accent nails. Pair it with sheer pink, white, or beige gel.
Brush away loose powder before adding the final top coat.
Difficulty: Easy
Best nail shape: Any shape
Tools: Chrome powder and applicator
Best colors: Sheer pink with pearl chrome
Easy variation: Chrome only the tips
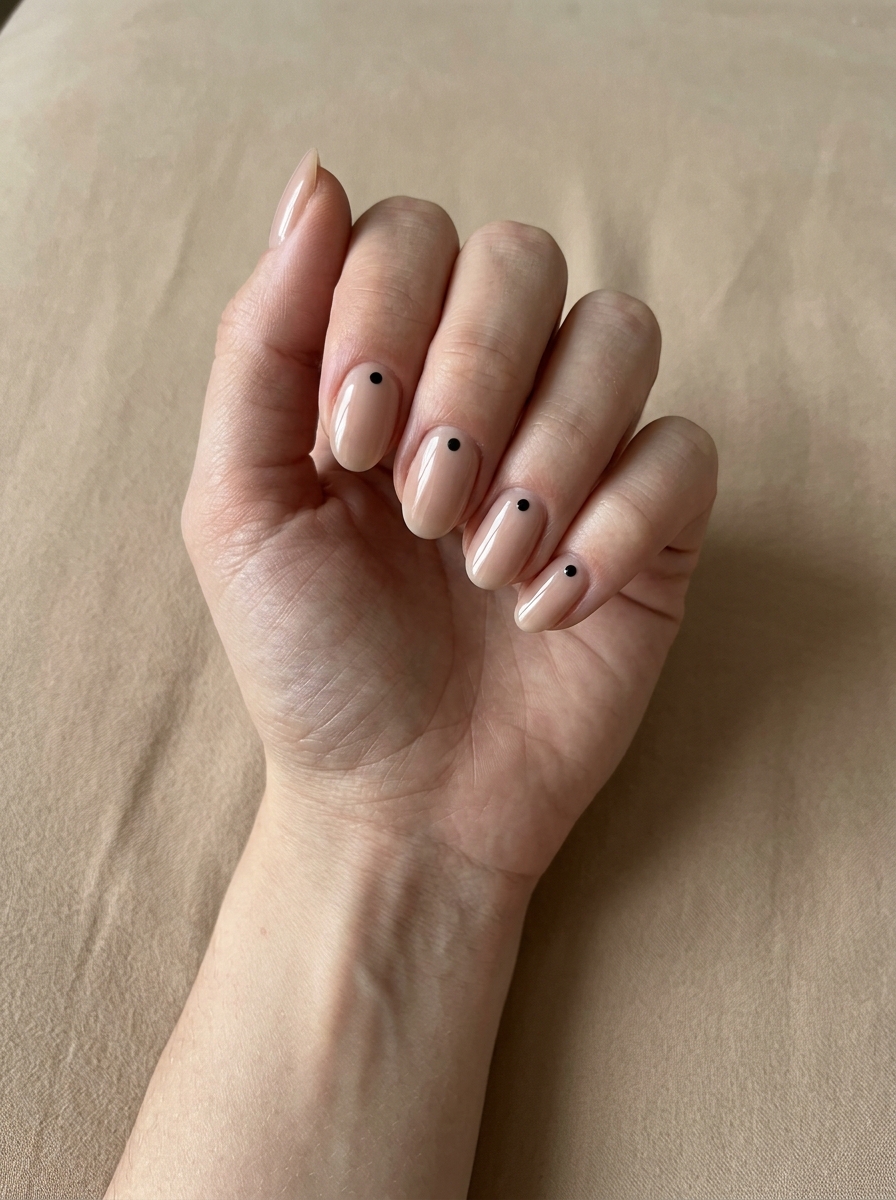
Single-Dot Nail Art
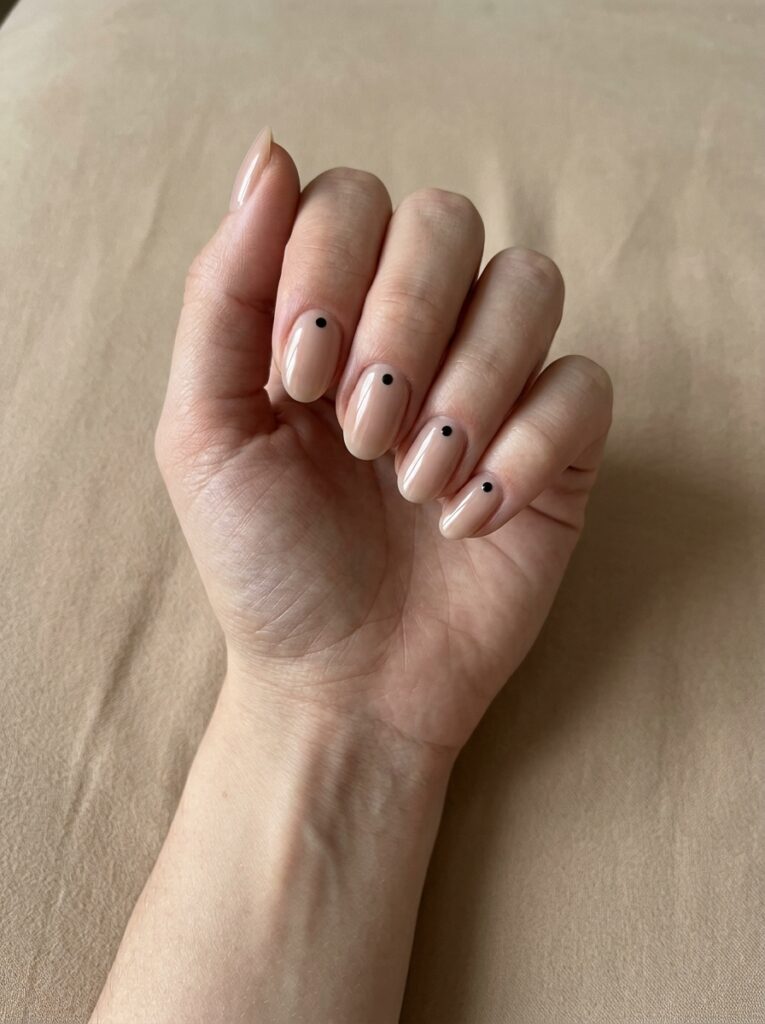
One small dot can change the look of a plain gel manicure.
Apply a neutral base color. Then place one dot near the cuticle, center, or tip of each nail.
Use a dotting tool for the cleanest shape. A toothpick or rounded bobby pin can also work.
Black dots over nude gel create a simple look. Gold dots feel more dressed up. Red dots over pale pink add a fun pop of color.
Try to place each dot in the same area, but do not worry if they are not perfect.
Difficulty: Very easy
Best nail shape: Any shape
Tools: Dotting tool or toothpick
Best colors: Nude with black or gold
Easy variation: Add the dot to one accent nail only
Tiny Heart Gel Nails
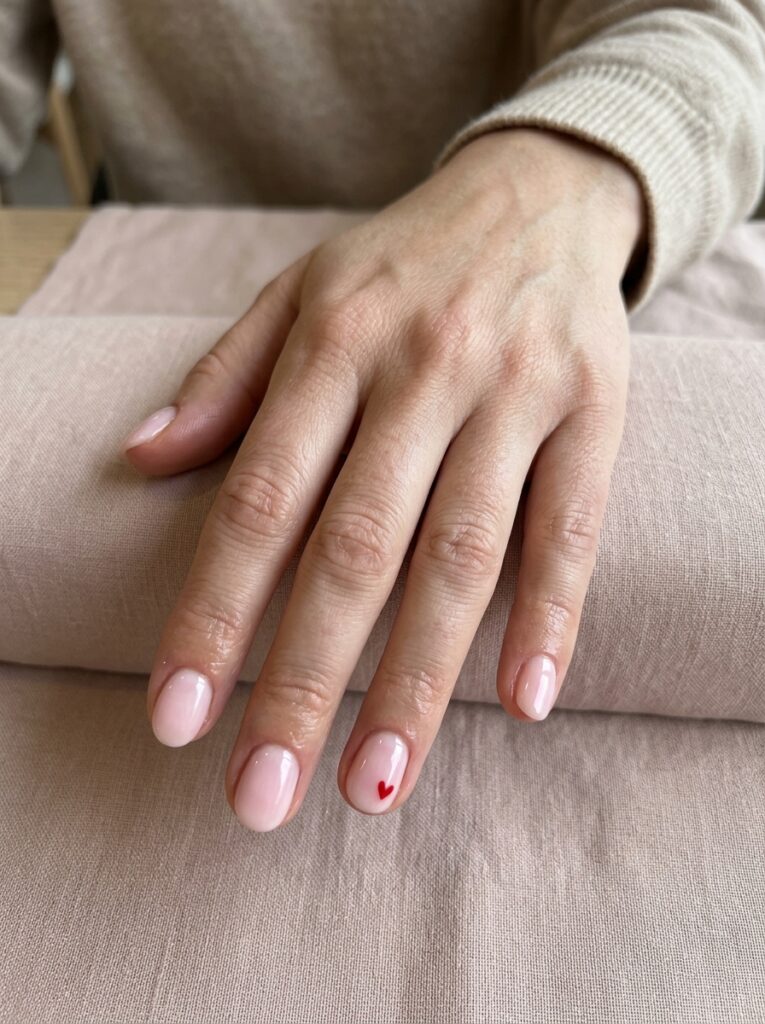
Small hearts are Easy and easier to paint than large filled hearts.
Start with a solid or sheer base. Make two small dots next to each other. Then use a fine brush to pull the gel down into one point.
Place one heart near the tip or cuticle. You can also add a single heart to each ring finger.
Red hearts over pale pink look classic. Black hearts over nude gel feel more modern. White hearts work well over soft pastel colors.
Keep the hearts small. Larger shapes show mistakes more easily.
Difficulty: Easy
Best nail shape: Short oval or almond
Tools: Dotting tool and fine brush
Best colors: Pink with red or nude with black
Easy variation: Add one heart to each hand
Two-Tone Gel Nails
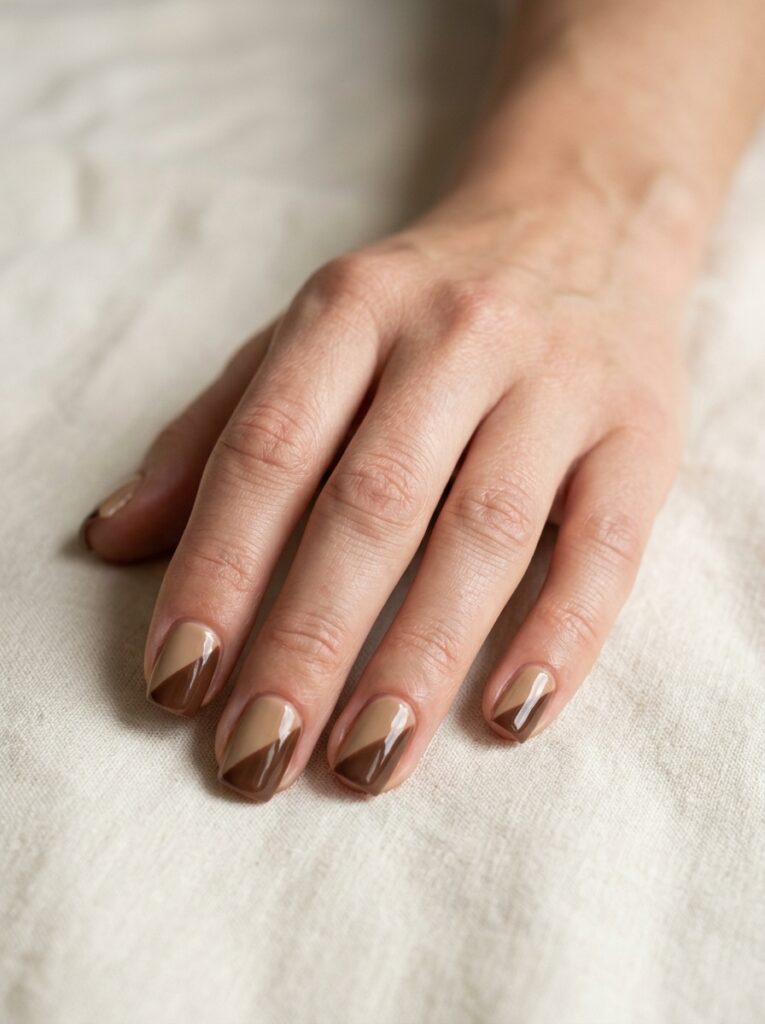
Two-tone gel nails use two colors on the same nail.
You can divide the nail from side to side, top to bottom, or across a diagonal line. Nail tape can help you create a cleaner edge.
Apply and cure the first color. Then place the tape and add the second shade. Remove the tape before curing if the product directions allow it.
Colors from the same family are easier to pair. Try pale pink with berry, beige with brown, or light blue with navy.
Use this design on one or two accent nails when you want a simpler manicure.
Difficulty: Easy
Best nail shape: Square or almond
Tools: Nail tape
Best colors: Beige and brown or pink and berry
Easy variation: Use a diagonal split
How to Choose the Right Easy Gel Nail Design
Twenty ideas can feel like too many when you are trying to choose one. Start by looking at your nail length and your skill level.
Short nails often look best with small details. Micro French tips, single dots, tiny flowers, and sheer colors do not need much space.
Longer almond and oval nails give you more room for swirls, foil, line art, and two-tone patterns.
Your daily routine also matters. Glitter, foil, and stickers may need more care around the edges. A sheer pink or solid neutral manicure may be easier to maintain.
Use this quick guide:
| What You Need | Best Design Choices |
| Very short nails | Micro French, dots, sheer pink |
| Complete beginner | Alternating colors, glitter accent |
| Simple work look | Milky white, nude lines, side French |
| Bright manicure | Pastels, swirls, tiny flowers |
| Special event | Gold foil, glitter tips, cat-eye |
| Low-maintenance look | Sheer pink, nude gel, solid colors |
You do not need to copy a design exactly. Change the colors, remove an accent, or use the art on one nail only.
Start with the easiest version. You can add more detail once you feel comfortable.
How to Make Simple Gel Nail Designs Look Neat
Clean preparation can make a basic manicure look much better.
Start by shaping your nails. Gently push back the cuticles and remove loose skin from the nail plate. Lightly buff the shine from the nail if your gel system requires it.
Clean the nail with a lint-free wipe. Dust, oil, or lotion can stop gel from sticking well.
Apply every gel layer thinly. Thick coats may spread into the skin or cure unevenly.
Leave a tiny gap between the gel and your cuticle. This helps prevent flooding.
Use a cleanup brush before curing. Dip it in the cleaner approved for your gel system, then remove any gel that has reached the skin.
Cure each coat for the time listed by the product maker. Do not guess the curing time.
Seal the free edge with top coat. This can help protect the tip from early wear.
Common Beginner Mistakes
Applying Too Much Gel
A thick layer may wrinkle or feel soft after curing. Use less product and build the color with two or three thin coats.
Flooding the Cuticle
Too much gel near the cuticle can spread onto the skin. Leave a small gap and clean spills before curing.
Loading the Brush Too Heavily
A brush full of gel is harder to control. Remove extra product before painting lines, hearts, or swirls.
Curing Before Fixing the Design
Once the gel cures, changing the shape becomes harder. Check your line, dot, or tip before placing your hand under the lamp.
Peeling Gel Off
Peeling can remove layers from the natural nail. Use the removal method recommended for your gel product.
How to Make Your Gel Manicure Last Longer
A good gel manicure still needs daily care.
Avoid long periods of water exposure right after your manicure. Water can affect the edges when there is already a weak spot.
Wear gloves when washing dishes or using cleaning products. This helps protect the shine and limits lifting.
Apply cuticle oil around your nails each day. Oil keeps the skin soft and can help the manicure look fresh as the nails grow.
Do not use your nails to open cans, scrape labels, or lift hard objects. These actions can chip the tips.
Check your nails when you notice lifting. Do not pull or peel the loose section. Peeling may damage the natural nail underneath.
Remove the gel when it grows out or starts lifting. Follow the product’s removal directions. Some gels soak off, while others require careful filing.
Good preparation and aftercare matter as much as the design, especially when you are doing easy gel nails at home.
Final Thoughts
With these 20 easy gel nail ideas, you can create a polished manicure without learning difficult nail-art skills.
Start with sheer pink, alternating colors, dots, or one glitter accent nail. These options need fewer tools and leave less room for mistakes.
Once you feel more confident, try micro flowers, swirls, chrome, or cat-eye gel. You can also place a detailed design on one nail instead of painting the full set.
Choose two or three colors, save your favorite idea, and use it for your next at-home or salon manicure.