
You find a Easy nail design online and decide to try it. Then the lines turn messy, the dots look too large, and the polish smudges before you finish. It can feel frustrating, especially when the design looked so simple in the photo.
The good news is that you do not need professional tools or a perfectly steady hand. You just need the right design and a few basic supplies.
Pick two or three polish colors, prepare your tools, and start with the design that feels easiest.
What You Need for Easy Nail Designs at Home
You do not need a large nail art kit to create a clean manicure. Most easy DIY nail designs use basic polish and one small tool.
Start with a nail file, base coat, top coat, and two or three polish colors. A base coat helps protect your natural nails from staining. It also gives the color a smoother surface. A top coat adds shine and may help reduce early chips.
A dotting tool is helpful for dots, flowers, and small hearts. However, you can use the rounded end of a bobby pin instead. A toothpick works well for tiny dots, thin lines, and small details.
Use regular tape or nail striping tape for straight lines and color blocks. A small makeup sponge can create glitter fades and ombré effects. You may also use a clean, fine eyeliner brush for swirls and stripes.
Keep cotton swabs and nail polish remover nearby. They will help you clean polish from the skin around your nails.
| Tool | What It Does | Household Alternative |
| Dotting tool | Creates round dots | Bobby pin |
| Striping brush | Draws thin lines | Fine eyeliner brush |
| Nail tape | Creates clean sections | Regular tape |
| Nail sponge | Blends polish colors | Makeup sponge |
| Cleanup brush | Cleans nail edges | Cotton swab |
A beginner can complete most of these designs with one base color, one accent color, a toothpick, tape, and clear top coat
Colorful French Tips
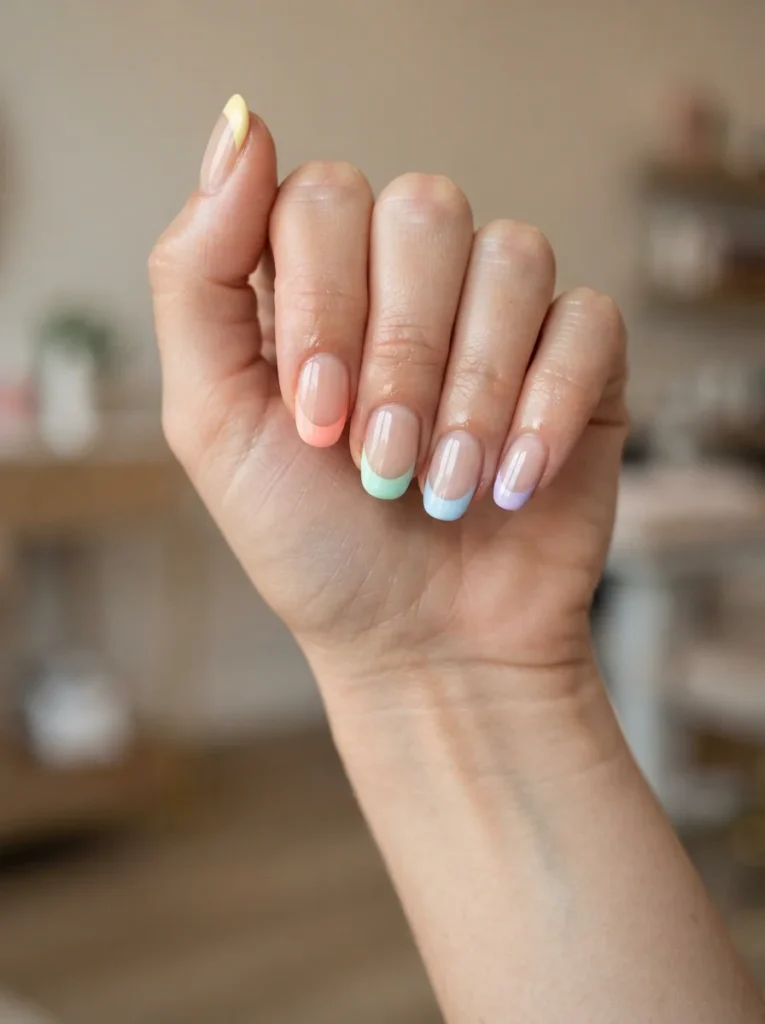
Colorful French tips add a brighter feel to a classic manicure.
Start with a clear or neutral base. Paint each nail tip with a different shade. You can use pastel colors, bold summer tones, or soft muted polish.
Choose shades from the same color group to keep the set balanced. For example, use five soft pastels instead of mixing random bright and dark shades.
Try to keep the tip thickness similar on each nail. Nail guides can help you form a cleaner edge.
Difficulty: Easy
Best for: Medium and long nails
Tools: Thin brush or nail guides
Quick variation: Use one color on all tips and add a tiny dot below each one.
Confetti Nail Design
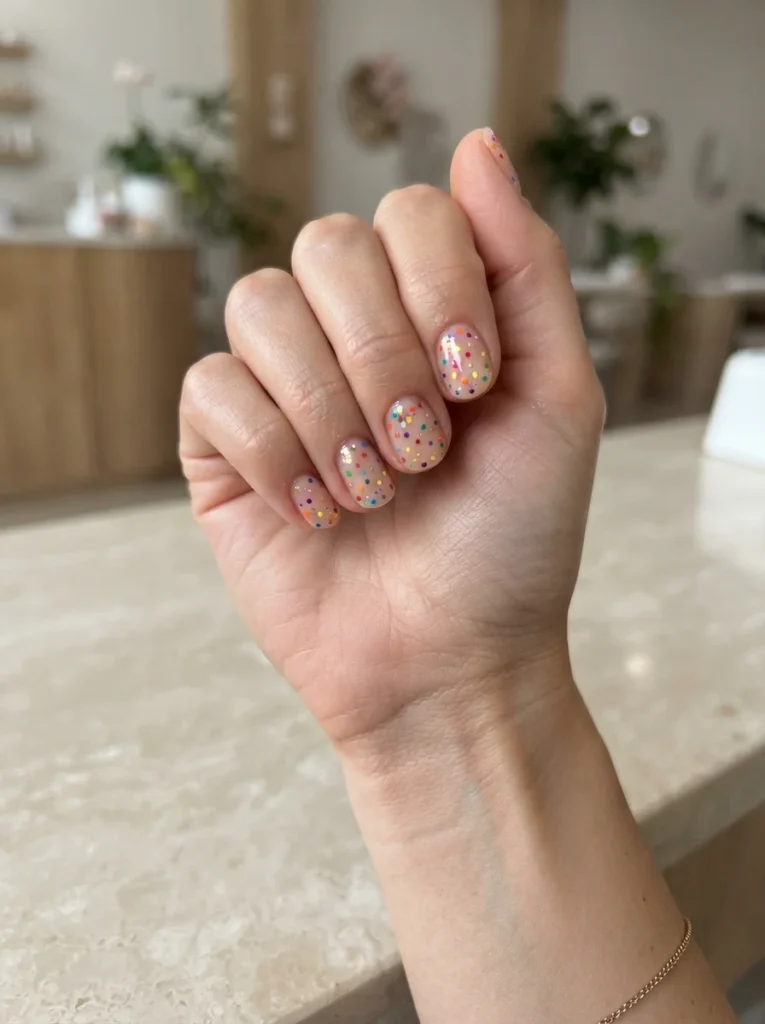
Confetti nails are bright, fun, and hard to mess up.
Apply a clear, white, or nude base. Use a dotting tool to add random dots in several colors. Change the size and spacing of the dots.
Leave some empty space so the design does not look crowded. You can match the colors to a birthday, holiday, or seasonal theme.
Use soft pastel confetti for spring. Choose red, pink, and white for a romantic look. Bright rainbow colors work well for parties.
Difficulty: Very easy
Best for: Short and medium nails
Tools: Dotting tool or bobby pin
Quick variation: Use glitter dots instead of several polish colors.
Diagonal Two-Tone Nails
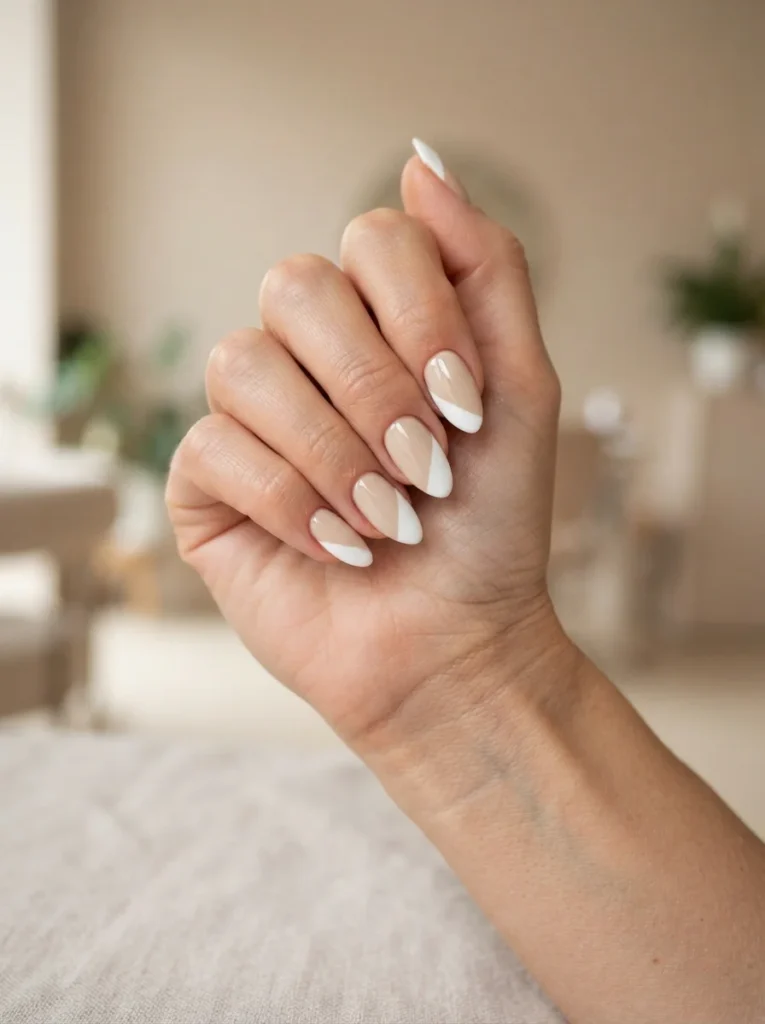
Two-tone nails let you use two colors without painting detailed patterns.
Apply your first polish color and wait until it is fully dry. Place a piece of tape diagonally across the nail. Press the edges down so polish cannot leak underneath.
Paint the open section with your second color. Remove the tape before that layer becomes fully hard. Finish with top coat after the design dries.
Beige and white create a soft look. Pink and red feel brighter. Black and nude offer stronger contrast.
Difficulty: Easy
Best for: Any nail length
Tools: Regular tape
Quick variation: Add a thin glitter line between the two colors.
Easy Cow Print Nails
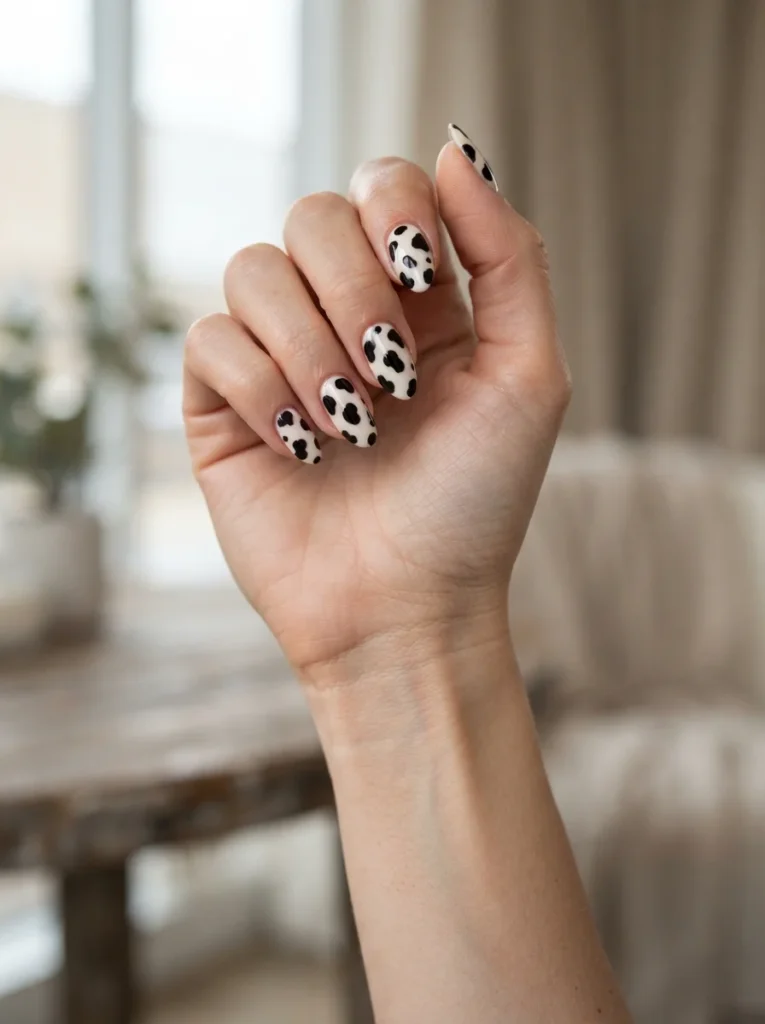
Cow print works well for beginners because the spots should look uneven.
Apply a white, cream, or nude base. Use black or brown polish to paint random spots. Change the shape and size of each one.
Do not create a repeated pattern. Leave open areas between the spots. Some marks can sit near the edge while others stay in the center.
A toothpick works for small spots. Use the polish brush corner for larger ones.
Difficulty: Easy
Best for: Any nail length
Tools: Toothpick or thin brush
Quick variation: Add cow print to one or two accent nails.
Easy Polka Dot Nails
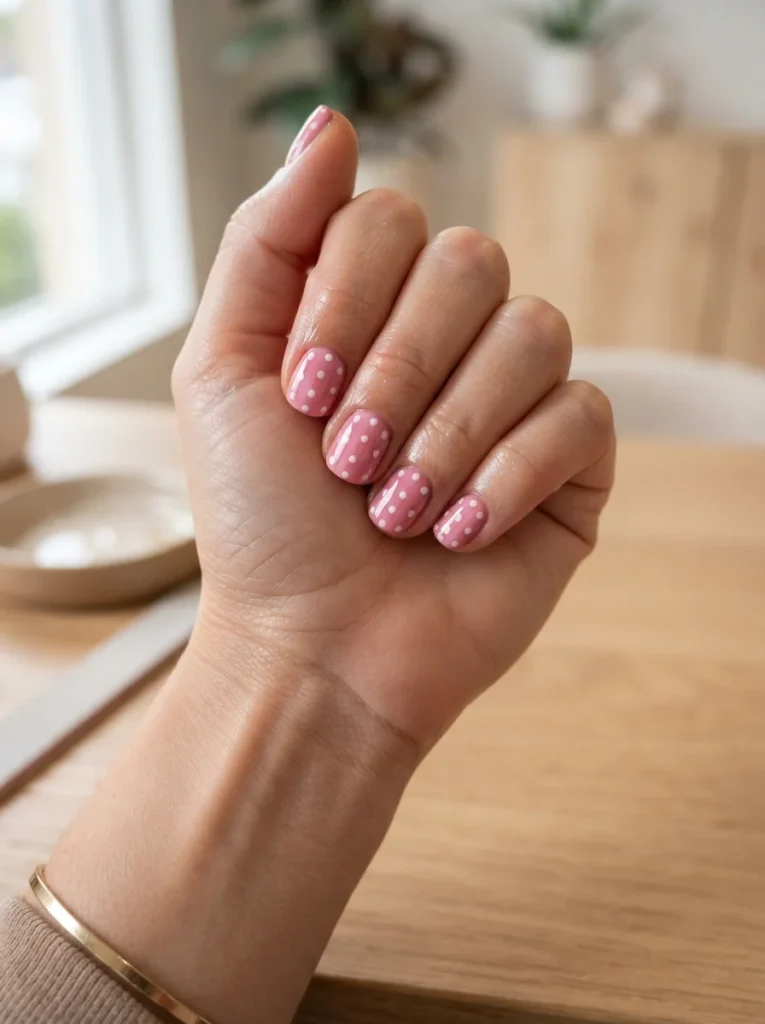
Polka dots are beginner-friendly because the spacing does not need to look perfect.
Apply a solid base color and let it dry. Place a small amount of your second polish color on foil. Dip a dotting tool or bobby pin into the polish. Press it gently onto the nail.
You can space the dots evenly or place them at random. Use white dots on pink, black dots on nude, or pastel dots on a white base.
Wipe the tool between colors to keep each dot clean.
Difficulty: Very easy
Best for: Short and medium nails
Tools: Bobby pin or dotting tool
Quick variation: Use several dot sizes for a playful look.
Glitter Gradient Nails
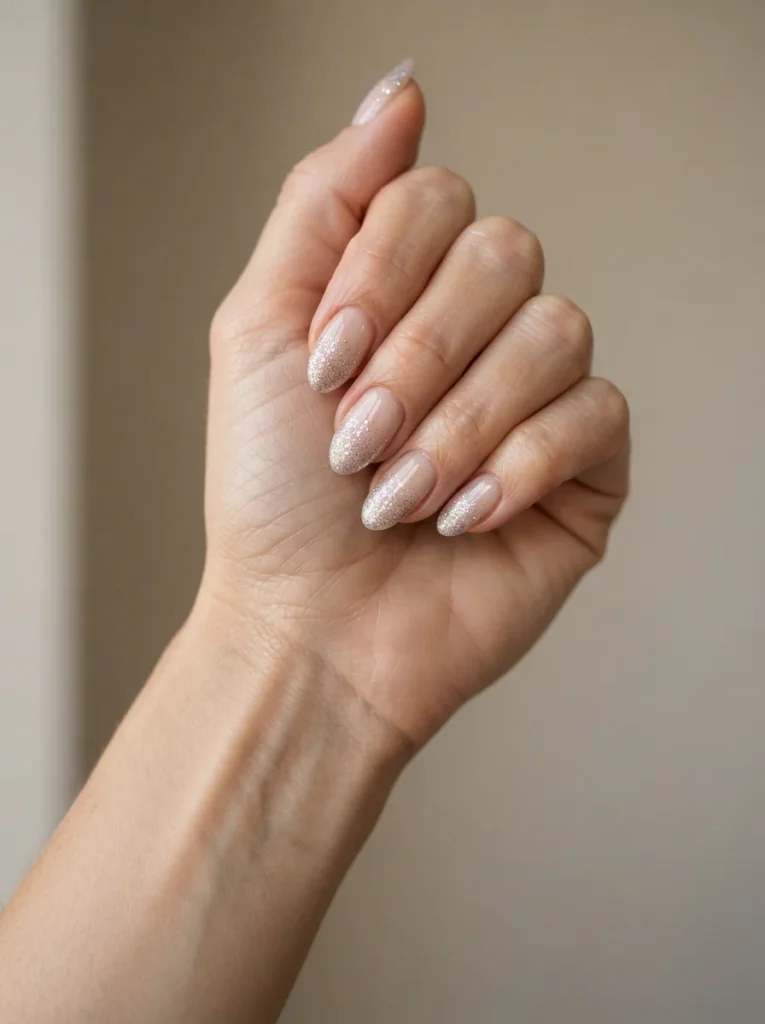
A glitter gradient has a softer fade than a glitter tip.
Apply your base color. Add glitter near the tip or cuticle. Use less polish as you move away from the main glitter area.
Several thin layers create a smoother fade than one thick coat. Let each layer dry before adding more.
If the glitter looks uneven, add a few pieces in empty areas with a toothpick. Cover the finished design with top coat to smooth the surface.
Difficulty: Easy
Best for: Short and long nails
Tools: Glitter polish
Quick variation: Fade glitter down from the cuticle instead of up from the tip.
Glitter Tip Nails
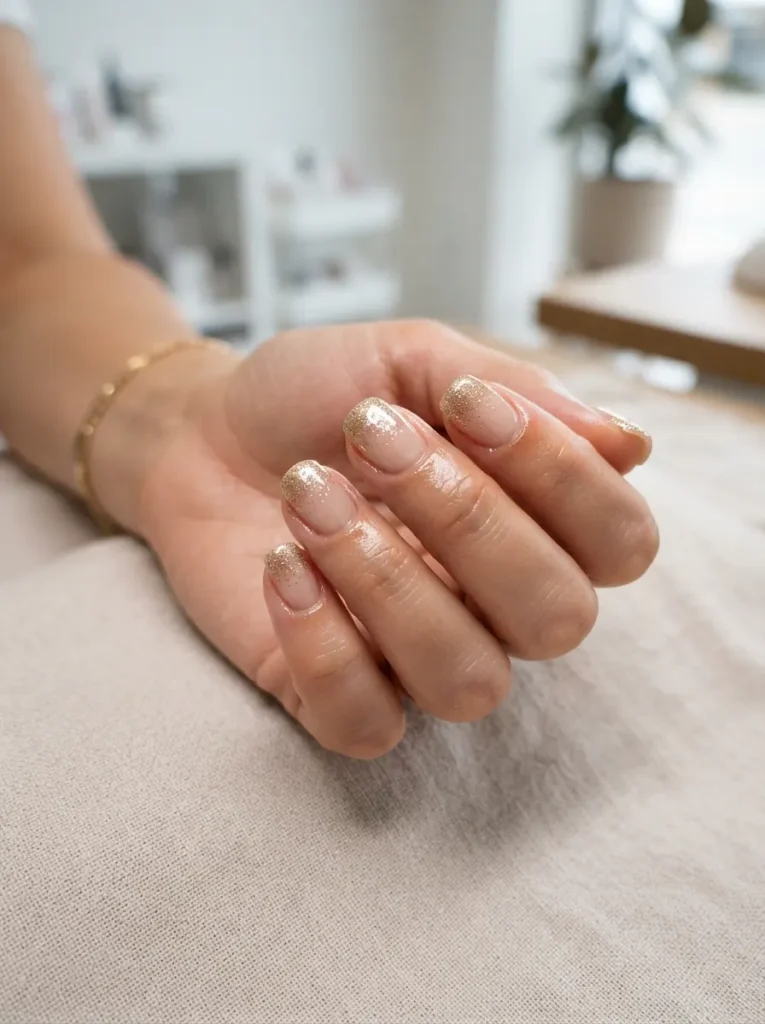
Glitter tips create a party-ready look without a perfect French line.
Apply clear, nude, or pale pink polish. Let it dry. Brush glitter polish across the tips. Keep the glitter thick near the edge and lighter as you move down the nail.
For more sparkle, press glitter onto the tip with a small makeup sponge. The sponge absorbs some clear polish and leaves more glitter behind.
Try nude with gold, pink with silver, or clear polish with rose gold glitter.
Difficulty: Very easy
Best for: Any nail length
Tools: Glitter polish and optional sponge
Quick variation: Add glitter to one accent nail only.
Half-Moon Nail Design
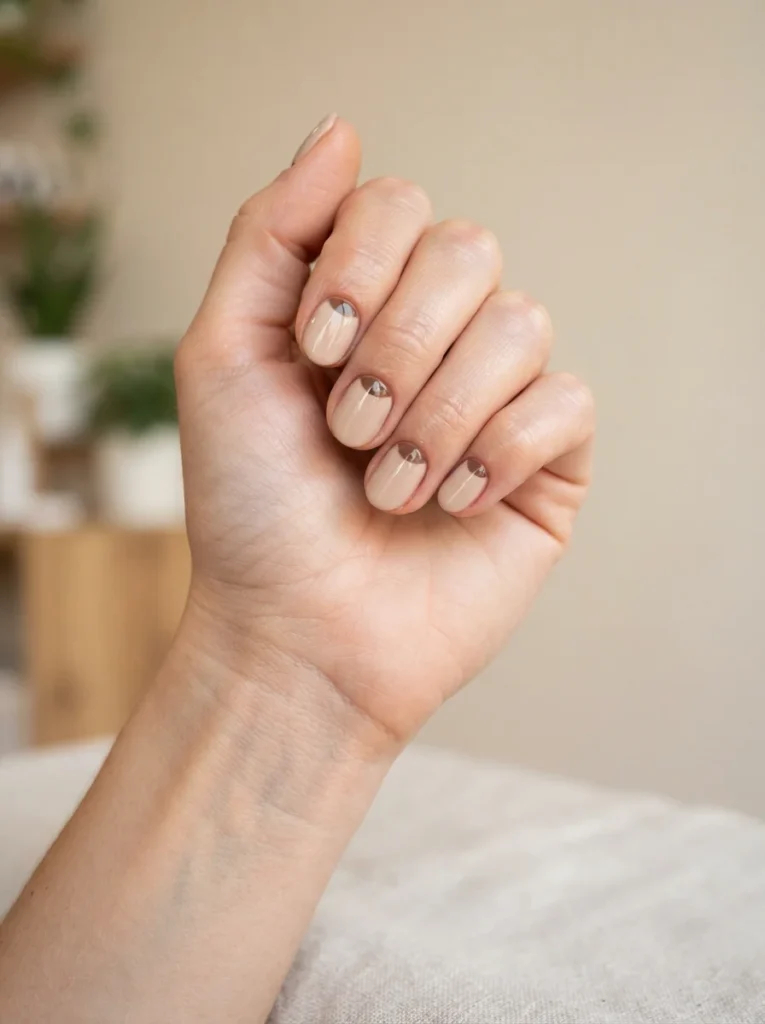
A half-moon design places a curved shape near the cuticle. It looks detailed, but a round sticker does most of the work.
Paint your nails with the first color. Let it dry fully. Place round reinforcement stickers near the base of each nail. Paint the exposed area with your second color.
Remove each sticker while the top color is still slightly wet. Pull slowly to avoid lifting the base coat.
Try nude with red, pink with gold, or beige with brown.
Difficulty: Easy
Best for: Short and medium nails
Tools: Reinforcement stickers
Quick variation: Leave the half-moon clear instead of adding a second color.
Leopard Print Accent Nails
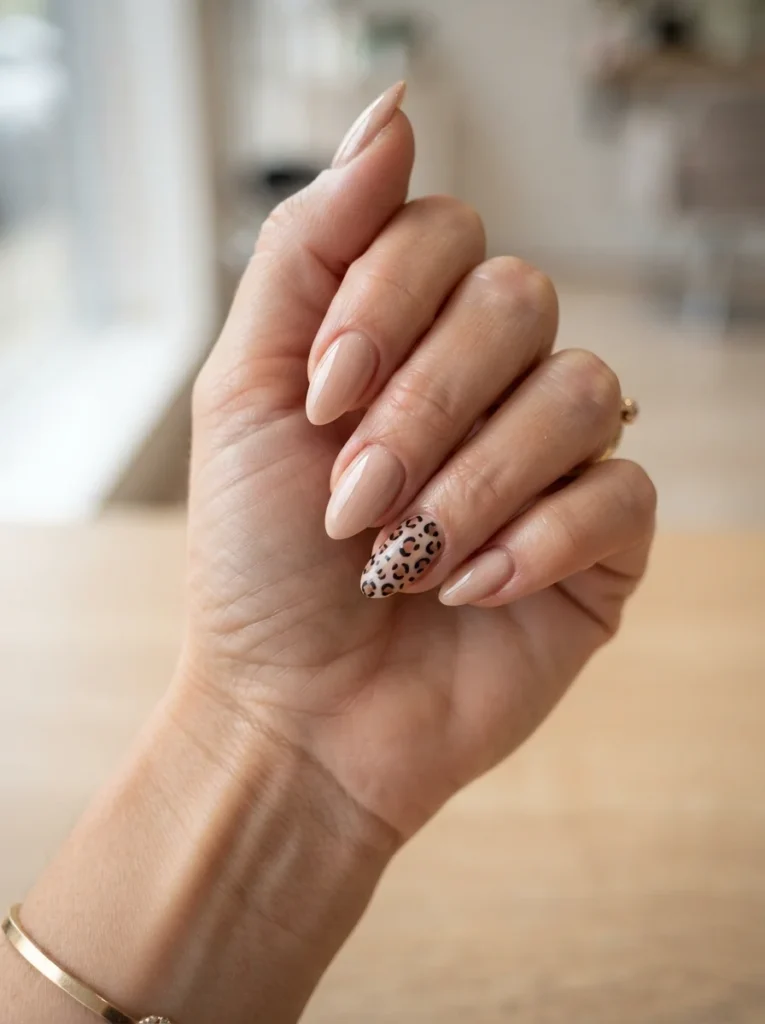
Leopard print takes more steps than cow print, so start with one accent nail.
Apply a nude or tan base. Add small brown spots in random areas. Use a thin brush or toothpick to paint black lines around parts of each spot.
Do not make a complete black circle. Leave gaps in the outline. Add a few small black marks between the larger spots.
Keep the other nails plain to make the pattern stand out without looking too busy.
Difficulty: Moderate
Best for: Medium and long nails
Tools: Toothpick or detail brush
Quick variation: Use pink spots over a pale pink base.
Minimalist Dot Nails
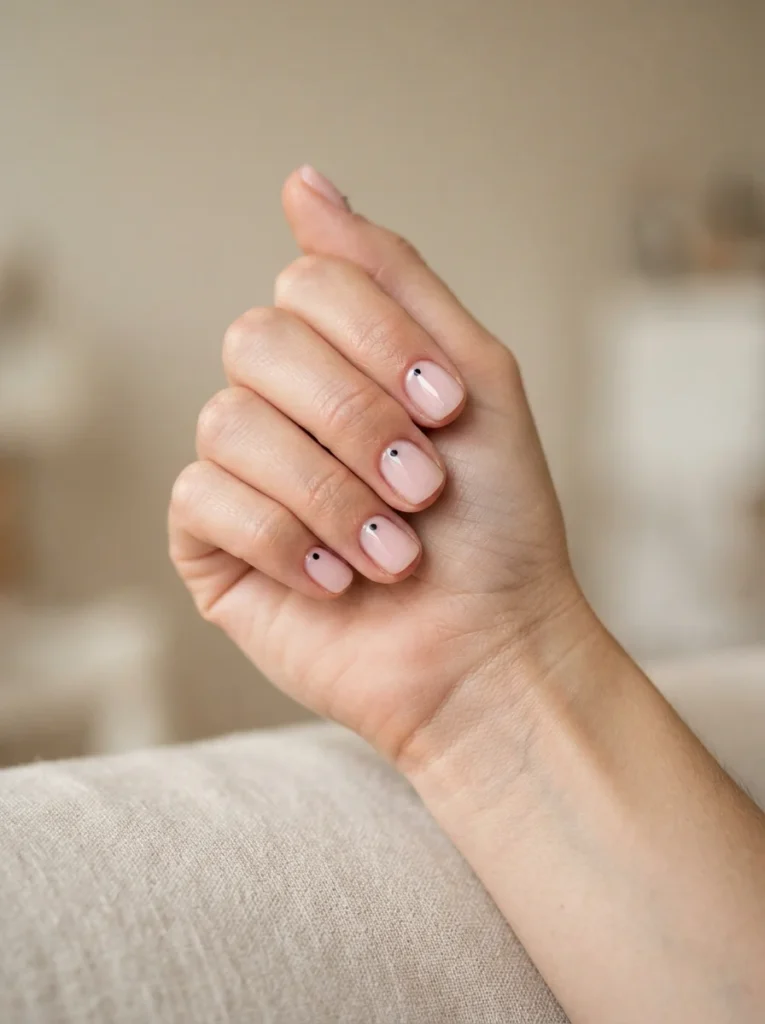
Minimalist dot nails give you a subtle design without covering the whole nail.
Apply a clear, nude, or pale pink base. Let it dry fully. Add one small dot near the cuticle of each nail. Keep the dots in the same general area, but do not worry if they are not perfectly matched.
Black dots look clean and modern. Gold or silver dots add a soft shine. White dots create a lighter look.
This style works well for work, school, and everyday wear.
Difficulty: Very easy
Best for: Short nails
Tools: Toothpick or small dotting tool
Quick variation: Place the dot near the tip instead of the cuticle.
Simple Striped Nails
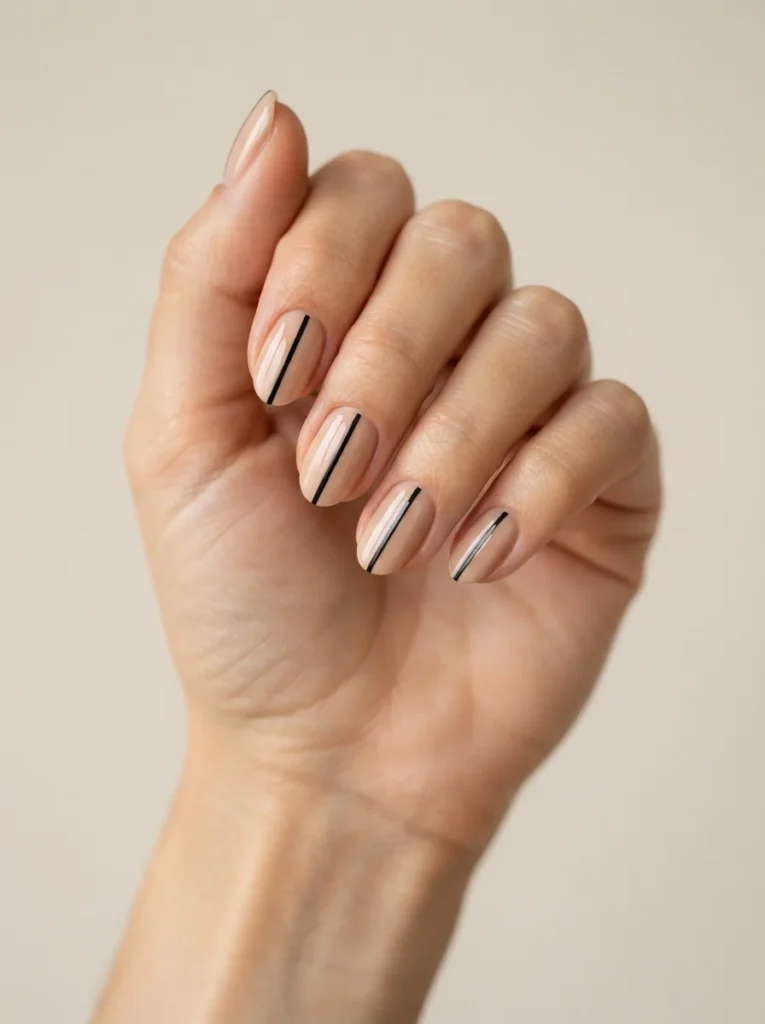
One clean stripe can look better than several uneven lines.
Apply your base color and let it dry. Use a thin nail brush to paint one vertical or horizontal stripe. You can also place striping tape across the nail for a sharper line.
Keep the design simple. One line in the center or along one side is enough.
Try black stripes over nude polish, white stripes over blue, or gold stripes over dark green.
Difficulty: Easy
Best for: Short and long nails
Tools: Thin brush or striping tape
Quick variation: Add stripes to only two accent nails.
Single Accent Nail Design
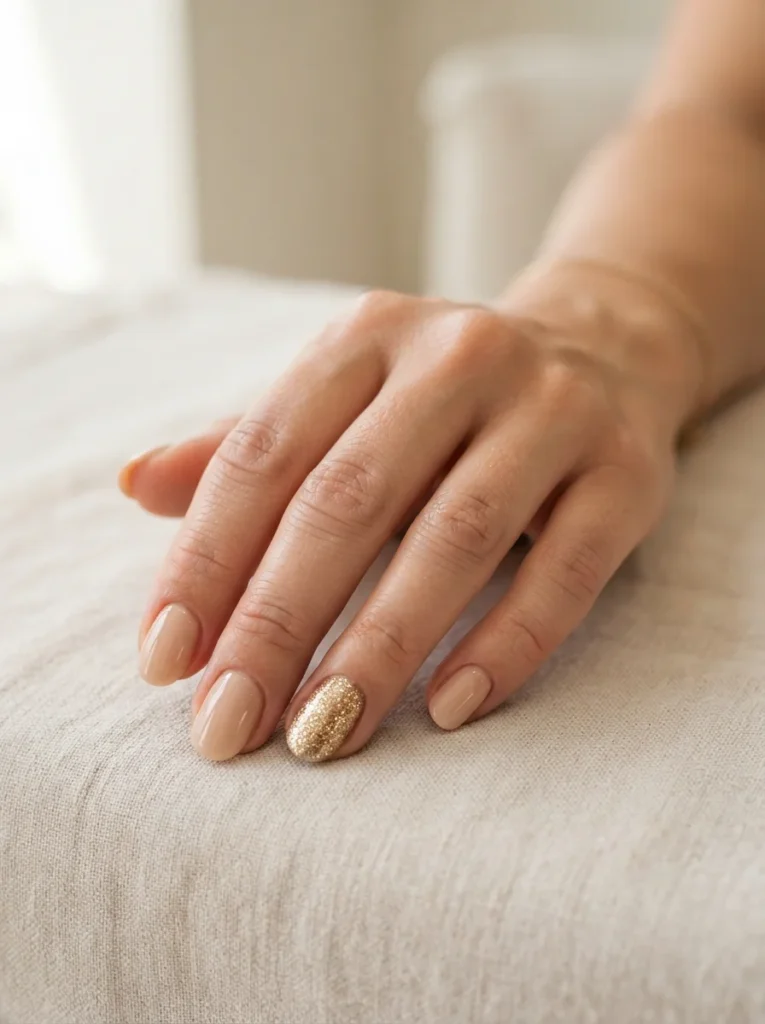
An accent nail is one of the fastest ways to make a plain manicure more interesting. It also requires no detailed painting.
Paint most of your nails with one color. Then choose one nail on each hand for a different shade. The ring finger is the most common choice, but you can use any nail.
Try nude polish with gold glitter, black with silver, pink with white, or navy with metallic gold. Apply top coat after every nail feels dry.
Difficulty: Very easy
Best for: Any nail length
Tools: Two polish colors and top coat
Quick variation: Use a nail sticker on the accent nail.
Sponge Ombré Nails
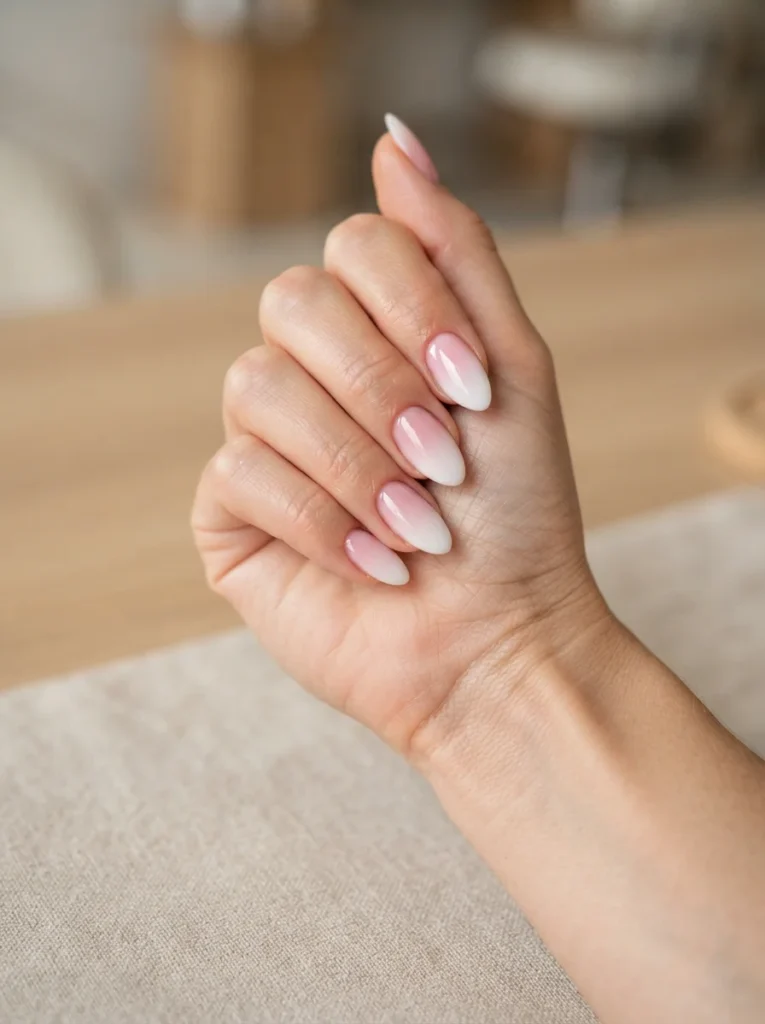
Ombré nails blend two colors together. A makeup sponge makes the fade easier.
Choose two shades that look good side by side. Paint both colors in lines on a small sponge. Press the sponge gently onto the nail. Lift it straight up instead of sliding it.
Repeat with thin layers until the colors look blended. Clean the skin around your nail with a brush and remover.
Pink and white create a soft look. Blue and lavender feel cool and calm. Peach and yellow work well for warmer seasons.
Do not load the sponge with too much polish. Thick polish may create a rough surface.
Difficulty: Moderate
Best for: Medium and long nails
Tools: Makeup sponge
Quick variation: Use glitter as the second ombré color.
Star Sticker Nails
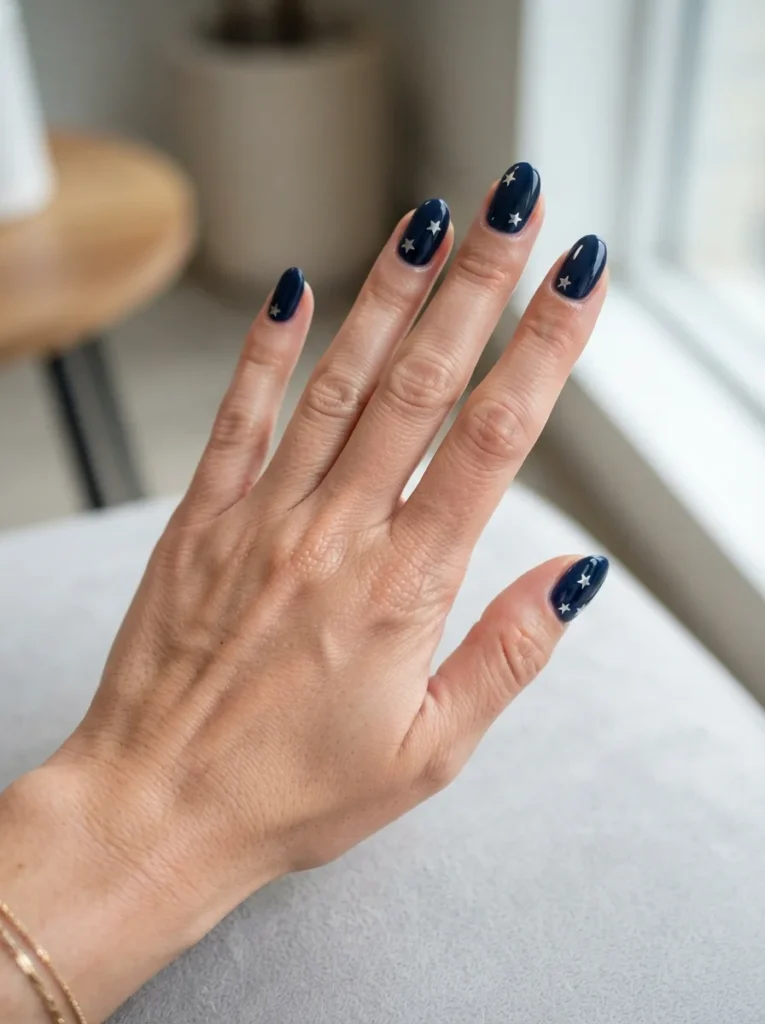
Nail stickers give you a detailed design without hand painting.
Apply a smooth base color and let it dry fully. Use tweezers to place one or two star stickers on each nail. Press down the edges so they do not lift.
Cover the stickers with a thin layer of top coat. Add another layer if the edges still feel raised.
Dark blue polish with silver stars creates a night-sky effect. Nude polish with gold stars feels softer.
Difficulty: Very easy
Best for: Any nail length
Tools: Nail stickers and tweezers
Quick variation: Mix stars with small dot stickers.
Tiny Flower Nail Art
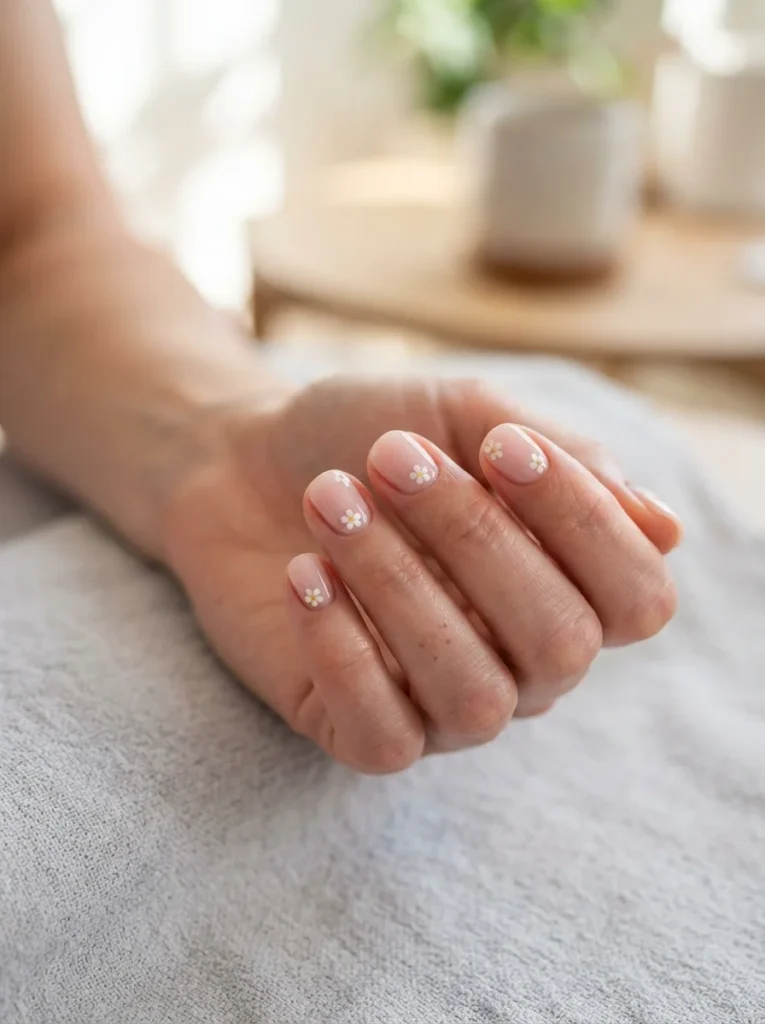
You can make a small flower with five dots and one center dot.
Apply your base color and let it dry. Create five small dots in a circle. Place a different color in the center. Use a bobby pin for larger petals or a toothpick for smaller ones.
Add one flower to each nail or decorate only your accent nails. White flowers look soft over pink. Yellow flowers stand out over blue. Pastel flowers work well over clear polish.
Wait until the petals dry before adding top coat.
Difficulty: Easy
Best for: Short and medium nails
Tools: Dotting tool, bobby pin, or toothpick
Quick variation: Add two small green dots as leaves.
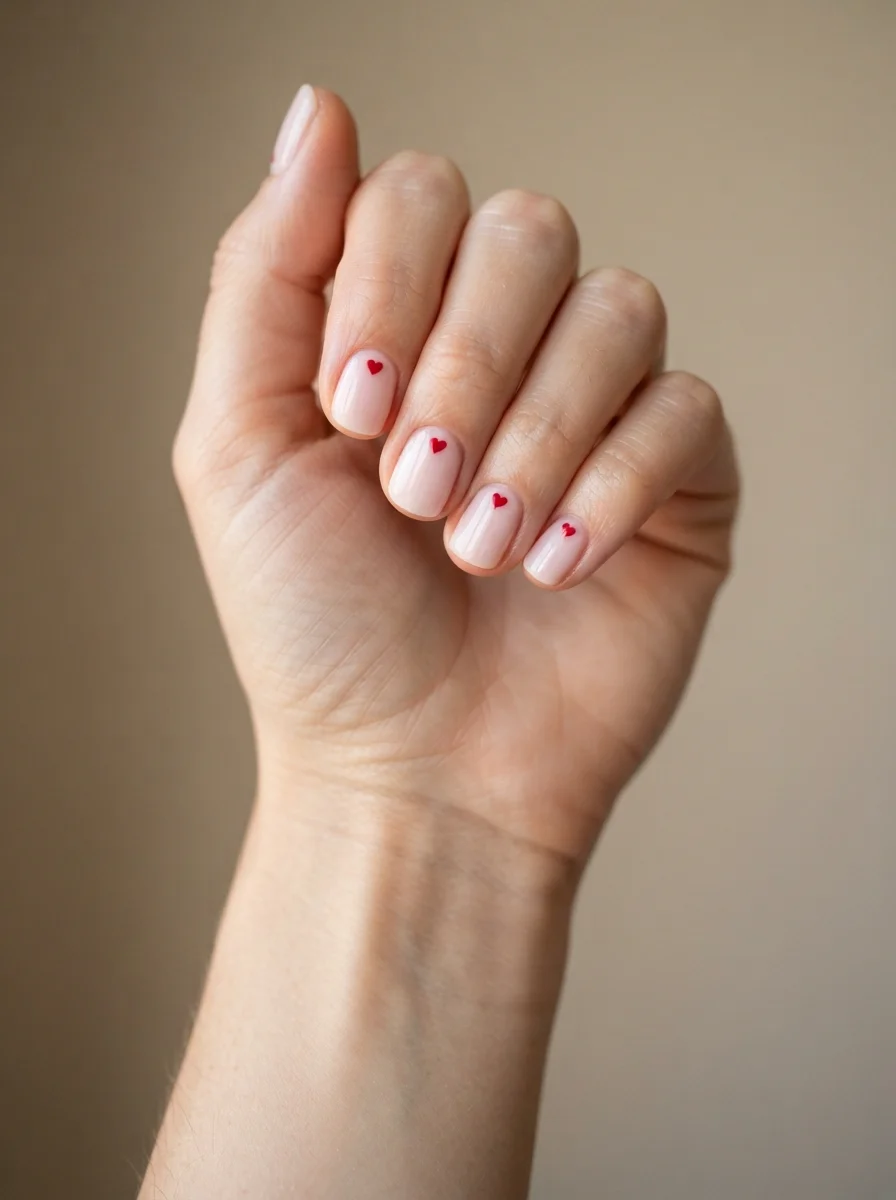
Tiny Heart Nails
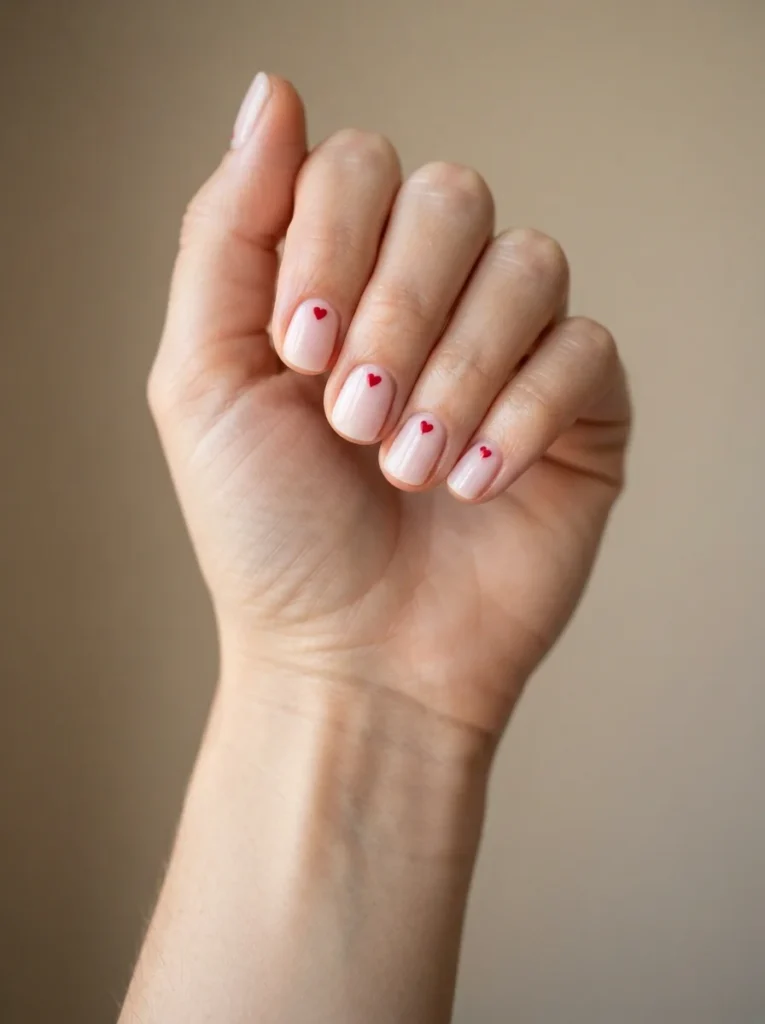
A tiny heart starts with two small dots.
Place the dots beside each other. While the polish is wet, drag both dots down into one point with a toothpick. This forms the bottom of the heart.
Practice the shape on foil or paper first. It will help you learn how much polish to use.
Add one heart near the cuticle, in the center, or close to the nail tip. Red hearts look classic, but pink, black, and white also work well.
Difficulty: Easy
Best for: Any nail length
Tools: Toothpick or small dotting tool
Quick variation: Add hearts to only the ring fingers.
Wavy Line Nails
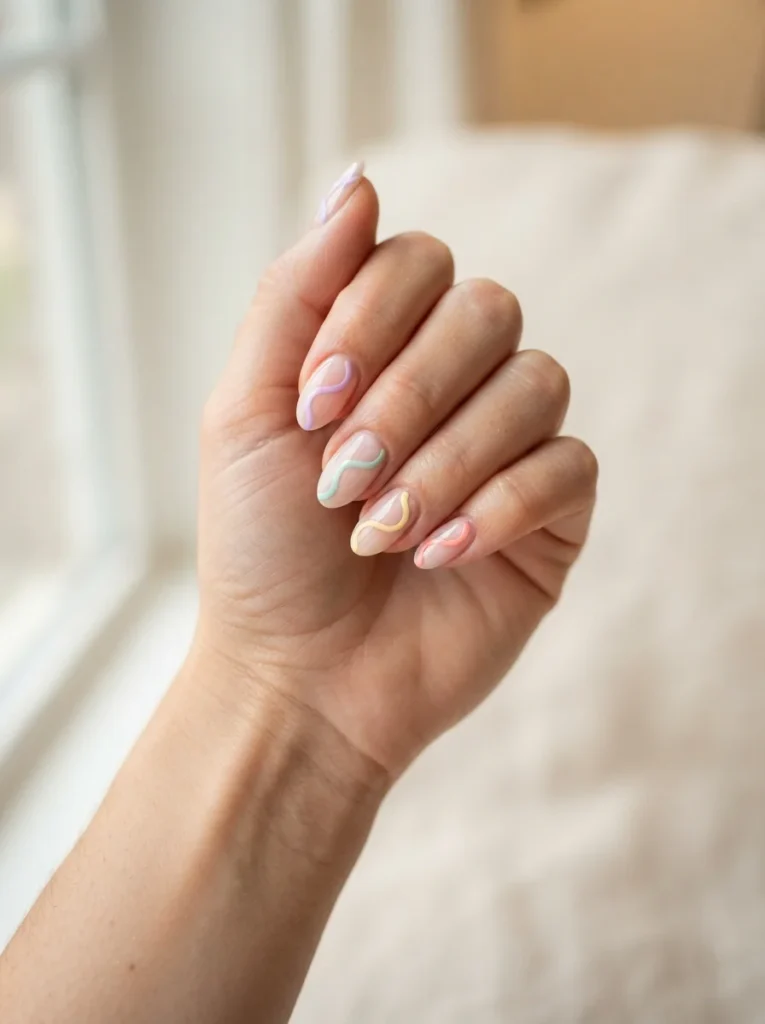
Wavy nails are useful for beginners because each line can look different.
Start with a nude, clear, or pastel base. Dip a thin brush into your accent color. Paint one loose wave from one side of the nail to the other.
Do not try to copy the same wave on every nail. Small changes make the set feel more natural.
Use one bold color for a simple finish. You may also add a second wave beside the first after it dries.
Difficulty: Easy
Best for: Medium and long nails
Tools: Thin brush or toothpick
Quick variation: Use two matching pastel colors.
How to Prepare Your Nails for a Cleaner Design
Even the easiest design can look rough if your nail surface is oily or uneven. Good preparation helps polish sit smoothly and last longer.
First, remove all old polish. Shape your nails with a file, moving in one direction instead of sawing back and forth. Gently push back your cuticles, but do not cut healthy skin around the nail.
Wash and dry your hands. Then wipe each nail with a small amount of nail polish remover. This removes oil, lotion, and dust from the surface.
Apply one thin layer of base coat. Let it dry before adding color. Use two thin coats of polish instead of one thick coat. Thick polish takes longer to dry and may wrinkle or smudge.
Wait until the base color feels dry rather than sticky before adding tape, dots, or detailed lines. Drying time can change based on the polish, room temperature, and thickness of each layer.
Avoid applying hand cream right before painting your nails. The oil may stop the polish from sticking well.
Once your base color feels smooth and dry, you are ready to add your design.
How to Choose the Right Easy Nail Design
With 20 options, the easiest way to choose is to look at your time, tools, nail length, and skill level.
Start with accent nails, stickers, polka dots, or confetti if this is your first time trying nail art. These designs are forgiving and easy to fix.
For short nails, try minimalist dots, half-moons, tiny flowers, or simple French tips. Small designs leave more open space and may help short nails look neat.
Glitter tips, glitter gradients, stars, and colorful French tips work well for parties. Neutral dots, thin stripes, and soft swirls are better for work or school.
| What You Need | Best Designs |
| No special tools | Accent nails, glitter tips, stickers |
| Very short nails | Dots, flowers, half-moons |
| Quick manicure | Accent nails, confetti, minimalist dots |
| Work-friendly style | French tips, stripes, neutral swirls |
| Party manicure | Glitter gradient, colorful tips, stars |
Choose one technique first. You can add extra details after you feel more comfortable.
5 Beginner Nail Art Mistakes and How to Fix Them
Small mistakes are normal when you are learning. You often do not need to remove the entire manicure.
1. Applying Thick Polish Layers
Thick polish takes longer to dry. It may wrinkle, bubble, or smudge.
Use thin layers and wait before adding another coat. Three thin coats may dry better than one heavy coat.
2. Adding Art Before the Base Dries
Tape, stickers, and tools can damage wet polish.
Wait until the base feels dry and smooth. Give it more time if it still feels soft or sticky.
3. Using Too Much Polish on the Tool
Too much polish creates large dots and thick lines.
Place polish on foil first. Dip only the tip of your tool into it. Wipe off extra polish before touching the nail.
4. Removing Tape Too Late
Dry polish may lift or crack when you remove the tape.
Pull the tape away while the new layer is still slightly wet. Move slowly and pull in one direction.
5. Dragging the Design With Top Coat
A top-coat brush may smear wet dots or lines.
Wait until the design dries. Then place a larger drop of top coat on the nail. Move the brush gently without pressing hard against the artwork.
| Problem | Likely Cause | Quick Fix |
| Smudged line | Base was still wet | Wait longer and repaint |
| Thick dots | Too much polish | Wipe off the tool |
| Rough surface | Layers were too thick | Use thinner coats |
| Uneven edge | Polish reached the skin | Clean with remover |
| Dragged design | Heavy top-coat pressure | Float the brush gently |
Before starting again, try hiding a mistake with a dot, stripe, sticker, or small glitter accent.
How to Make Your Nail Design Last Longer
A lasting manicure starts before you apply the first color.
Clean oil and lotion from your nails with polish remover. Apply a base coat and use thin color layers. Let each layer dry before adding the next one.
Run a small amount of color and top coat across the front edge of each nail. This is called sealing the free edge. It may help reduce early chipping.
Apply top coat after your design dries. Move the brush gently so you do not drag the artwork.
Wear gloves while washing dishes or using cleaning products. Water and strong cleaners may weaken your manicure. Avoid using your nails to open packages, scrape labels, or lift hard objects.
Do not peel off chipped polish. Peeling may remove thin layers from the natural nail. Use remover instead.
You can add another thin top-coat layer when the manicure starts to lose its shine.
Choose One Easy Nail Design and Try It Today
Simple nail art can look polished without advanced tools or professional training. You can start with dots, accent nails, glitter tips, flowers, stickers, or loose swirls.
Begin with one simple design. Give each polish layer enough time to dry. Do not worry if every nail looks slightly different. Small differences often make handmade nail art feel more natural.
Save these easy nail designs, choose your favorite, and try it during your next at-home manicure.
1 thought on “20 Easy Nail Designs Anyone Can Do at Home”