looks too detailed, too scary, or hard to wear after the party ends.
You may also wonder whether a design will suit your nail length. A full haunted scene might look great on long acrylic nails but feel crowded on short natural nails. Some styles also need professional tools, while others take only a toothpick and two polish colors.
How to Choose a Halloween Nail Design You Will Love
The best Halloween nail designs fit your nail length, daily routine, and personal style. A design may look great online but still feel wrong if it does not suit your normal look.
Start with your nail length. Short nails work well with tiny ghosts, bats, dots, pumpkins, and simple French tips. These details stay clear without making the nail look crowded.
Almond nails suit flowing designs such as spiderwebs, flames, moons, and vampire details. The curved shape makes these patterns feel smooth and balanced.
Long coffin or stiletto nails give you more space. You can add skeleton hands, connected haunted scenes, blood drips, and detailed horror art.
Next, choose the mood you want. Cute Halloween nails use soft bases, smiling ghosts, tiny pumpkins, and simple bats. Gothic styles often use black, burgundy, silver, lace, crosses, and matte polish.
Think about where you will wear the manicure too. A nude base with one black accent may work well at the office. Neon slime or horror art may suit a costume party better.
You should also be honest about your skill level. Detailed haunted houses may need a salon visit. Small ghosts, stitches, and blood drips are much easier to create at home.
When a design feels too busy, use it on one accent nail. This keeps the Halloween theme while making the manicure easier to wear.
Vampire Fang French Tips
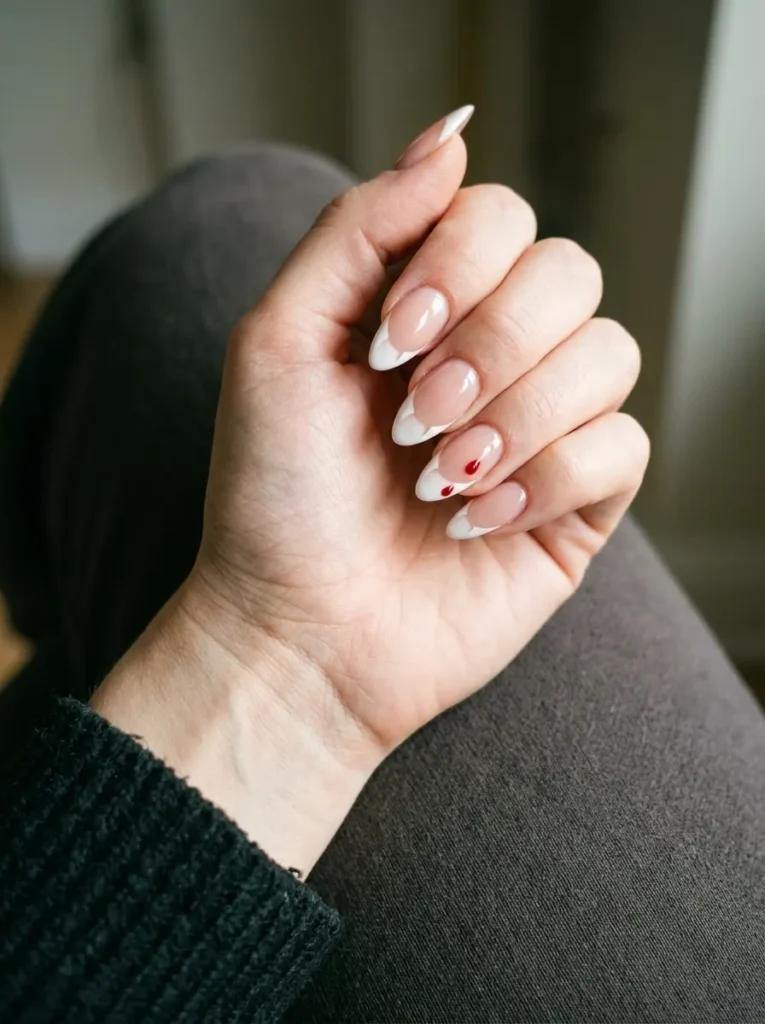
Vampire fang tips turn a simple French manicure into a sharp Halloween look.
Use a nude, black, or deep red base. Paint the tips white, then shape the lower edge into two soft points that look like fangs.
Add one or two tiny red drops below the white tips. Keep the rest of the nail plain so the fang shape stays clear.
Rounded points create a cute vampire style. Sharp tips feel darker and more dramatic.
This design works best on almond and stiletto nails because the nail shape supports the fang effect. Press-on nails can help you get the pointed shape without growing your natural nails.
Tiny Pumpkin Nail Art
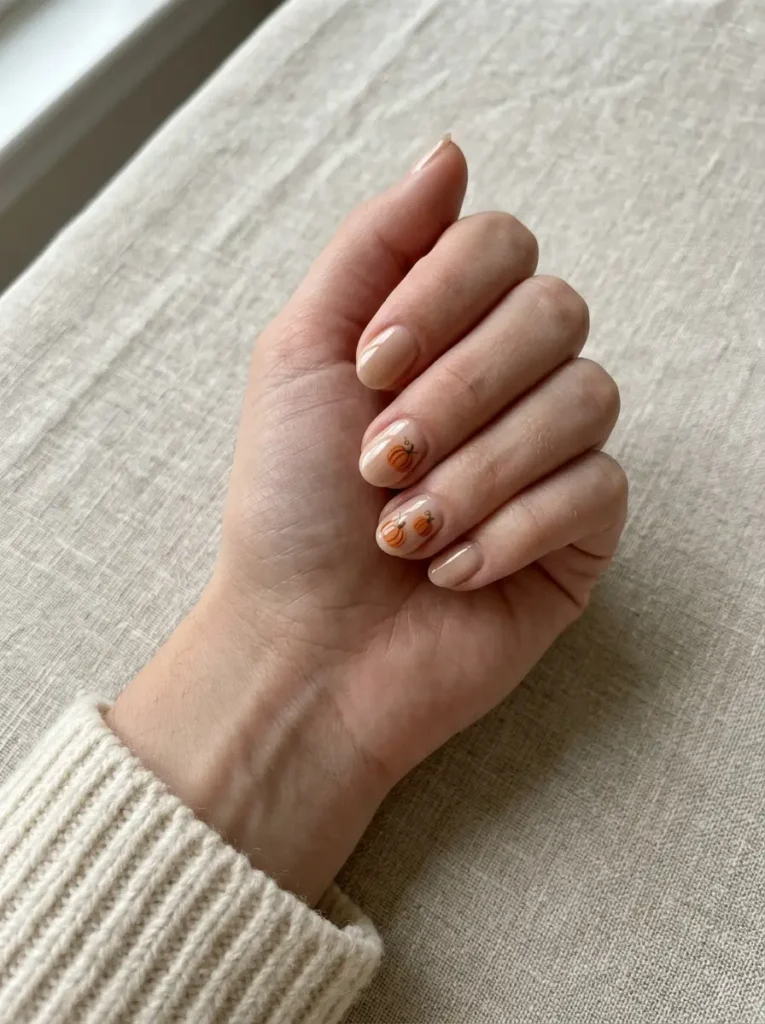
Tiny pumpkin nail art gives you a cute Halloween look without making your manicure feel childish.
Use a cream, pale beige, nude, or soft pink base. Paint small orange pumpkins on one or two accent nails. Add short brown or green stems to finish each shape.
Try using different pumpkin sizes instead of repeating the same design. One nail can have a single pumpkin, while another can have two smaller ones.
You can pair the pumpkin details with thin orange French tips. This ties the full manicure together without adding too much art.
This style works well on short and medium nails. It is a good choice for anyone who prefers autumn colors over scary details.
Spiderweb French Tips
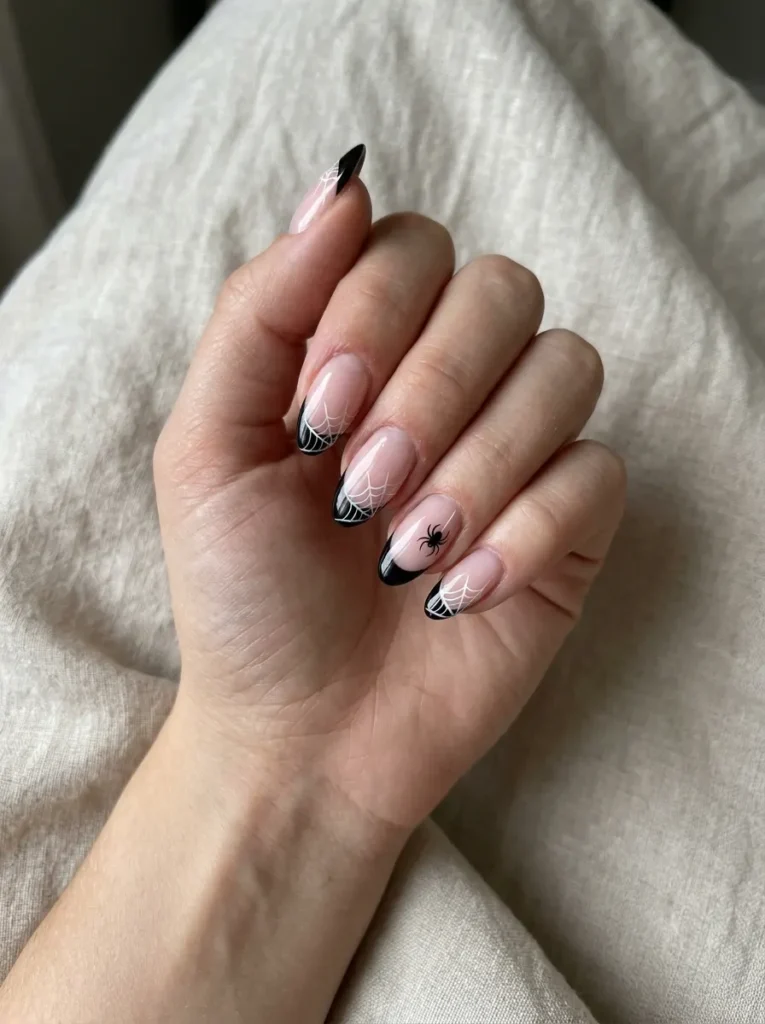
Spiderweb French tips mix a classic manicure with a clear Halloween detail.
Replace white French tips with black ones. Then draw fine white, silver, or grey web lines across one corner of each tip. A thin nail brush will help you create cleaner lines.
You do not need to cover the full tip with a web. A small corner design keeps the manicure neat and stops the pattern from looking crowded.
Add one tiny spider to an accent nail for extra detail. Keep the base nude, pale pink, or clear so the black tips stand out.
Spiderweb nails suit almond and square shapes. Nail stamping plates can also help if drawing even lines by hand feels hard.
Purple Witchy Celestial Nails
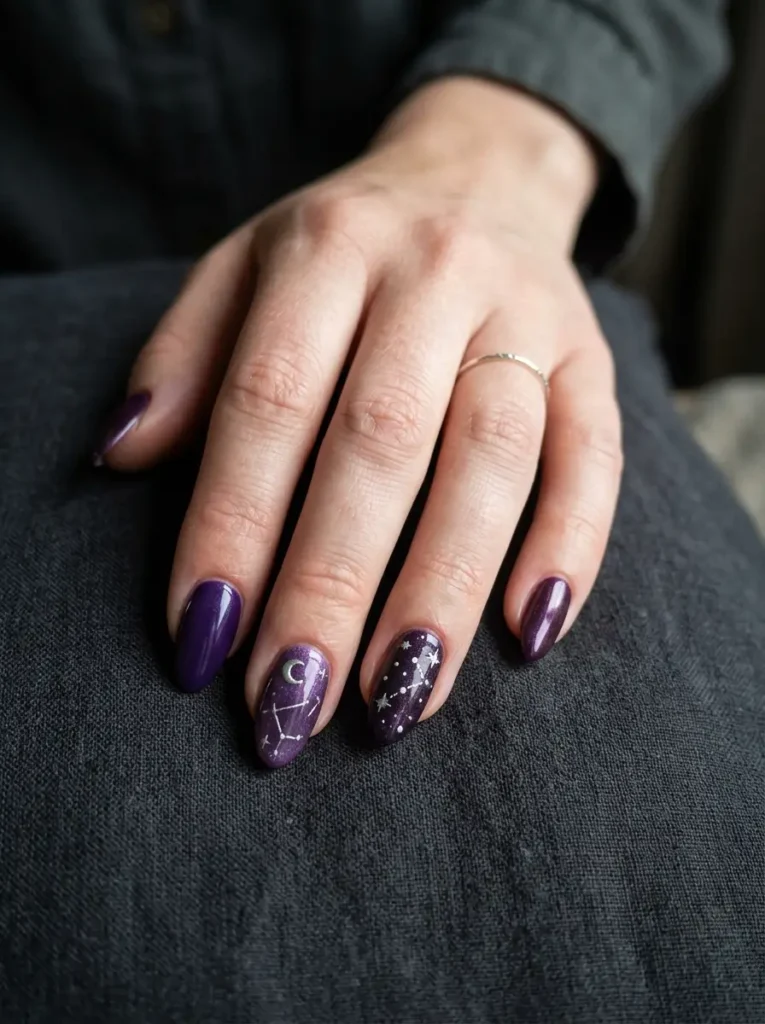
Purple celestial nails give you a witchy look without using common orange and black polish.
Choose plum, lavender, deep purple, or a mix of all three. Add small moons, stars, crystals, and constellation lines in gold or silver.
A shimmer polish creates a soft night-sky effect. Magnetic cat-eye polish can add a glowing line that moves as the light changes.
Keep some nails solid so the detailed art has room to stand out. You can place one crescent moon on each hand and use tiny stars on the other nails.
These witchy nail ideas look best on almond nails because the curved shape suits the flowing details.
Neon Slime Nails
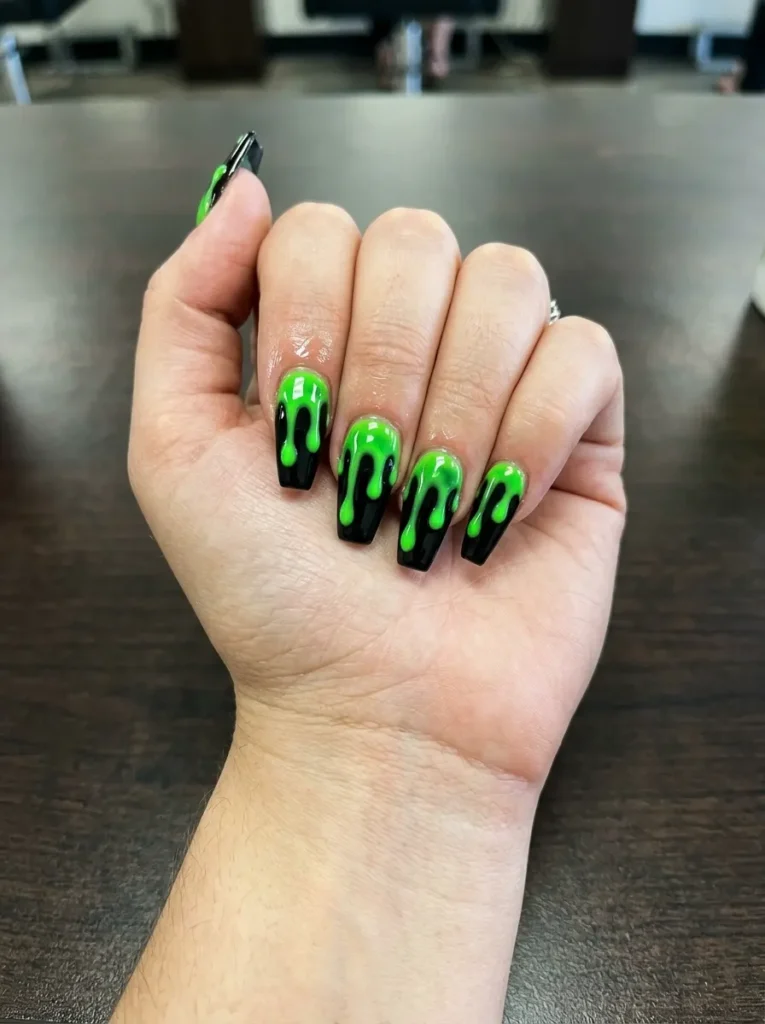
Neon slime nails are bold, bright, and perfect for Halloween parties.
Use black or deep purple as the base. Add neon green polish along the nail tips, then pull a few rounded drips down the nail.
A glossy top coat makes the slime look wet. You can also use glow-in-the-dark polish on one accent nail for a stronger party effect.
Keep the drips thick enough to show against the dark background. Very thin lines may disappear from a distance.
This design suits square, coffin, and almond nails. It also works well with monster, alien, and science-lab costumes.
Mummy Wrap Nails
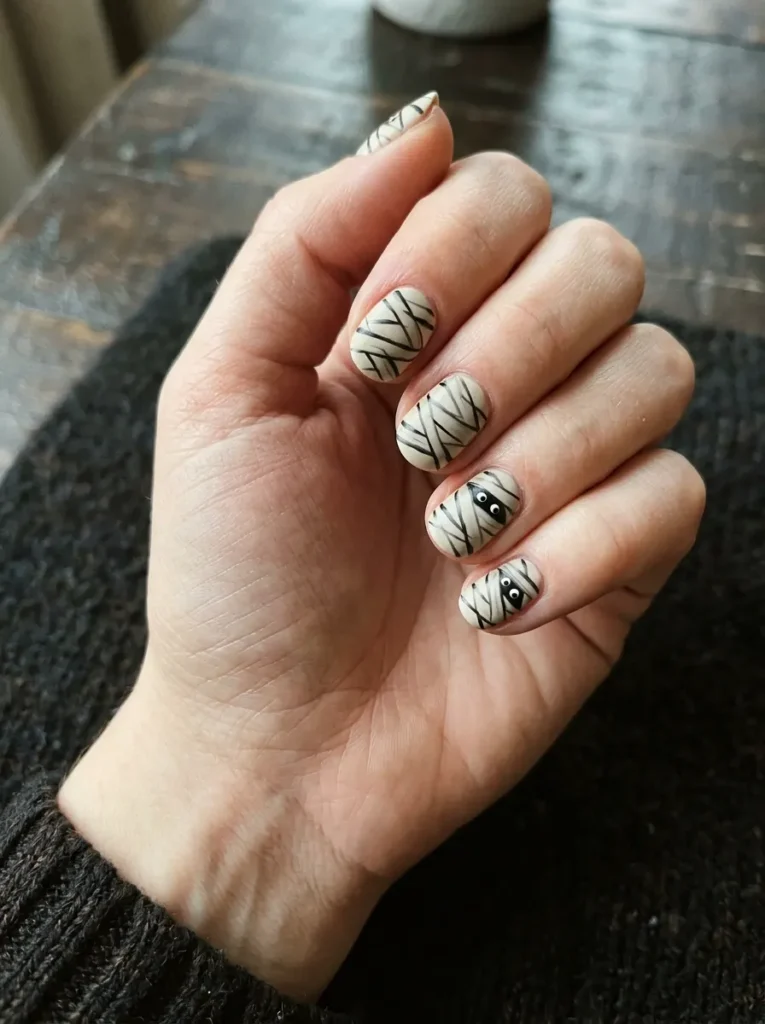
Mummy nails are easy to create because the lines do not need to look perfect.
Start with a white, grey, or pale beige base. Paint thin black or dark grey lines across the nail to copy uneven bandages.
Leave a small open space between two lines. Add two dots inside that space to create eyes peeking through the wraps.
Use a matte top coat for a soft fabric-like finish. A glossy coat will work too, but it creates a cleaner and less dusty look.
This beginner Halloween nail design works on short, square, and round nails. A thin brush or toothpick is enough for the small details.
Minimal Ghost Accent Nails
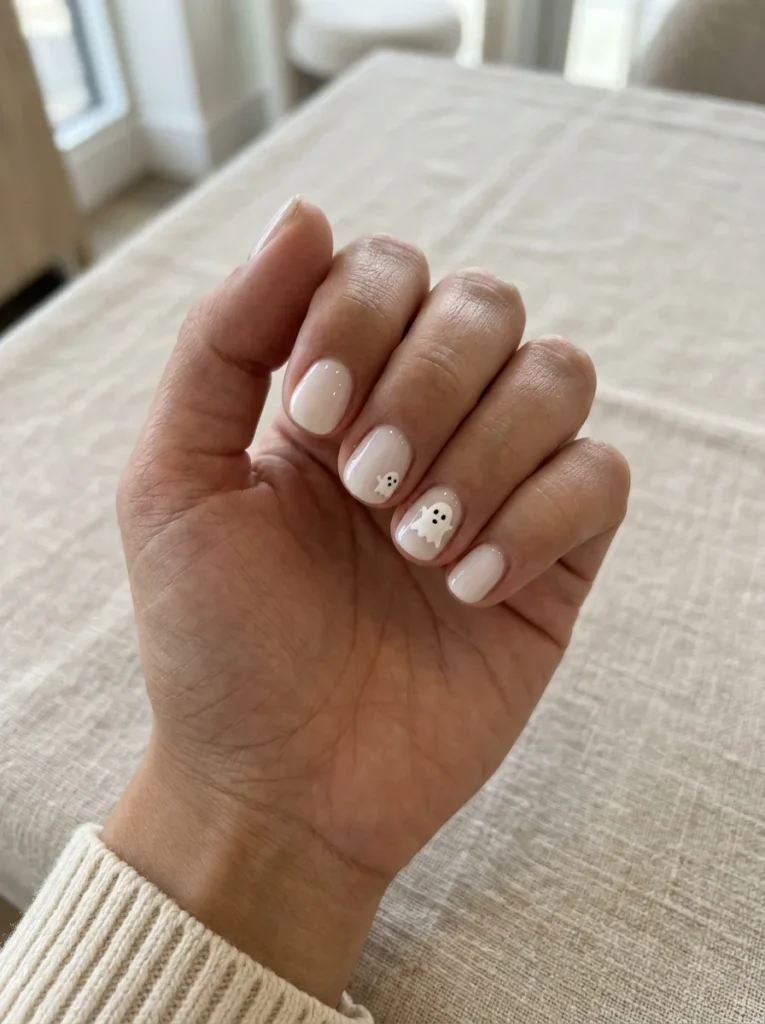
Minimal ghost nails are a great choice when you want a Halloween theme without covering every nail in detailed art.
Start with a nude, pale pink, or milky white base. Add one or two small white ghost shapes on each hand. Use a dotting tool or toothpick to create tiny black eyes and mouths.
Do not worry about making every ghost the same size. Slightly uneven shapes give the design a fun, hand-painted look.
Leave the other nails plain or add a few small stars. This keeps the manicure soft and clean.
These simple Halloween nails work best on short, round, or natural nails. You can also use ghost stickers when painting small details feels difficult.
Matte Black Gothic Nails
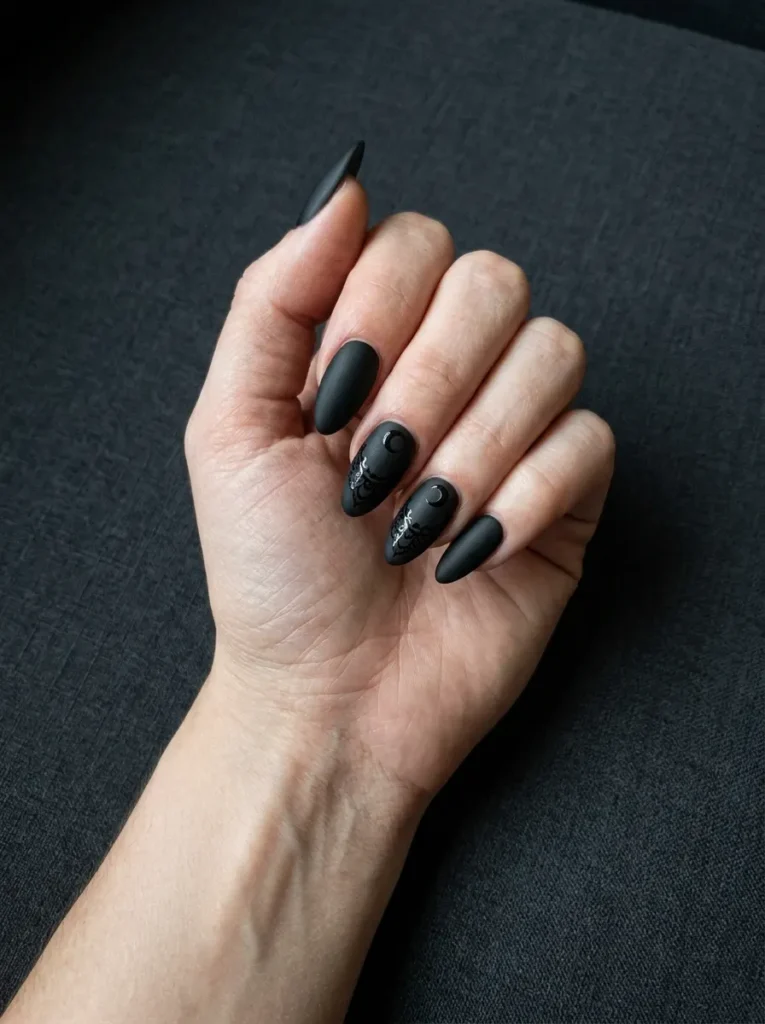
Matte black nails are a strong choice when you want a dark manicure without bright Halloween colors.
Paint each nail black and finish with a matte top coat. Add glossy black moons, crosses, lace lines, roses, or French tips over the matte base.
The difference between matte and glossy polish creates visible detail without changing the color. This keeps the look dark but stops it from feeling plain.
Add one silver charm, small crystal, or metallic line if you want a little contrast. Do not cover every nail with gems, since the finish should remain the main focus.
Gothic Halloween nails work best on almond, coffin, and stiletto shapes.
Horror Movie Mix-and-Match Nails
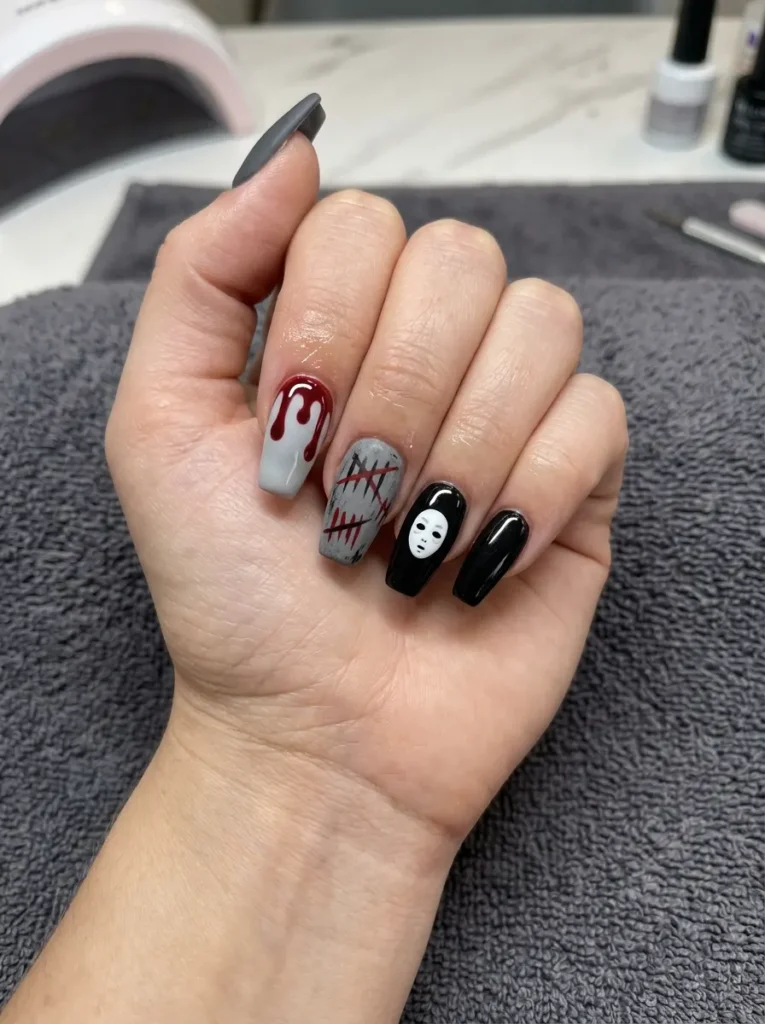
Mix-and-match nails let you place a different horror-inspired detail on every finger.
You can use masks, eyes, knives, blood splashes, warning marks, or dark lettering. Choose one shared color palette so the manicure still looks connected.
Black, white, grey, and red work well together. You can also add one silver detail to create contrast.
Do not fill every nail with small images. Leave one or two nails solid to give the detailed art more space.
This style works best on medium and long nails. Use general horror details unless you have permission to copy protected characters or branded artwork.
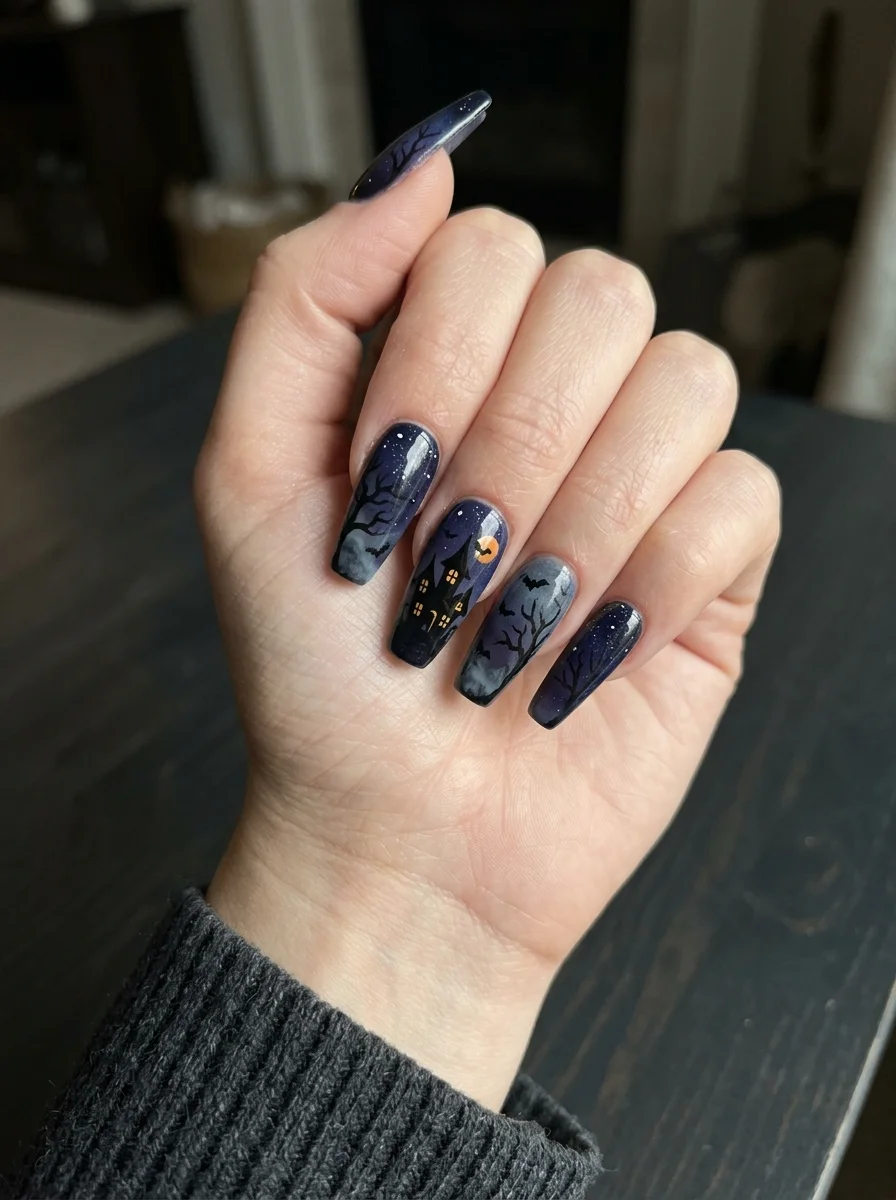
Haunted House Scene Nails
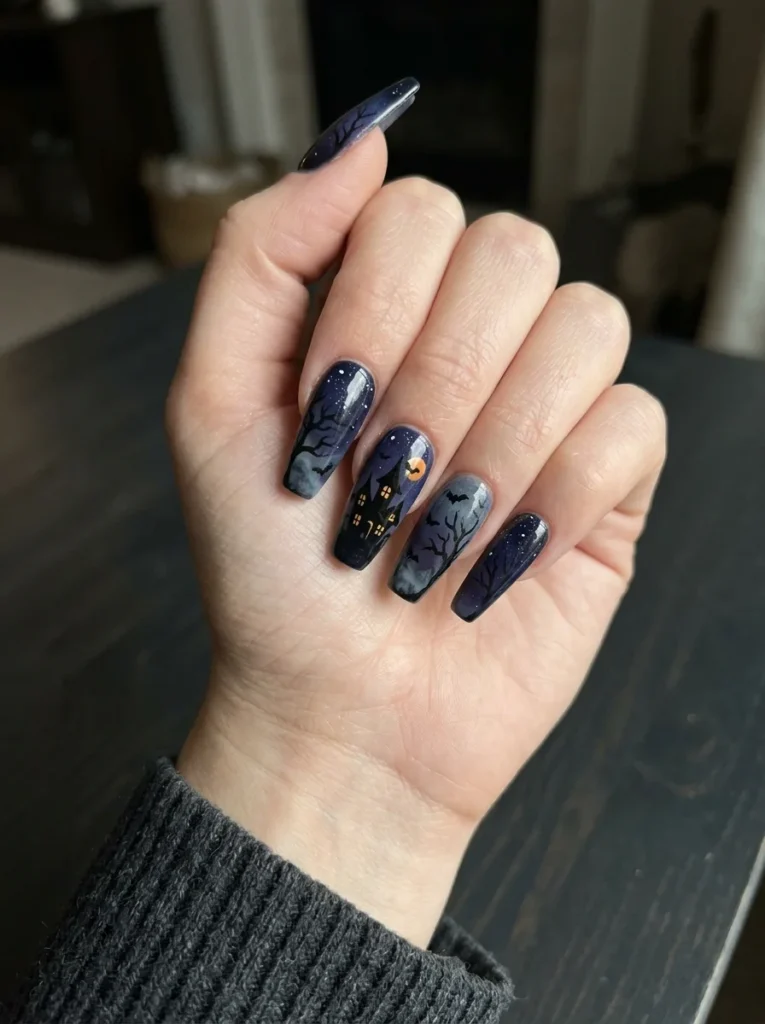
Haunted house nails create a full Halloween scene across your hand.
Use purple, navy, orange, and black to build a dark background. Add a moon, bare trees, bats, fog, and a shadowy house.
You can paint one part of the scene on each nail. The full picture appears when your fingers are placed together.
This design needs more space, so it works best on long acrylic or coffin nails. Short nails can carry one haunted house silhouette on an accent nail.
Fine details can be hard to paint by hand. Nail stamps, water decals, or a professional nail artist may give you a cleaner result.
Glow-in-the-Dark Skeleton Nails
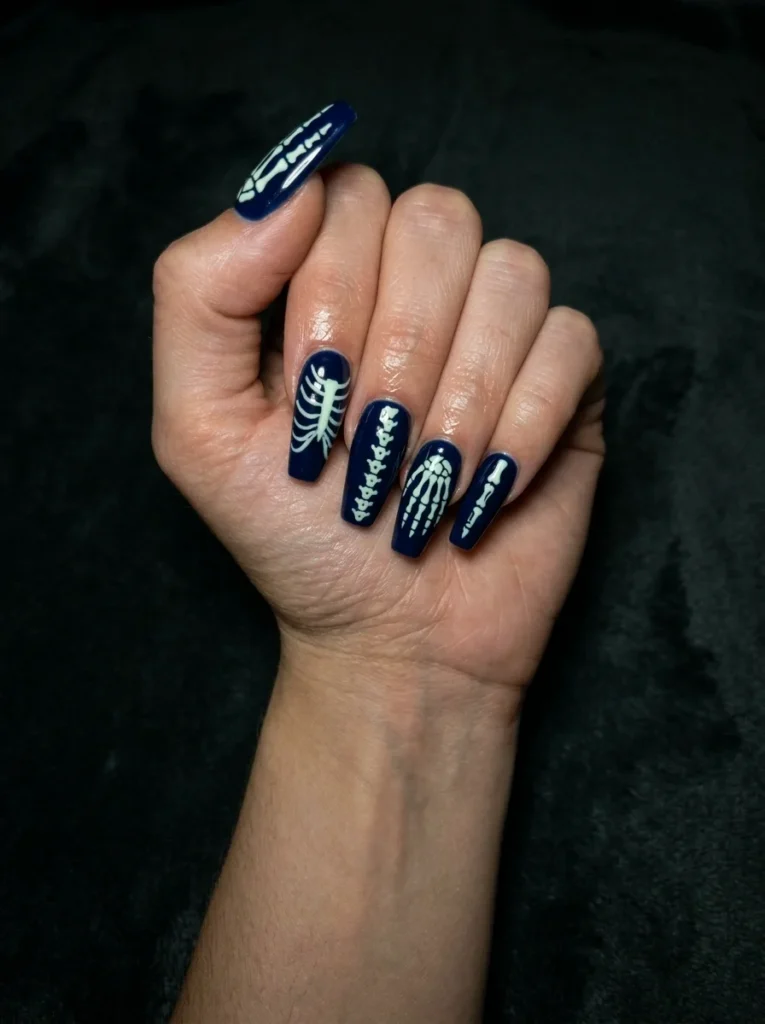
Glow-in-the-dark skeleton nails look simple in daylight and much more dramatic at night.
Use a black or deep navy base. Paint white bones, ribs, or skeleton hands over the dark polish. A glow polish can be added over the white details.
For a connected design, paint one part of a skeleton hand on each nail. The full image appears when you hold your fingers together.
Detailed bones may be hard to paint with a normal polish brush. Use a fine detail brush, nail decals, or salon art for sharper lines.
This design suits long square, coffin, and almond nails. Short nails can still carry one small bone or skull accent.
Frankenstein Stitch Nails
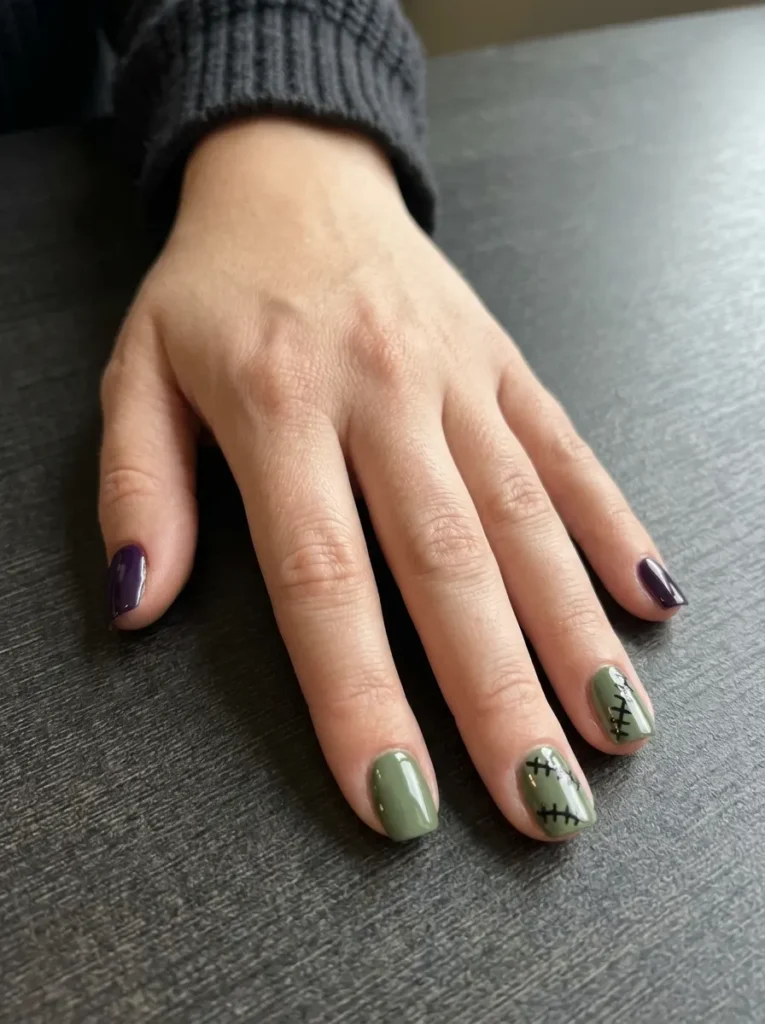
Frankenstein stitch nails use simple lines and classic Halloween colors.
Paint the nails green, purple, or black. Add short black lines across one or two nails to copy stitched skin.
You can create one Frankenstein face as an accent. Use black polish for the hair and mouth, then add small white and black eyes.
Keep some nails solid to balance the detailed art. Purple glitter or a black matte finish can add more texture without changing the theme.
This design looks best on short round or square nails. It is also simple enough for beginners to try with a toothpick.
Eyeball Nail Art
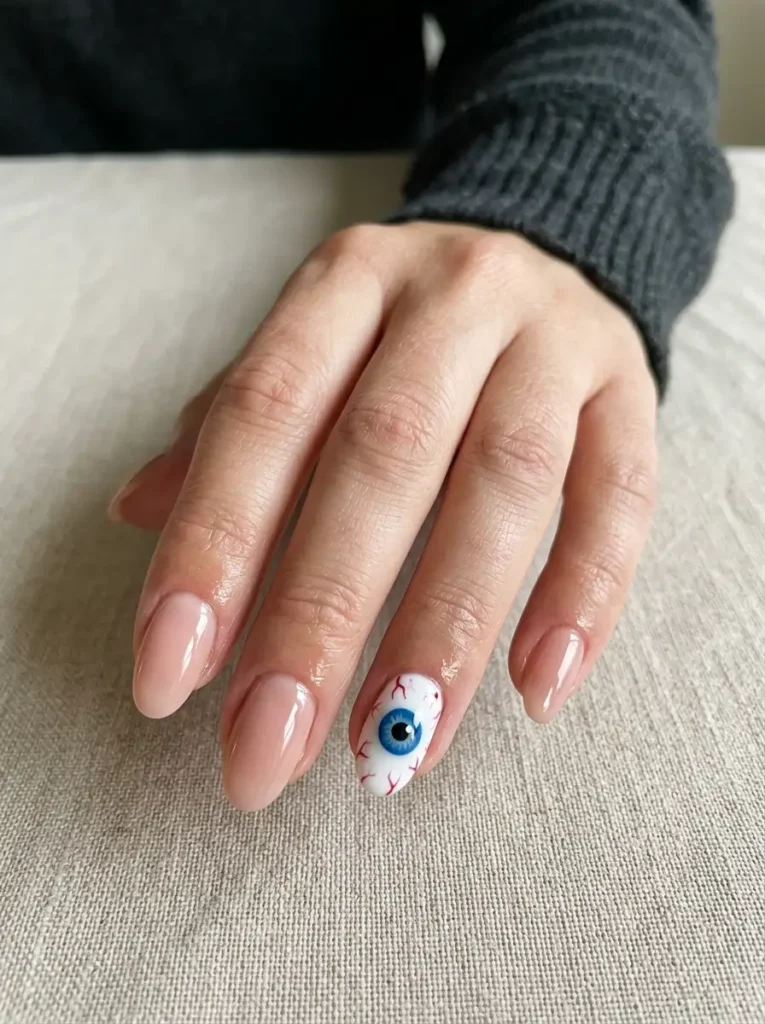
Eyeball nails can look cute, creepy, or mystical depending on the colors you choose.
Paint one eye on an accent nail and leave the rest simple. A white eye with red veins creates a horror look. A blue, green, or brown eye feels more realistic.
For a softer style, use an evil-eye design with dark blue, white, and metallic gold. Place it over a nude base to keep the detail clear.
Painting an eye on every nail can look busy. One or two accent nails are often enough.
This design works on all nail lengths. Decals can help you create even circles and sharp iris details.
Elegant Black Lace Halloween Nails
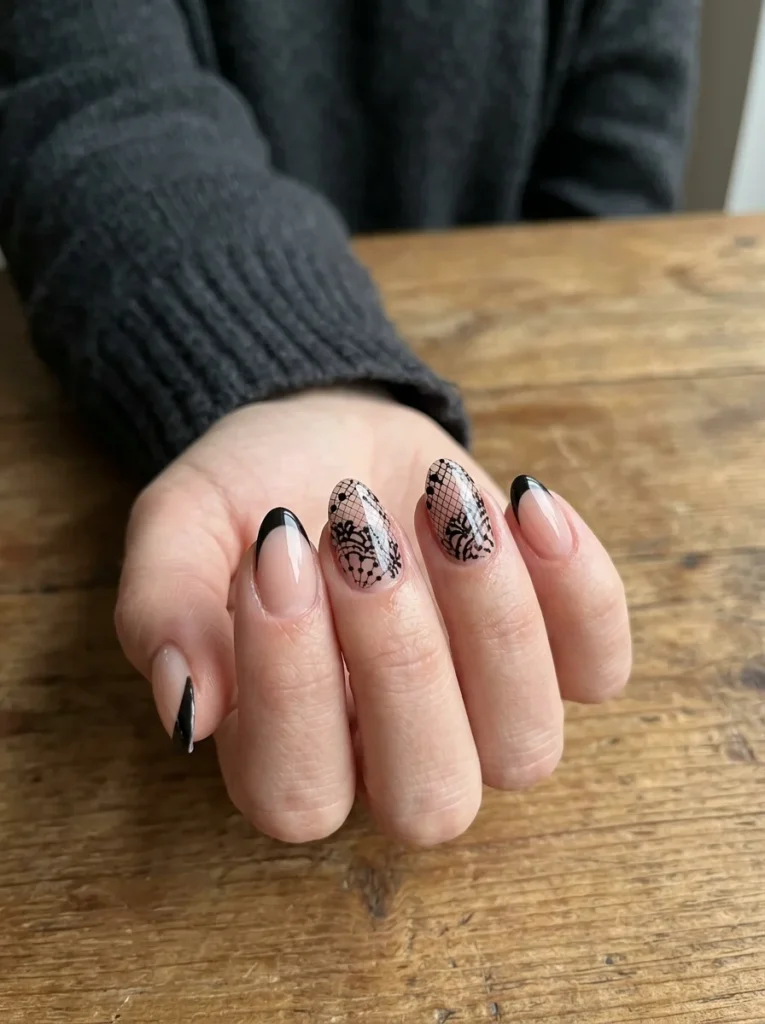
Black lace nails are ideal when you want a formal Halloween manicure.
Use nude, burgundy, pale pink, or black as the base. Add thin black lace lines, flowers, or curved patterns over one or two nails.
Pair the lace with black French tips to keep the full manicure connected. Small crystals or metallic lines can add a little shine.
Leave some of the base visible between the lace details. This open space stops the dark art from looking too heavy.
Elegant Halloween nails suit almond, square, and coffin shapes. They work well for dinners, weddings, or formal costume events.
Cute Bat Accent Nails
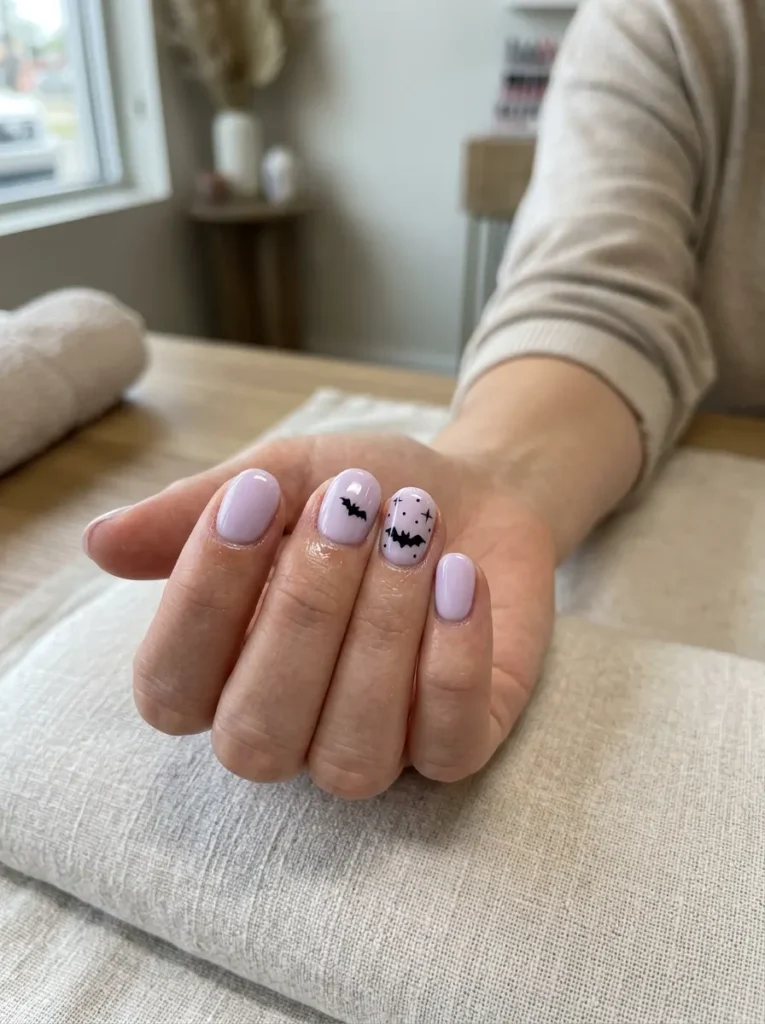
Bat accent nails give you a clear Halloween theme without looking too dark.
Start with a pale pink, nude, orange, or lavender base. Paint small black bat shapes on one or two nails.
Keep the bats simple. A curved body with two pointed wings is enough to make the shape easy to recognize.
Add tiny stars or crescent moons around the bats if the design feels empty. Leave the other nails solid or use thin black French tips.
These cute Halloween nails suit short and natural nails. Bat stickers are also useful when you want a quick at-home manicure.
Classic Black and Orange Nails
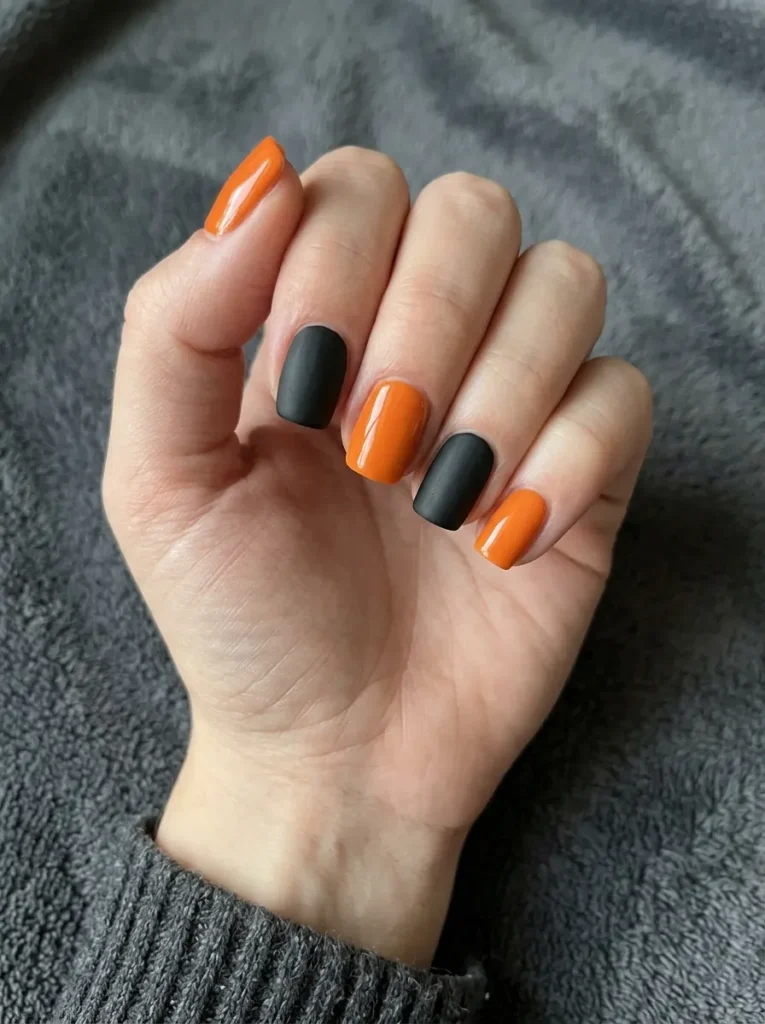
Black and orange nails are easy to recognize and work with almost every Halloween outfit.
Alternate glossy black and bright orange polish across your nails. You can keep the colors solid or add small details such as dots, stripes, glitter, or pumpkin faces.
A matte black finish makes the manicure feel more modern. Glossy orange accents add contrast and keep the design from looking flat.
For a softer autumn style, replace bright orange with burnt orange, rust, or copper. These shades still feel festive but are easier to wear after Halloween.
This color mix suits short, square, almond, and coffin nails. It is also an easy Halloween manicure for beginners.
Candy Corn Color-Block Nails
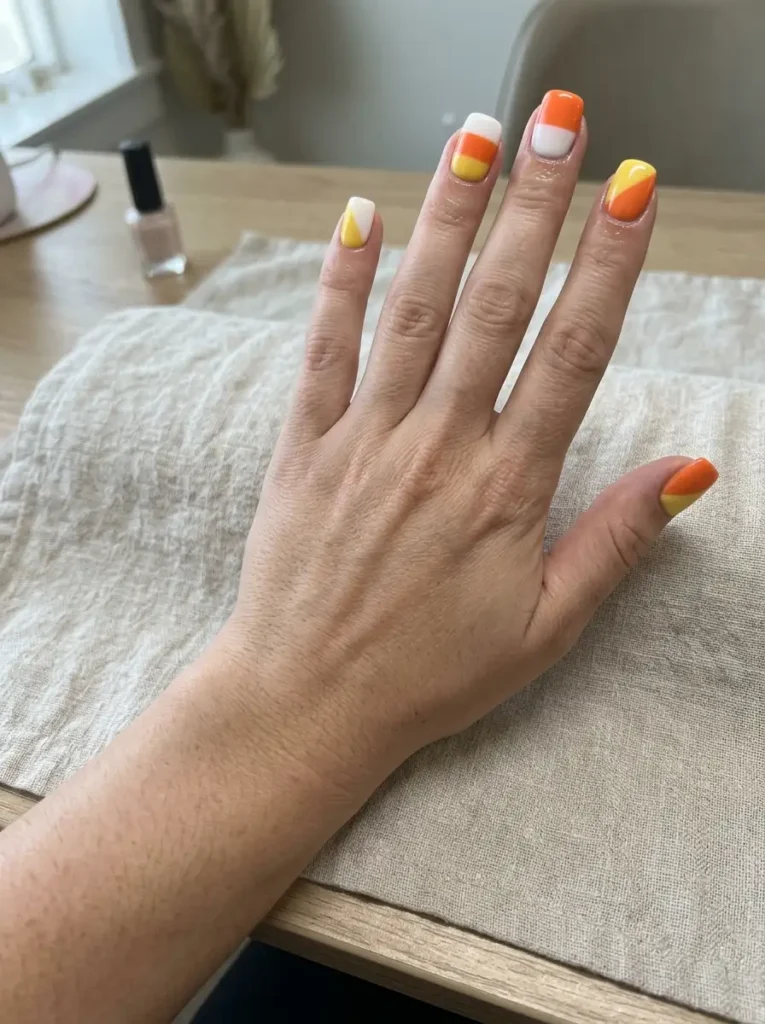
Candy corn nails bring classic Halloween colors into a clean, graphic design.
Use white, orange, and yellow polish to create stripes, diagonal blocks, or color-block French tips. You do not need to paint full candy shapes on each nail.
Striping tape can help keep the edges straight. Remove the tape before the polish fully dries to avoid pulling up the color.
You can use all three shades on one accent nail and keep the others solid. This makes the manicure easier to create.
Candy corn nail art works well on short and medium nails. It is bright, playful, and beginner-friendly.
Blood-Drip Halloween Nails
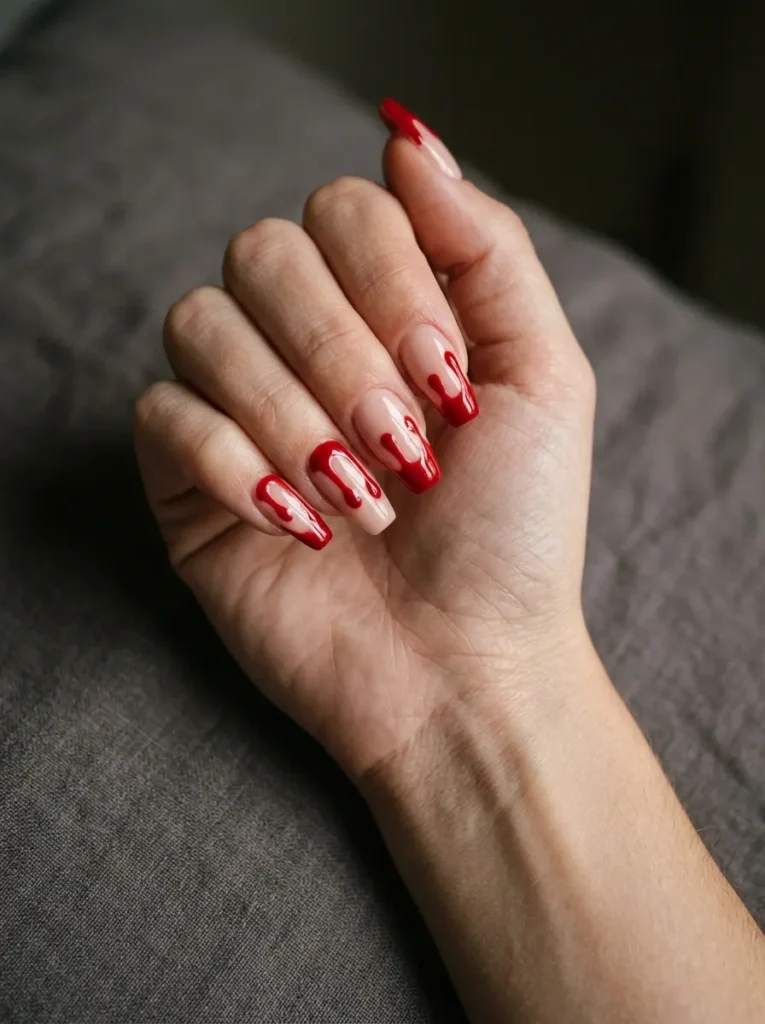
Blood-drip nails create a bold look with very little detail work.
Start with a nude, pale pink, white, or black base. Add red polish along the tips, then pull a few rounded drips down each nail.
Keep the drip lengths uneven. This makes the design look more natural and less like a repeated pattern.
Bright red creates a fresh horror style. Deep burgundy gives the same effect but feels darker and more polished. Finish with a glossy top coat to make the drips look wet.
This design works best on almond, coffin, and stiletto nails. You can also place the drips near the cuticle for a reversed version.
Black Flame Halloween Nails
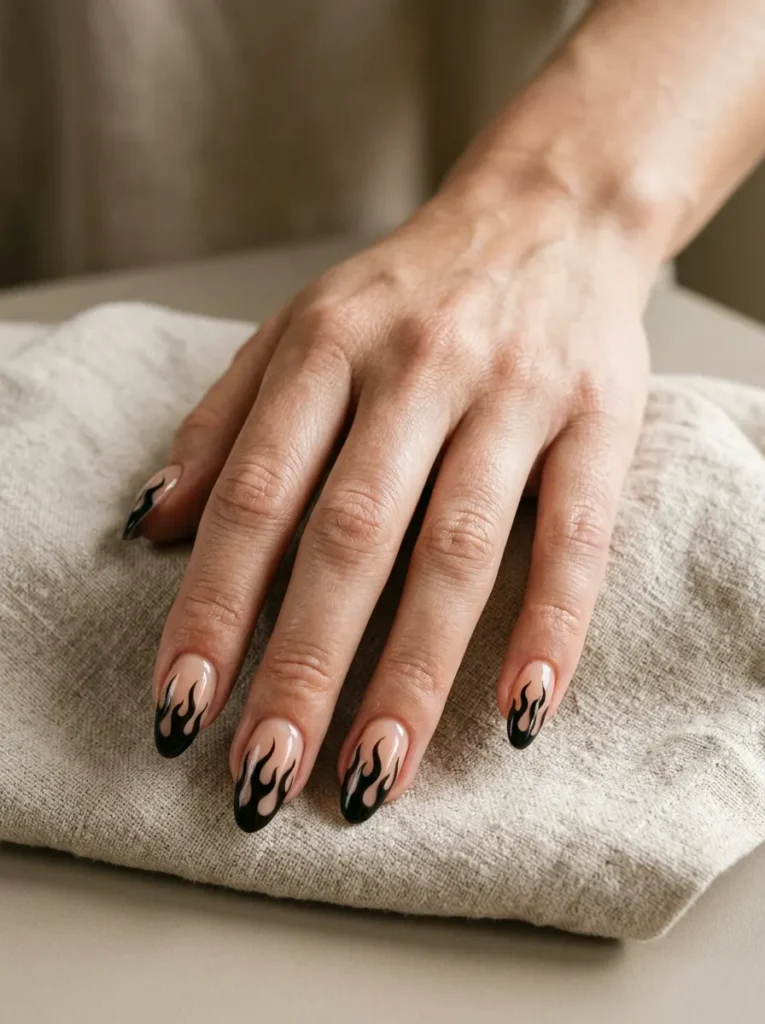
Black flame nails give Halloween art a sharp and modern feel.
Paint black flames over a nude, orange, or clear base. The open space between the flames keeps the design from feeling too heavy.
You can reverse the colors by adding orange flames over black polish. Silver chrome outlines create a stronger party look.
Keep the flame height similar across the hand, but do not copy each shape exactly. Small changes make the design feel more natural.
Black flame nails work best on almond, coffin, and stiletto shapes. You can place the flames only on the tips for an easier version.
Black Cat Silhouette Nails
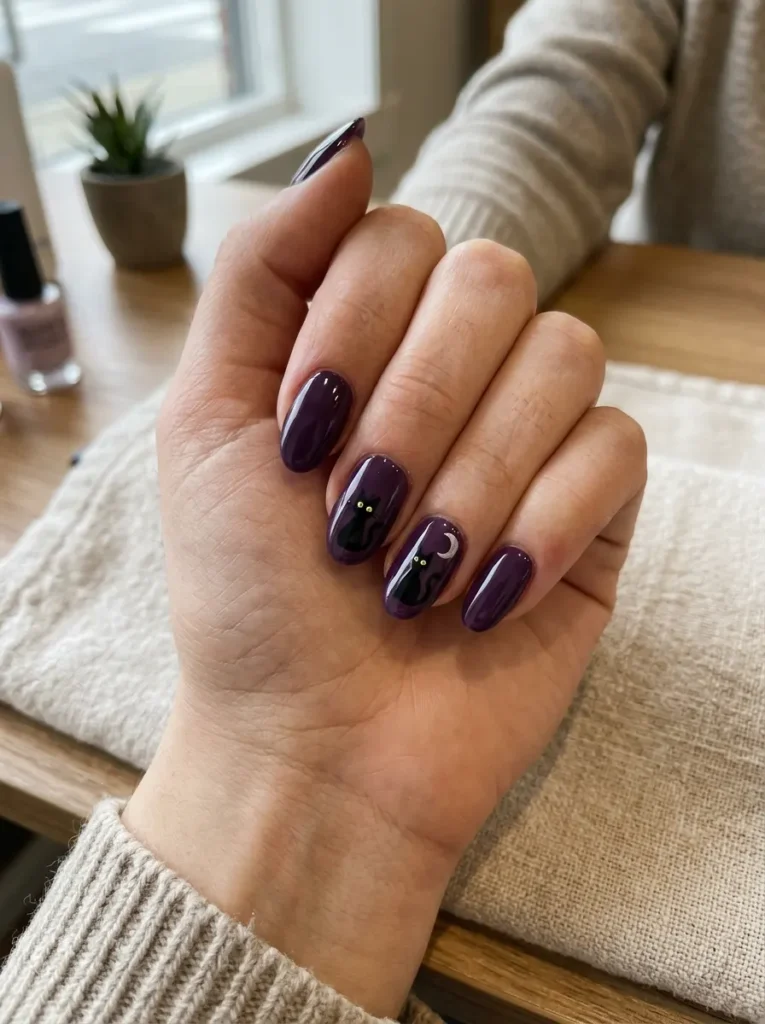
Black cat nails are playful, simple, and easy to match with other Halloween details.
Choose an orange, purple, nude, or deep blue base. Add black cat ears, tails, faces, or full silhouettes to one or two nails.
Small yellow eyes create strong contrast against black polish. You can also add a moon behind the cat for a night-sky effect.
Keep the remaining nails simple with solid polish, dots, or tiny stars. Too many detailed cats may make the manicure look crowded.
These cute Halloween nail designs work well on short and medium nails. Cat stickers or stamping plates can give you cleaner shapes at home.
Easy Halloween Nail Art You Can Recreate at Home
Detailed nail art can look difficult, but basic tools make many designs much easier.
Start by cleaning your nails and removing old polish. Shape the edges, push back the cuticles gently, and wipe the nail plate before adding a base coat.
Apply your main color in thin layers. Thick polish takes longer to dry and may wrinkle or peel.
Choose a simple design first. Ghost eyes, blood drips, dots, stitches, and mummy lines are easier than detailed faces or haunted scenes.
You can use common items when you do not have nail-art tools:
- Use a toothpick for ghost eyes, dots, and small stitches.
- Use a makeup sponge for smoky backgrounds and color fades.
- Use striping tape for candy-corn blocks and clean lines.
- Use a thin brush for spiderwebs, flames, and lace.
- Use decals for skeletons, haunted houses, and detailed images.
Clean the skin around your nails with a small brush dipped in acetone. Wait until the art is dry, then add a top coat.
Brush the top coat across the nail tip too. This seals the edge and may help the manicure last longer.
Practice hard designs on paper or a plastic nail tip before painting your real nails.
Which Halloween Nails Suit Your Nail Shape?
Your nail shape can help a design look more balanced. It can also give you more or less space for art.
| Nail Type | Best Halloween Designs | Why They Work |
| Short nails | Ghosts, bats, pumpkins, dots | Small details stay clear |
| Almond nails | Webs, moons, flames, vampire tips | Curved edges suit flowing art |
| Square nails | Mummy wraps, stitches, color blocks | Straight edges suit graphic lines |
| Coffin nails | Blood drips, skeletons, horror scenes | More space supports detailed art |
| Stiletto nails | Fangs, flames, gothic art | Sharp tips add drama |
Short Halloween nails look best when you use one main detail. Tiny ghosts, bats, pumpkins, and simple webs are easier to see on a small nail plate.
Almond Halloween nails suit designs that curve or point. Flames, fangs, moons, and spiderweb lines follow the shape well.
Square nails work with straight designs such as stitches, bandages, stripes, and color blocks.
Long coffin nails give you enough room for connected scenes and detailed images. Still, you do not need to cover every nail.
Most long-nail designs can be changed for short nails. Use the full design on one accent nail and keep the other nails simple.
Press-on nails are also useful when you want extra length for one event without changing your natural nails.
Choose a Halloween Manicure That Fits Your Style
Halloween nails do not need to be packed with small details to make an impact. One ghost, black French tips, or a few tiny bats can create a clear seasonal look.
Choose your design based on your nail length, skill level, costume, and daily routine. Keep it cute with pumpkins and cats, or go darker with blood drips, gothic lace, and skeleton art.