Beautiful nails do not have to mean long extensions, thick acrylic, or frequent salon visits. You can create a clean and stylish manicure using your natural nails, regular polish, gel polish, nail stickers, or simple nail art tools.
Many people want polished nails but do not like the cost or upkeep of acrylics. You may also have short, weak, or damaged nails that need a break from heavy nail products. The good news is that natural nails can still look neat, modern, and creative.
What Can You Use Instead of Acrylic Nails?
Acrylic is only one way to add color, strength, or length to your nails. There are several other options, and each one has different benefits.
Regular nail polish is the simplest choice. It is easy to apply, comes in many colors, and can usually be removed without filing the nail surface. It works well for weekend looks, seasonal colors, and quick at-home manicures.
Gel polish gives nails a shiny finish and often lasts longer than regular polish. It must be cured under the correct lamp. It should also be removed with care. Peeling gel polish can remove layers from the natural nail.
Builder gel or BIAB may add support to weak natural nails. These products are thicker than standard gel polish. They are often used as an overlay rather than a long extension.
Press-on nails are useful when you want temporary length. They are available in simple colors and detailed designs. Adhesive tabs may work for short wear, while nail glue may hold longer.
Nail wraps, stickers, and decals make detailed nail art easier. They are a good choice when you do not have a steady hand.
No nail product is completely risk-free. Follow the product directions and remove each product correctly.
Colorful Side-French Nails
Best for: Modern and bold natural nail looks
Difficulty: Intermediate
Best nail shape: Oval, almond, or squoval
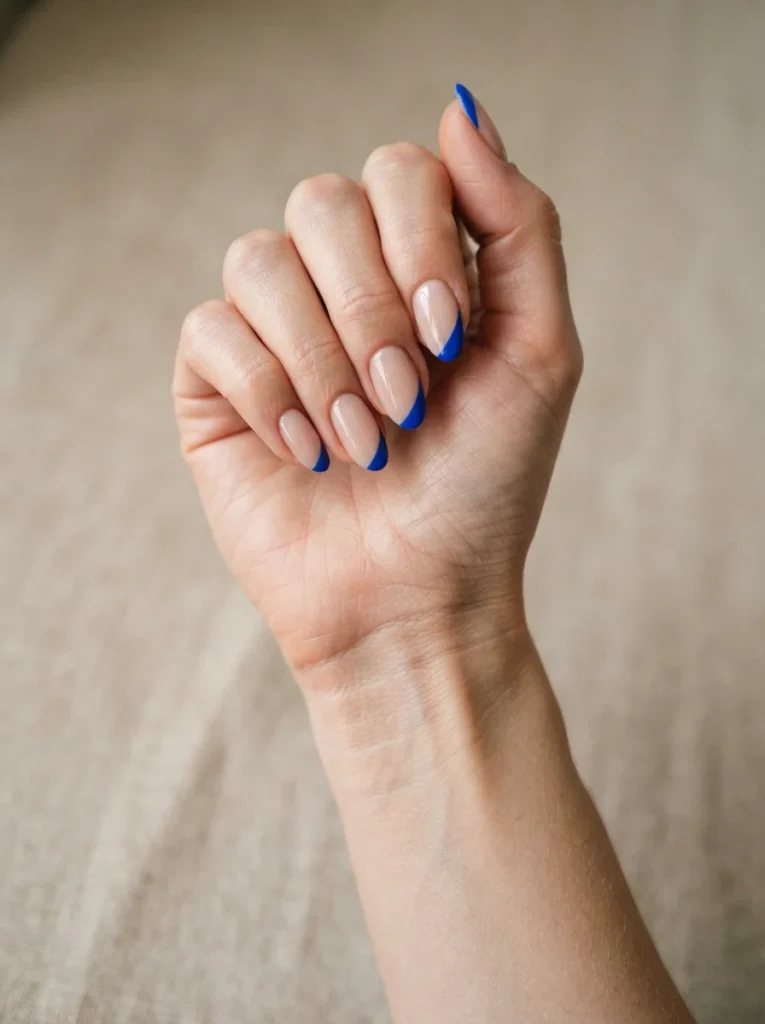
A side-French design places color along one side of the nail tip. The line may be curved or diagonal.
This design feels more modern than a classic French manicure. The angled line can also make the nail look longer.
Start with a clear or nude base. Add cobalt blue, red, green, hot pink, or another bright shade along one side of the tip.
Use a thin brush and follow the natural curve of the nail. Keep the rest of the design simple.
You can use one color on every nail or change the shade from finger to finger.
Fine-Line Swirl Nails
Best for: Trendy and artistic manicures
Difficulty: Advanced
Best nail shape: Short or medium natural nails
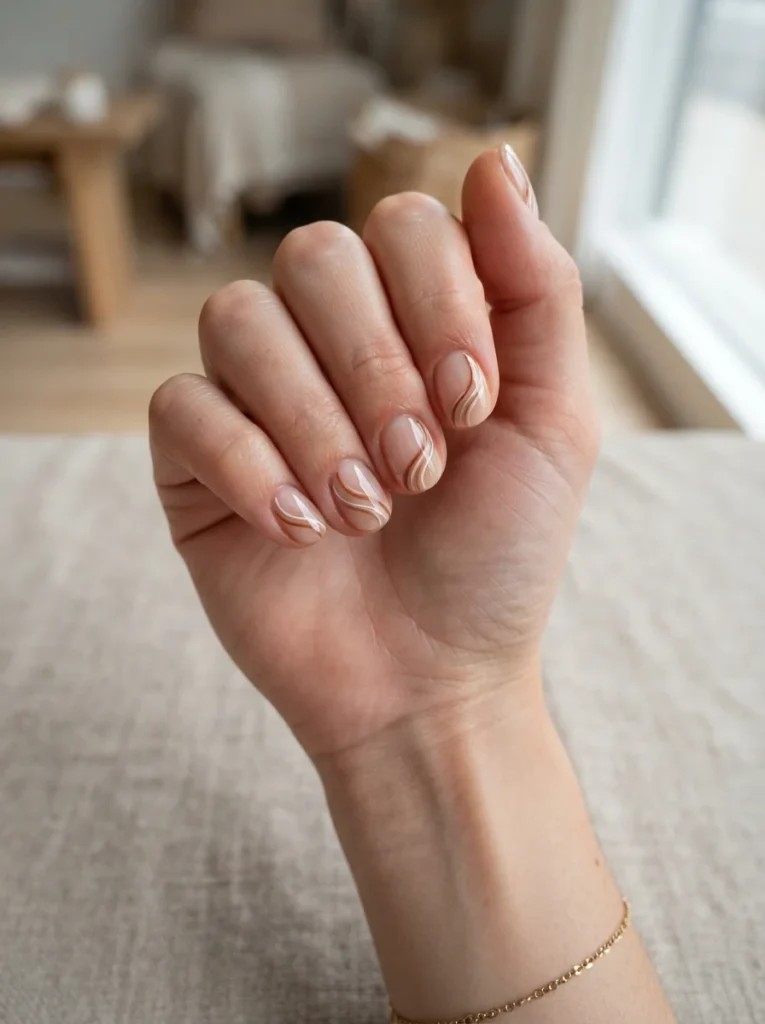
Fine-line swirls add movement and color while leaving much of the nail visible.
Start with a clear or nude base. Use a thin liner brush to paint curved lines across each nail. Change the position of the lines so the design does not look copied.
Use two or three colors that work well together. Brown and cream create a warm neutral style. Pink and red feel bold. Blue and lavender create a softer look.
Keep some nails plain or use fewer lines on them. Too many swirls can make short nails look crowded.
Seal the design with a smooth top coat.
Glazed Pearl Natural Nails
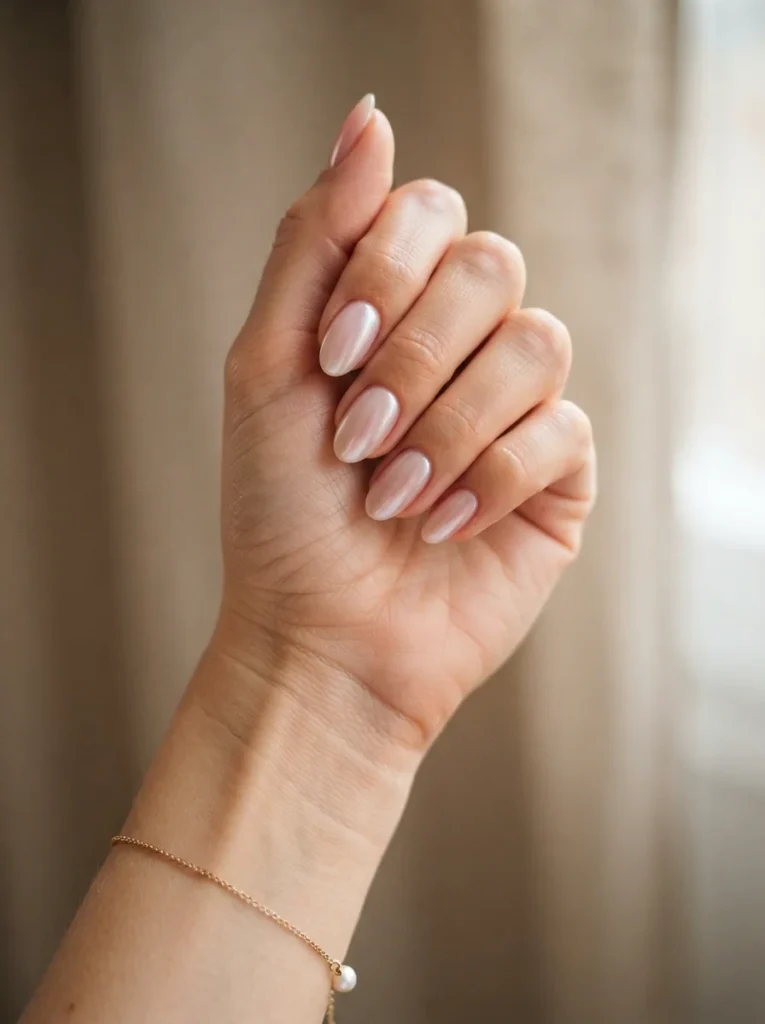
Best for: Weddings, dinners, and special events
Difficulty: Beginner to intermediate
Best nail shape: Oval, almond, or squoval
Glazed pearl nails have a soft reflective finish. They look shiny without appearing too metallic.
Start with a sheer pink, milky white, or light beige base. Add a pearl-effect or iridescent polish over it. Finish with a glossy top coat.
Some chrome effects require gel polish and special powder. You can still create a similar look with regular pearl polish. The result may be softer, but it is easier to apply and remove.
Keep the base light so the pearl layer remains visible. This acrylic-free manicure idea works well with both short and medium natural nails.
Micro-French Tips
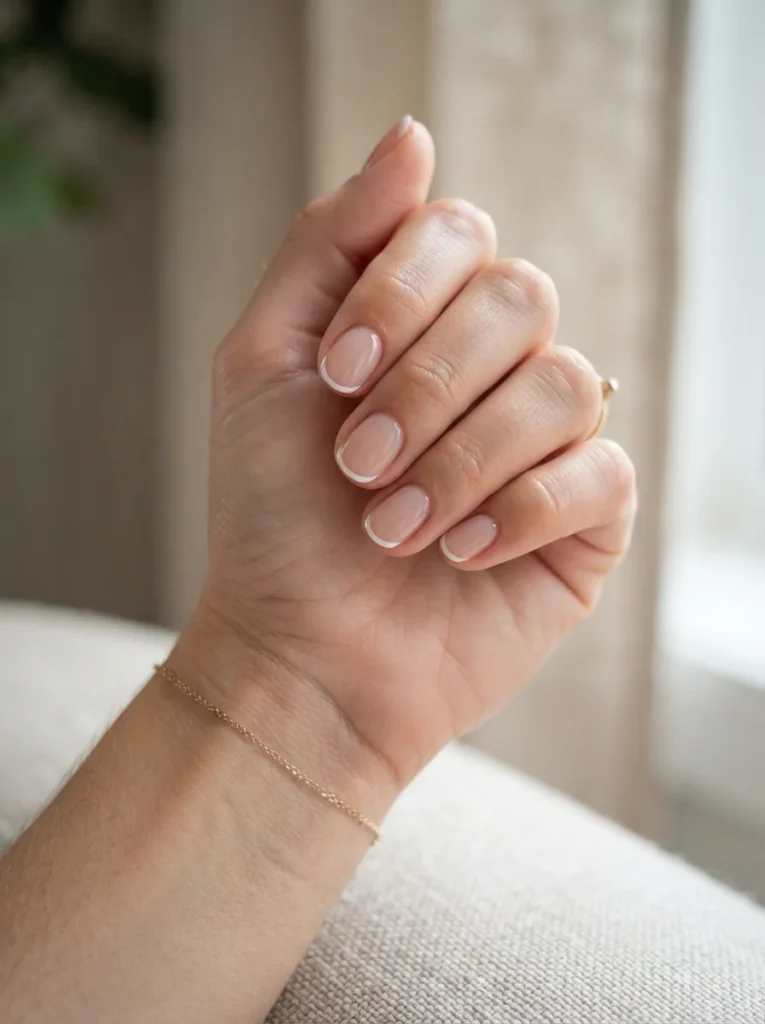
Best for: Short nails and minimalist styles
Difficulty: Intermediate
Best nail shape: Round, oval, squoval, or short almond
Micro-French tips use a very thin line across the free edge of the nail. The free edge is the small part of the nail that grows past the fingertip.
A classic white line gives you a clean and timeless look. Black tips feel more modern. You can also use pastel colors, red, blue, or gold.
Start with a sheer pink or nude base. Use a thin detail brush to paint a narrow line along each tip. French tip guides can help if your hand is not steady.
Keep the line thin. A thick tip can make very short nails look smaller.
Milky White Short Nails

Best for: Bridal, clean, and simple styles
Difficulty: Beginner
Best nail shape: Short oval, round, or squoval
Milky white polish gives natural nails a soft and smooth finish. It is less harsh than a solid white shade.
Sheer white polish adds a light cloudy layer. Milky white gives more coverage but still looks soft. Solid white polish is fully opaque and creates a stronger contrast.
Apply two thin coats instead of one thick coat. Thick white polish can look uneven or take too long to dry.
Finish with a glossy top coat. Add cuticle oil after the polish has dried to create a fresh salon-style finish.
Milky white nails work well through every season.
Minimalist Dot Nail Art

Best for: Beginners and very short nails
Difficulty: Beginner
Best nail shape: Any natural nail shape
Dot nail art is one of the easiest designs to create at home. You only need polish and a small tool.
Start with a nude, clear, or pale base. Add one dot near the cuticle or in the center of each nail. Use a dotting tool, toothpick, or the rounded end of a bobby pin.
Black dots over a nude base create a simple modern style. Pastel dots feel softer and work well for spring. You can also place one gold dot on each nail for a dressier finish.
Keep the dot placement similar on every nail. This helps the design look balanced.
Nail Stickers on a Clear Base
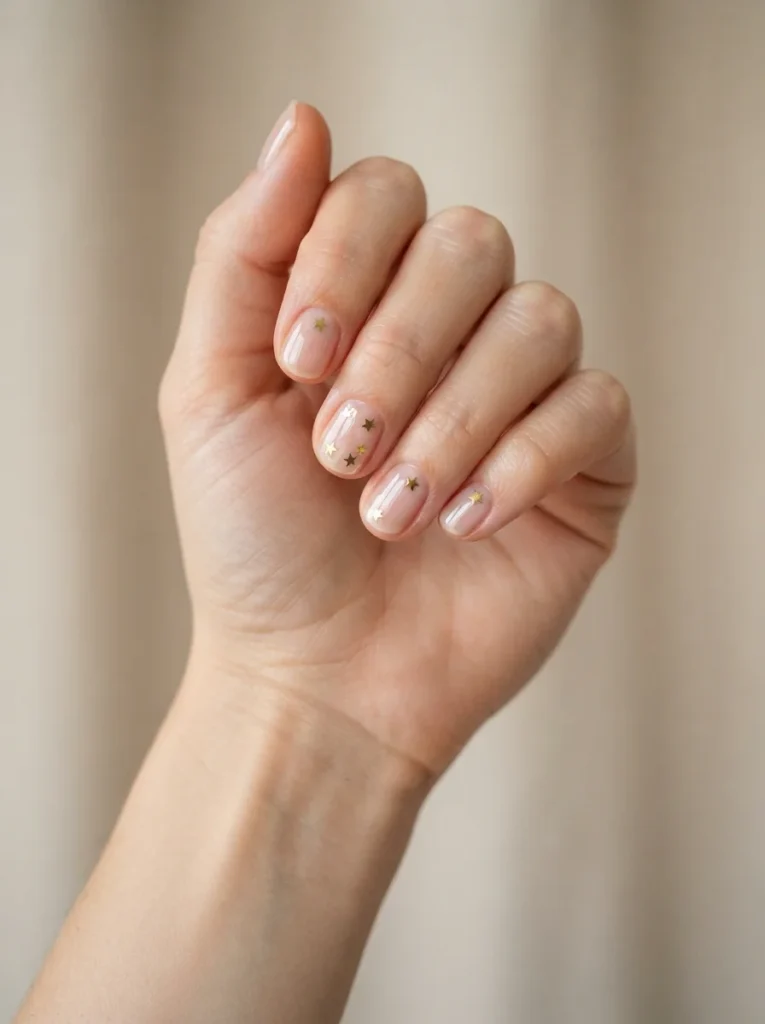
Best for: Beginners and quick at-home nail art
Difficulty: Beginner
Best nail shape: Short or medium nails
Nail stickers let you create detailed art without painting each shape by hand.
Start with clean and dry nails. Apply clear polish or a sheer nude base. Allow it to dry before adding the stickers.
Choose small stars, cherries, flowers, hearts, gold lines, or abstract shapes. Press each sticker flat, especially around the edges.
Do not place stickers too close to the cuticle or side of the nail. Lifted edges may catch on your hair or clothes.
Seal the design with top coat. Make sure the top coat covers every edge of the sticker.
Negative-Space Nail Designs
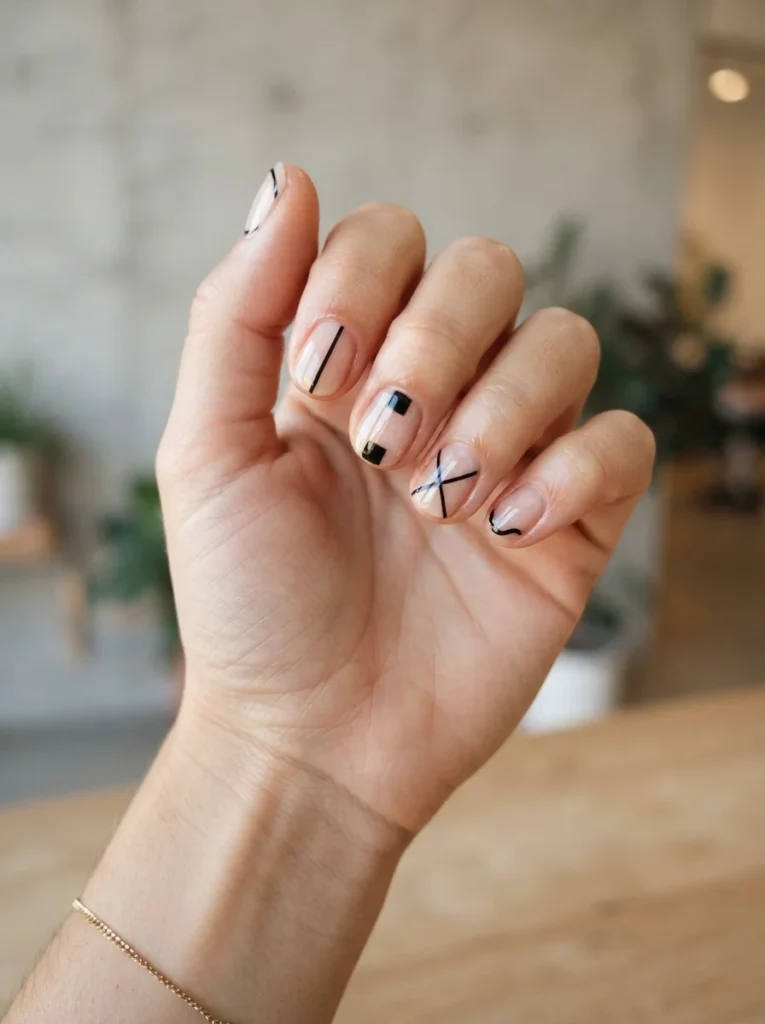
Best for: Low-maintenance and modern manicures
Difficulty: Intermediate
Best nail shape: Any natural nail shape
Negative-space nail art leaves part of the natural nail bare. The unpainted area becomes part of the design.
You can create half-moons, thin lines, waves, or simple blocks of color. Nail tape can help you form clean edges.
Use one or two colors to keep the design easy to read. Black, white, red, green, and blue all work well over a clear base.
Finish the full nail with clear top coat. This protects the painted sections and gives the bare areas the same shine.
Regrowth may look less obvious because part of the nail is already left unpainted.
Pastel Skittle Nail
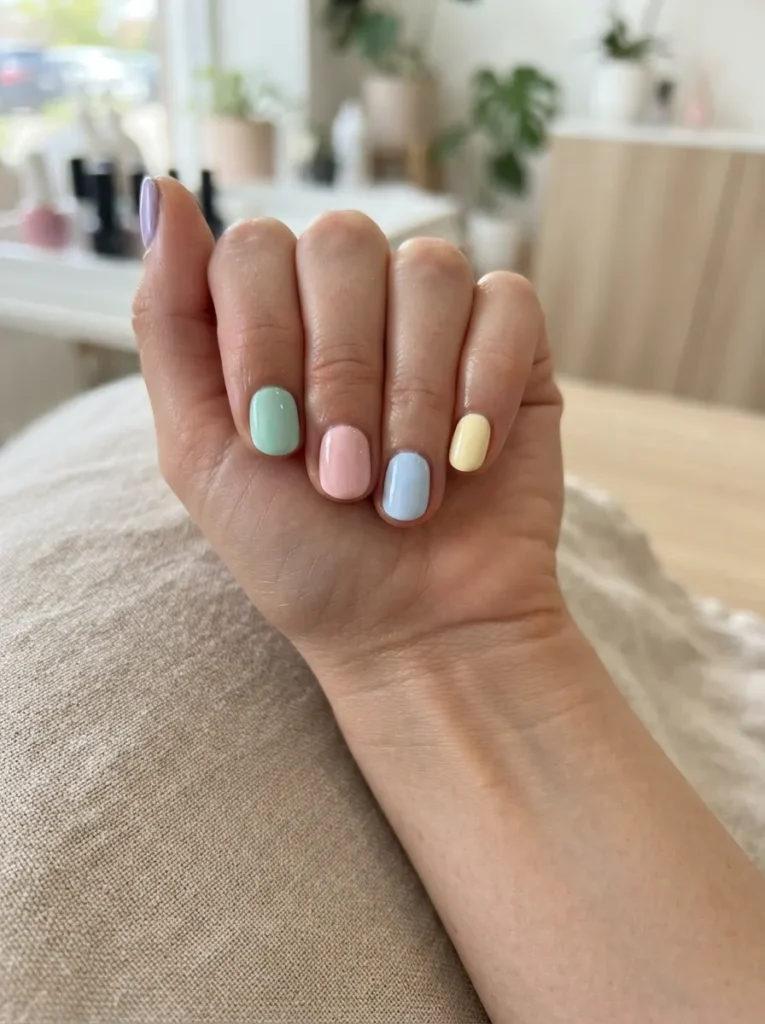
Best for: Spring, summer, and playful everyday looks
Difficulty: Beginner
Best nail shape: Short or medium natural nails
Skittle nails use a different color on each finger. The design is simple, but the mix of shades makes it feel more creative.
Choose colors with the same softness. Lavender, mint, blush pink, baby blue, and pale yellow work well together. Five unrelated shades may look messy, so use colors that share a similar tone.
Apply two thin coats of each color. Finish all nails with the same top coat so the shine looks even.
This design does not require brushes, stickers, or advanced skills. It is a quick way to make short natural nails look bright and fun.
Sheer Nude Natural Nails
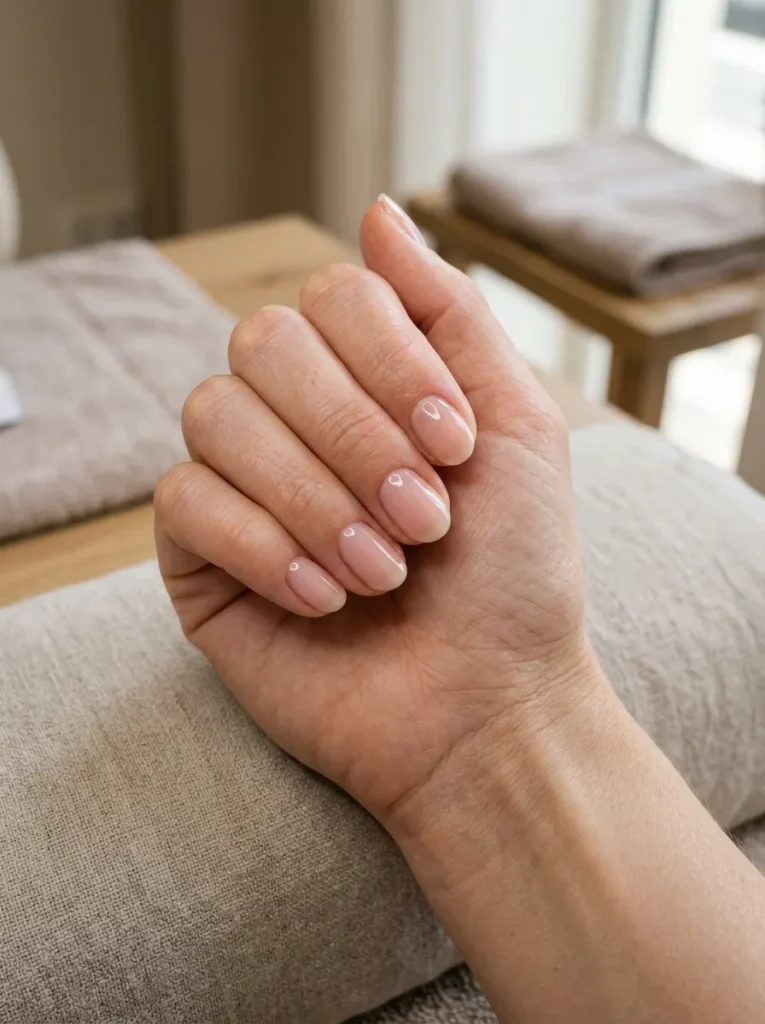
Best for: Work, school, interviews, and daily wear
Difficulty: Beginner
Best nail shape: Round, oval, squoval, or soft almond
Sheer nude nails are clean, simple, and easy to maintain. The polish adds a light wash of color while still allowing part of your natural nail to show.
Choose a pink-toned nude if your skin has cool undertones. Peach, tan, and beige shades often work well with warm undertones. A soft milky nude can suit many skin tones.
Apply one coat for a very natural finish. Add a second thin coat if you want more coverage. Finish with a glossy top coat to make the nails look smooth and polished.
This is one of the easiest natural nail ideas for people who want a neat manicure without bold color.
Short Red Natural Nails
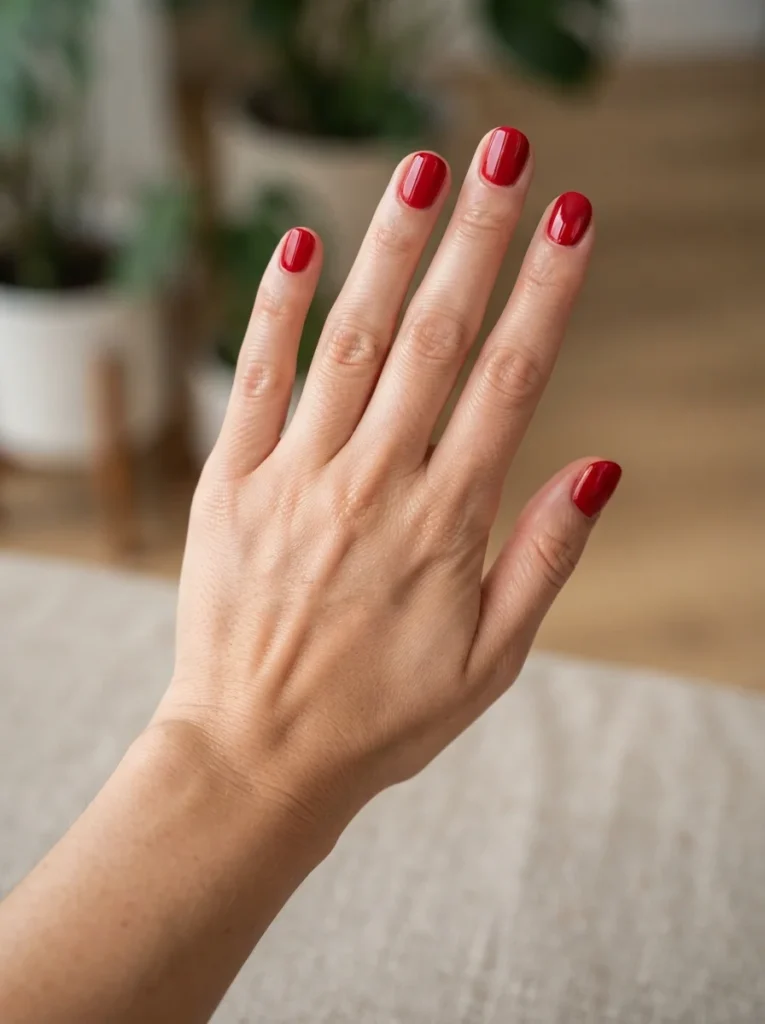
Best for: Classic, evening, and seasonal looks
Difficulty: Beginner
Best nail shape: Short round, oval, or squoval
Red polish can make short natural nails look clean and bold. The final result depends on the shade you choose.
Blue-based reds feel cool and classic. Orange-red shades look warmer and brighter. Brick red and deep wine work well in autumn and winter.
Shape each nail evenly before applying color. Use a base coat because deep red polish may stain some nails.
Apply two thin color coats. Clean any polish around the cuticle with a small brush and remover.
Finish with glossy top coat for shine or matte top coat for a softer look.
Soft Ombre Polish Nails

Best for: Parties, weddings, and soft color blends
Difficulty: Intermediate
Best nail shape: Medium oval, almond, or squoval
Ombre nails blend one shade into another. You do not need acrylic extensions to create the effect.
Apply a light base color first. Paint two polish shades beside each other on a small cosmetic sponge. Press the sponge gently onto the nail.
Repeat the step with thin layers until the blend looks smooth. Use tape or a peel-off barrier around the nail to reduce cleanup.
Try nude fading into white, pink blending into peach, or lavender blending into blue. Finish with top coat to soften the texture left by the sponge.
This is a polish ombre on natural nails, not an acrylic ombre extension.
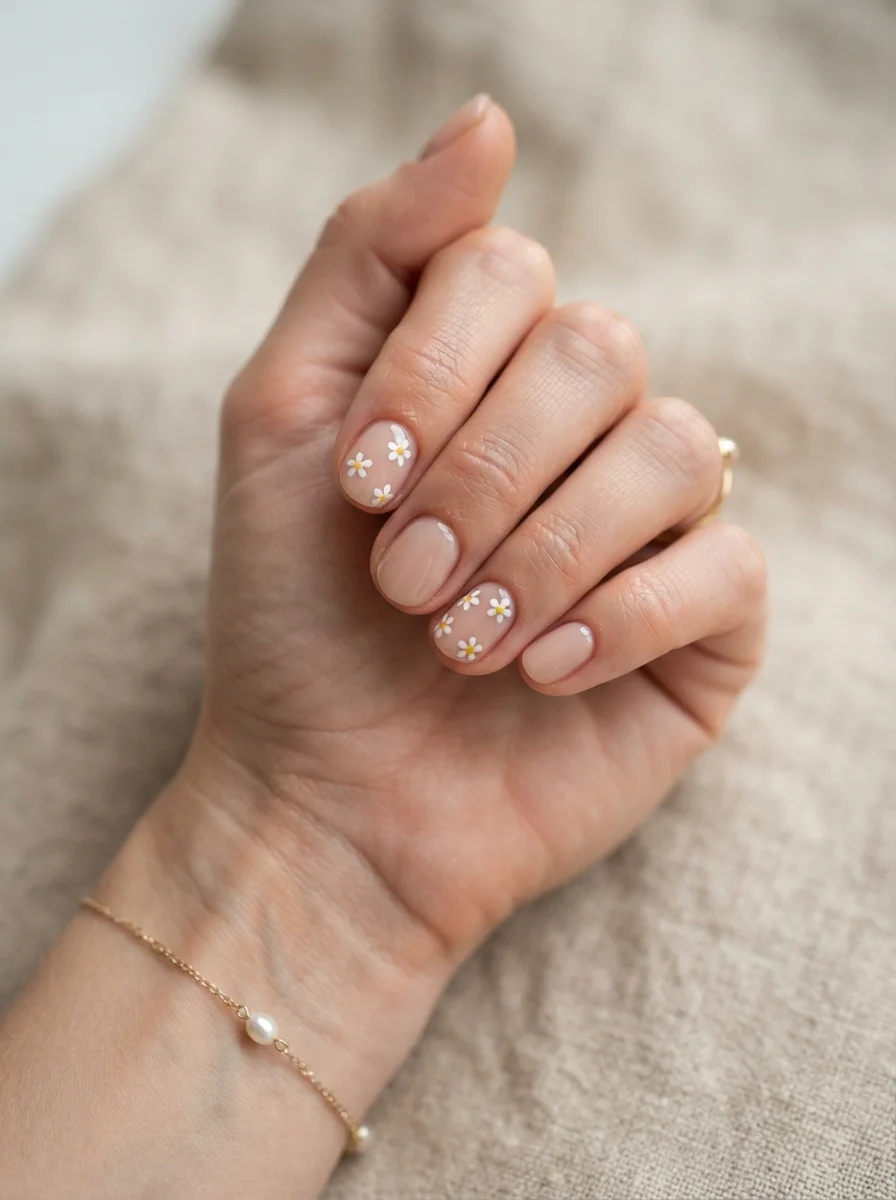
Tiny Floral Nail Art
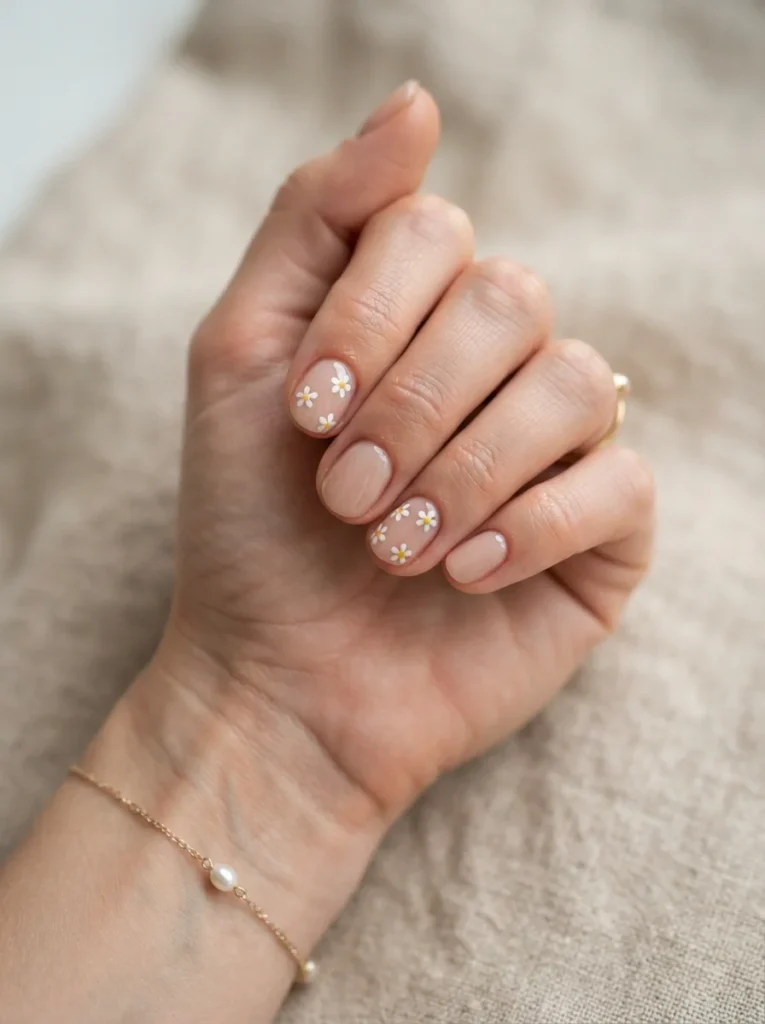
Best for: Spring, holidays, and soft feminine styles
Difficulty: Intermediate
Best nail shape: Short oval, round, or squoval
Tiny flowers add detail without covering the full nail. They work especially well as accent art.
Start with a clear, nude, or pastel base. Use a dotting tool to make five small dots in a circle. Add a smaller dot in the center.
Try white petals with yellow centers for small daisies. Blue flowers look fresh over a nude base. Pink flowers near the cuticle create a softer finish.
Place flowers on one or two nails if you want a simple look. Keep the petals small on short nails. Large flowers can make the design feel crowded.
Tortoiseshell Accent Nails
Best for: Autumn and warm neutral manicures
Difficulty: Advanced
Best nail shape: Oval, almond, or squoval
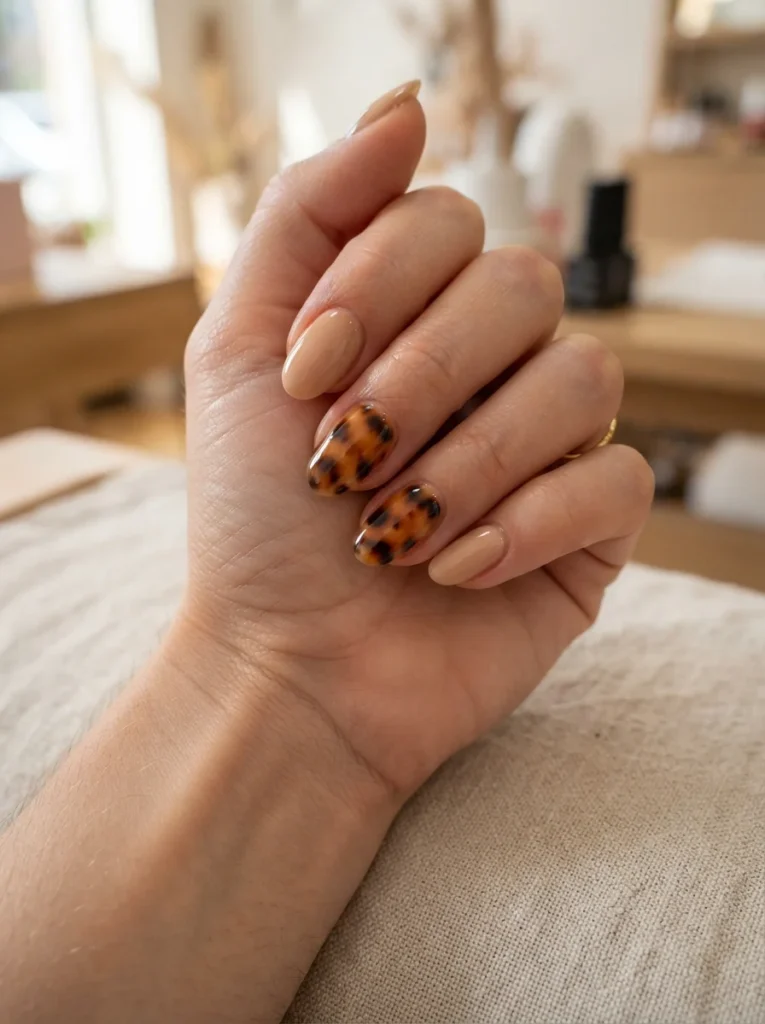
Tortoiseshell nail art mixes warm amber, caramel, brown, and black shades. The pattern should look soft and uneven.
Start with a translucent amber or light brown base. Add small patches of darker brown and black polish. Blend the edges lightly so the spots do not look too sharp.
Do not make every shape the same size. Imperfect spots create a more natural tortoiseshell effect.
Use the pattern on one or two accent nails. Paint the other nails nude, cream, chocolate brown, or warm beige.
This gives you a detailed design without making the full manicure feel too busy.
How to Choose the Best No Acrylic Nail Design
A nail design may look great in a photo but still feel wrong for your nail length or daily routine. Choose a style that fits how you use your hands.
Very short nails work well with sheer nude polish, tiny dots, solid colors, and micro-French tips. These designs need little space.
Short nails can also hold small flowers, stickers, side-French lines, and negative-space art. Medium natural nails give you more room for ombre, swirls, glazed finishes, and detailed patterns.
Your skill level also matters. Beginners may prefer solid red, pastel skittle nails, stickers, or sheer polish. Micro-French tips and tiny flowers need more control. Ombre, tortoiseshell, and fine swirls may take practice.
Think about maintenance too. Nude polish and negative-space designs often hide small chips or regrowth better than dark solid shades.
| Design | Skill Level | Best Nail Length | Maintenance |
| Sheer nude | Beginner | Any | Low |
| Micro-French | Intermediate | Short to medium | Medium |
| Nail stickers | Beginner | Short to medium | Low |
| Ombre | Intermediate | Medium | Medium |
| Fine-line swirls | Advanced | Short to medium | Medium |
For work, choose sheer nude, milky white, or a soft French tip. For a party, try glazed pearl, red polish, or colorful swirls.
When you are unsure, begin with a sheer base and one small detail.
How to Make Natural Nail Designs Last Longer
A long-lasting manicure starts before you apply the first coat of polish.
Shape your nails with a fine file. Avoid rough filing that may leave the edges weak or uneven. Make sure each nail is clean and dry before applying polish.
Oil and lotion can stop polish from sticking well. Wipe the nail plate with a suitable nail cleanser or remover before painting. Do not apply cuticle oil right before your manicure.
Use a base coat to help the color grip the nail. It may also reduce staining from deep shades.
Apply two or three thin color coats. Thick coats may wrinkle, bubble, or stay soft under the surface.
Seal the free edge by lightly brushing polish and top coat across the tip. This may help reduce early chips.
A simple routine looks like this:
- Shape the nails.
- Clean the nail surface.
- Apply base coat.
- Add thin color layers.
- Finish with top coat.
- Let every layer dry or cure correctly.
Wear gloves when cleaning or washing dishes. Water and cleaning products can shorten the life of your manicure.
Apply cuticle oil after the polish is fully dry. Use it often to keep the skin around your nails soft.
Common Mistakes to Avoid With Acrylic-Free Manicures
Small mistakes can cause chips, smudges, bubbles, and lifted stickers.
Do not apply polish over oily nails. Clean the nail surface first so the base coat can hold better.
Avoid thick coats. One heavy layer may look faster, but it often dries unevenly. Two or three thin layers create a smoother finish.
Do not file your nails with hard back-and-forth movements. Use gentle strokes and stop when the shape looks even.
Never peel off gel polish. Peeling may lift parts of the natural nail surface. Follow the removal steps listed by the product maker or visit a trained nail professional.
Be careful with your cuticles. You do not need to cut them deeply. Pushing them back gently may be enough for a clean polish line.
Seal nail stickers with top coat. Pay close attention to the edges, since this is where lifting often starts.
Choose art that fits your nail length. A large flower or thick French tip may look crowded on very short nails.
Clean preparation and thin layers matter more than perfect nail art.
Try a Stylish Acrylic-Free Manicure
You do not need long extensions to enjoy creative nails. Natural nails can hold French tips, flowers, swirls, ombre polish, stickers, pearl finishes, and bold solid colors.
Choose a design that fits your nail length and skill level. Start with nude polish, dots, or stickers if you are a beginner. Try ombre, tortoiseshell, or fine-line art when you feel ready for more detail.
Good preparation also matters. Clean the nails, use thin layers, add top coat, and remove products with care.