Halloween nails can be fun without looking too dark, bloody, or hard to wear. The real problem is finding a design that feels festive while still matching your style, nail length, and skill level.
Save the looks you like most. You can copy the full design, use one accent nail, or show the idea to your nail artist.
How to Choose Easy Halloween Nails That Suit You
The best cute nails for halloween should match your nail length, daily plans, and comfort level.
Start with your nail length. Small ghosts, dots, cat ears, and mini pumpkins work well on short nails. Longer almond or coffin nails give you more room for webs, monsters, and mixed character art.
Next, think about where you will wear the manicure. A nude base with tiny black details can feel subtle enough for work or school. Bright orange, purple, glitter, and glow polish may suit a party better.
Your skill level matters too. Stickers, dots, and simple French tips are easier for beginners. Detailed faces and thin web lines may need a steady hand or help from a nail artist.
You can also choose between regular polish, gel, acrylic, press-ons, and decals. Press-ons are useful when you need a fast look. Gel may last longer, but it also takes more care to apply and remove.
Black Cat French Tips
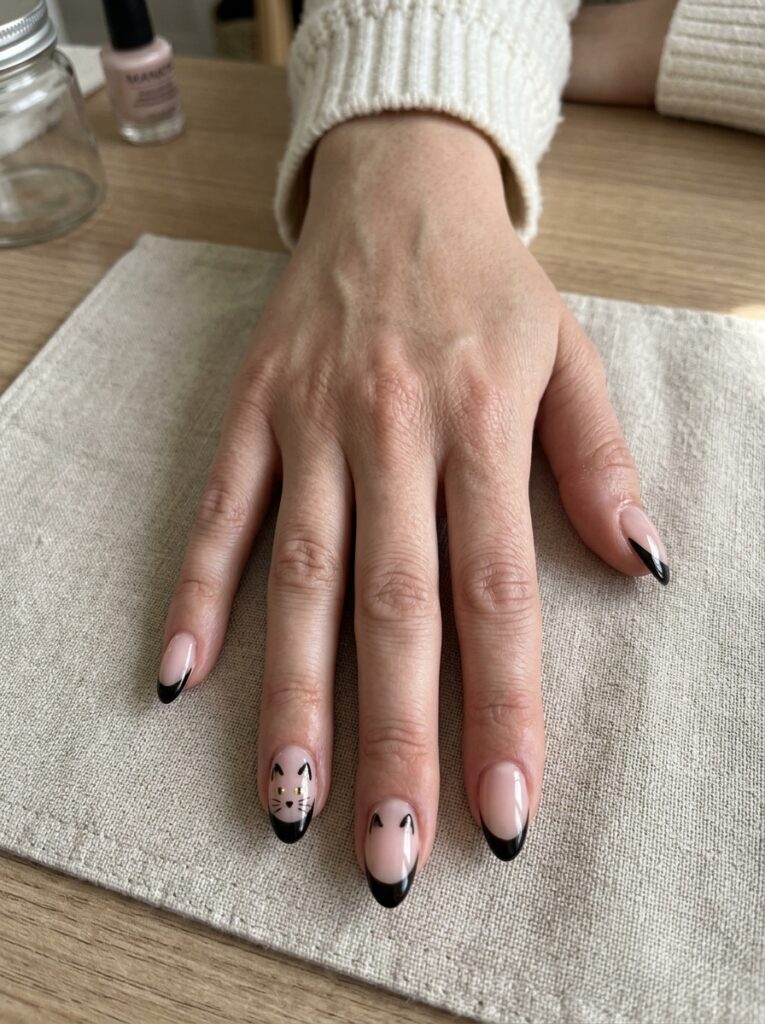
Black cat French tips mix a classic manicure with a small Halloween detail. Start with a sheer nude, pale pink, or milky base.
Paint thin black French tips, then add tiny cat ears above one or two tips. You can also draw small eyes, whiskers, or a curved tail on an accent nail.
This design works on short square nails and longer almond shapes. It feels festive, but it can still look neat enough for daily wear.
Use gold dots for the cat eyes if you want a small metallic accent. Keep the other details simple so the design stays clear.
Best for: Minimal nail art, short nails, and subtle Halloween looks.
Boo Lettering and Mini Hearts
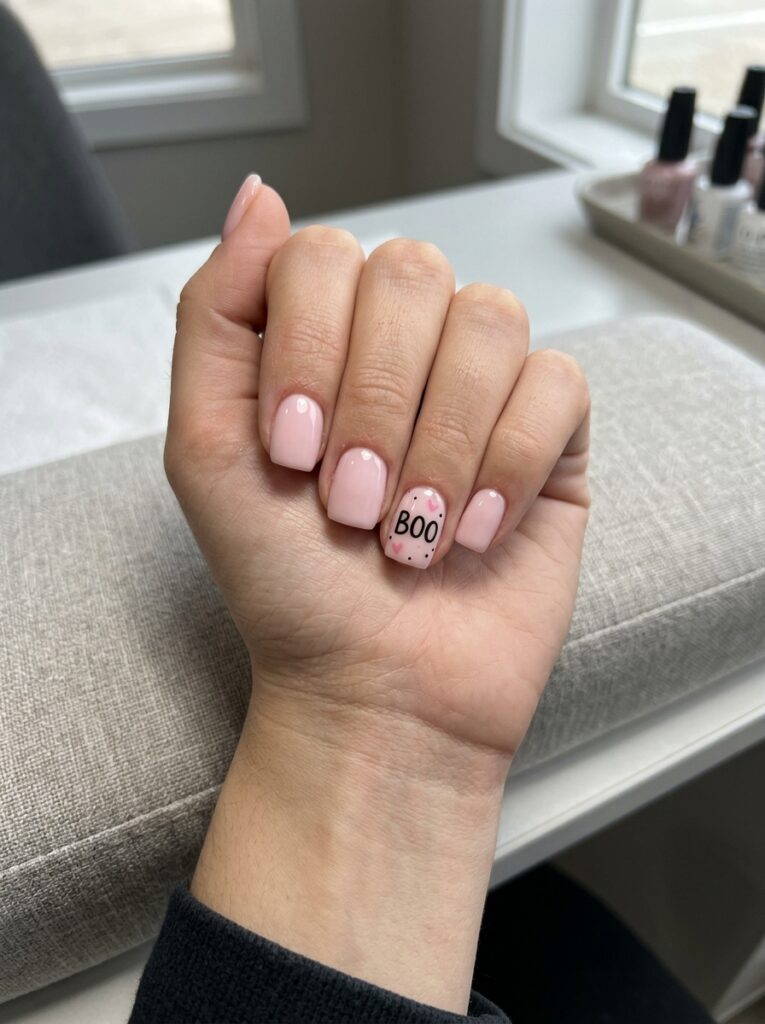
“Boo” lettering is a simple way to add a Halloween theme without drawing detailed characters.
Use a white, pink, lavender, or nude base. Spell “BOO” across one nail or place one letter on three separate nails. Add tiny hearts, stars, or dots around the letters.
Nail stickers can make the lettering easier and more even. You can also use a thin nail-art pen.
Replace black lettering with orange chrome for a brighter look. Keep the letters large enough to read on short nails.
Best for: Short nails, minimal designs, and nail stickers.
Cute Bat and Star Nails
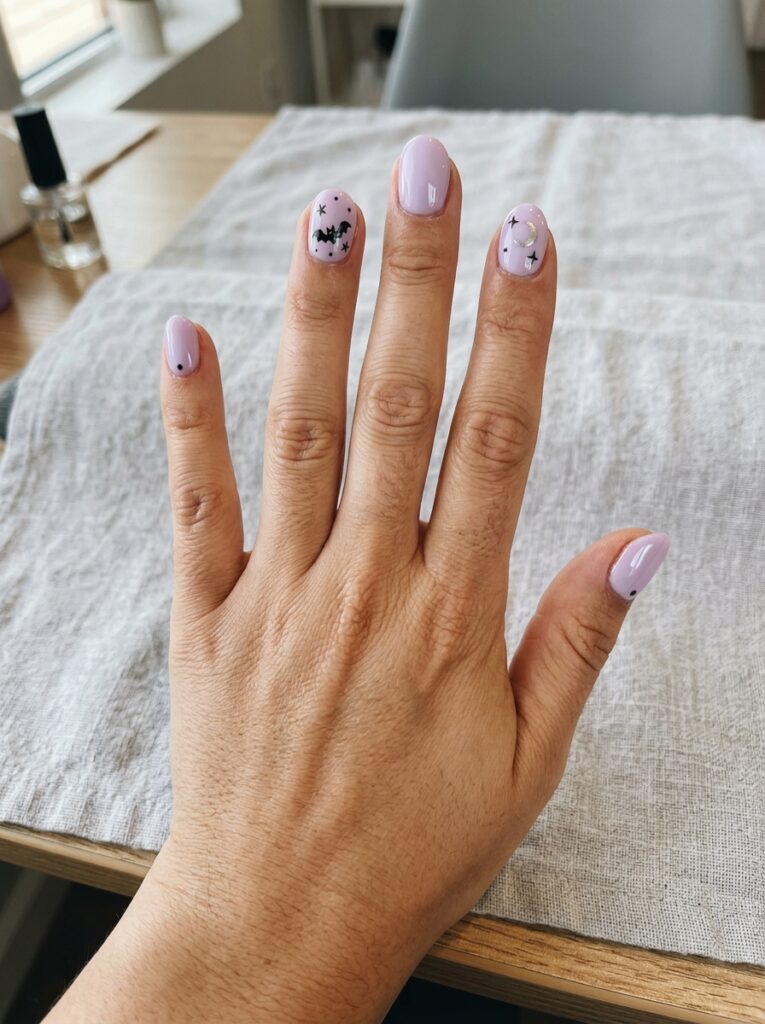
Small bats and stars can look playful when you keep the shapes simple. Use a lavender, nude, peach, or pale orange base.
Paint tiny black bat shapes with curved wings. Add small stars or dots between them so the design feels balanced.
Spacing is important here. Too many bats can make short nails look crowded. One or two shapes per nail are usually enough.
You can use decals if freehand painting feels hard. Add tiny silver moons for a little shine without changing the main color palette.
Best for: Purple Halloween themes, short nails, and decal users.
Cute Halloween Press-On Nails
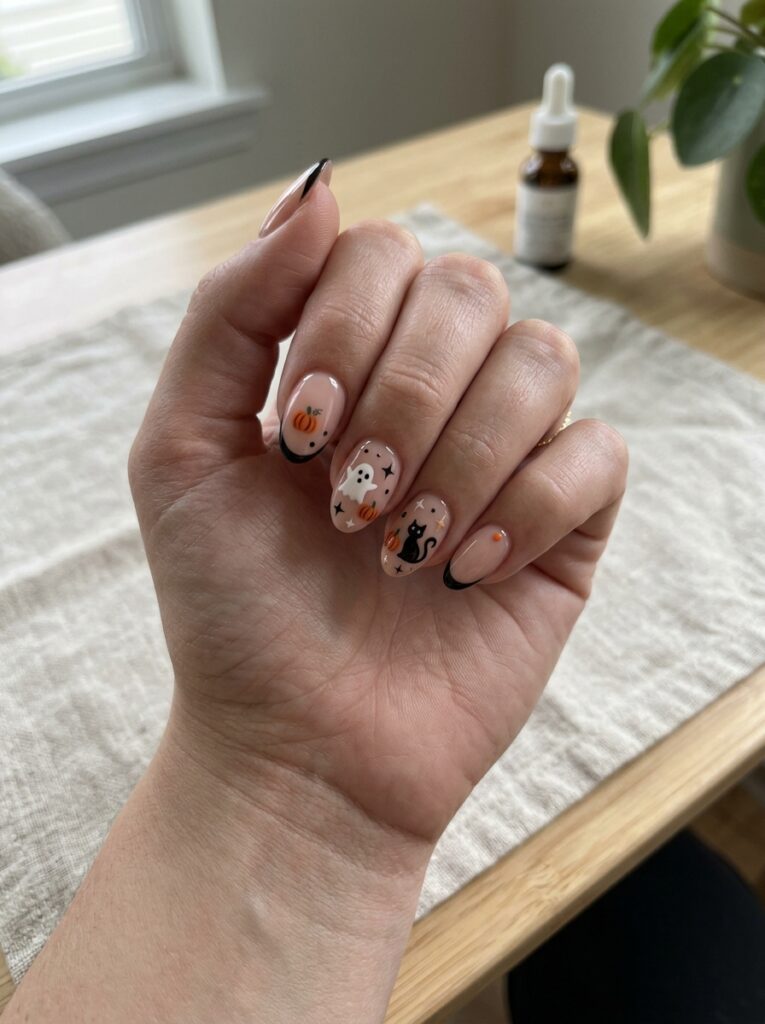
Press-ons are a quick choice when you want detailed Halloween art without painting it yourself.
Look for short almond, oval, or square sets with ghosts, pumpkins, stars, cats, or black French tips. You can choose adhesive tabs for short wear or nail glue for a stronger hold.
Check the size of every nail before applying the set. File the sides gently if one piece feels too wide.
Mix plain press-ons with two detailed accent nails if a full art set feels too busy.
Best for: Parties, temporary manicures, travel, and fast application.
Friendly Mummy Nails
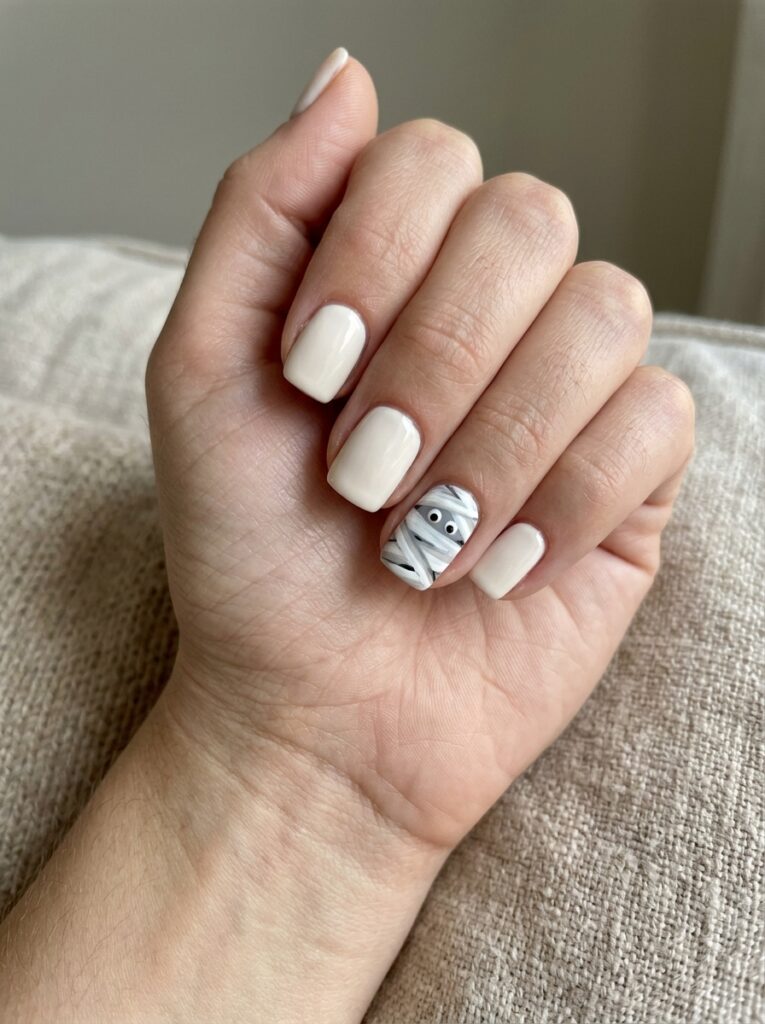
Mummy nails can look Easy when the face is simple and the colors stay soft.
Use a cream, beige, or pale grey base. Add thin white lines to look like wrapped bandages. Leave a small space between the lines for two round eyes.
The lines do not need to be perfect. Slightly uneven wraps make the mummy look more animated.
For an easier version, create one mummy accent nail and paint the other nails cream or black. A fine brush or nail-art pen can help with the small eyes.
Best for: Short square nails, beginners, and black-and-white sets.
Friendly Skeleton Face Nails
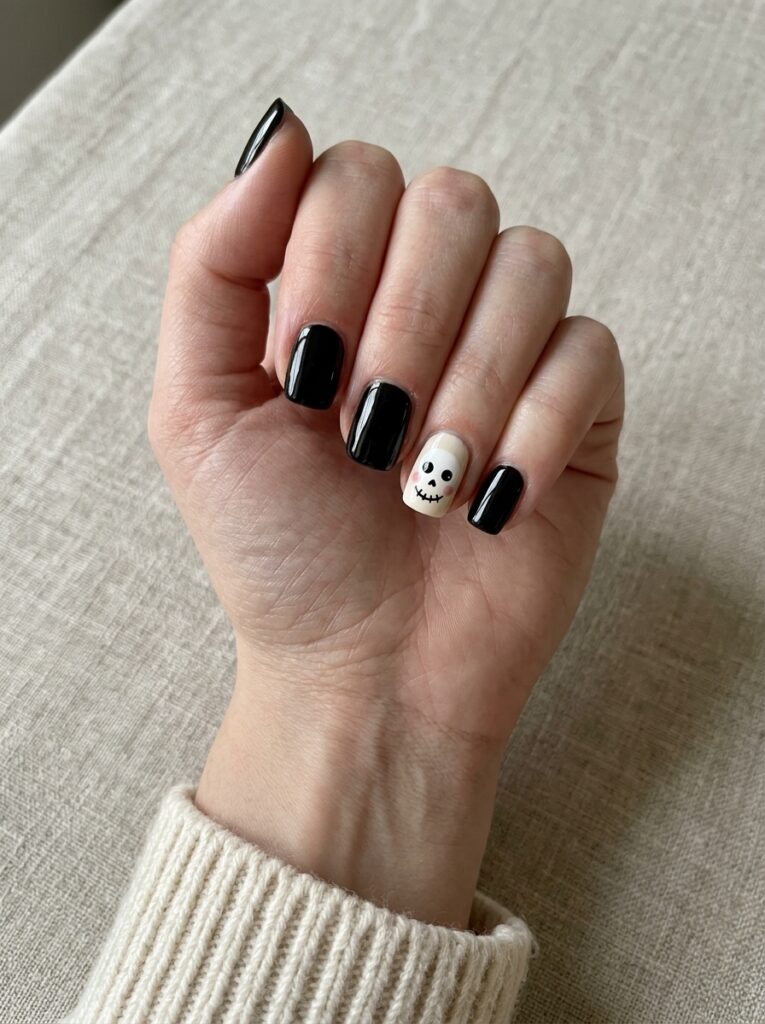
Skeleton faces can feel Easy when you use round shapes and soft expressions.
Paint simple white faces with dot eyes and small curved smiles. Add black French tips or solid black nails around them.
Avoid sharp teeth or deep shadows. Pink cheeks can make the faces look even more playful.
This design works well on short square nails because the round faces are easy to see. Use only one or two skeleton accents if you want a less dramatic manicure.
Best for: Black-and-white sets, short nails, and character designs.
Glow-in-the-Dark Ghost Nails
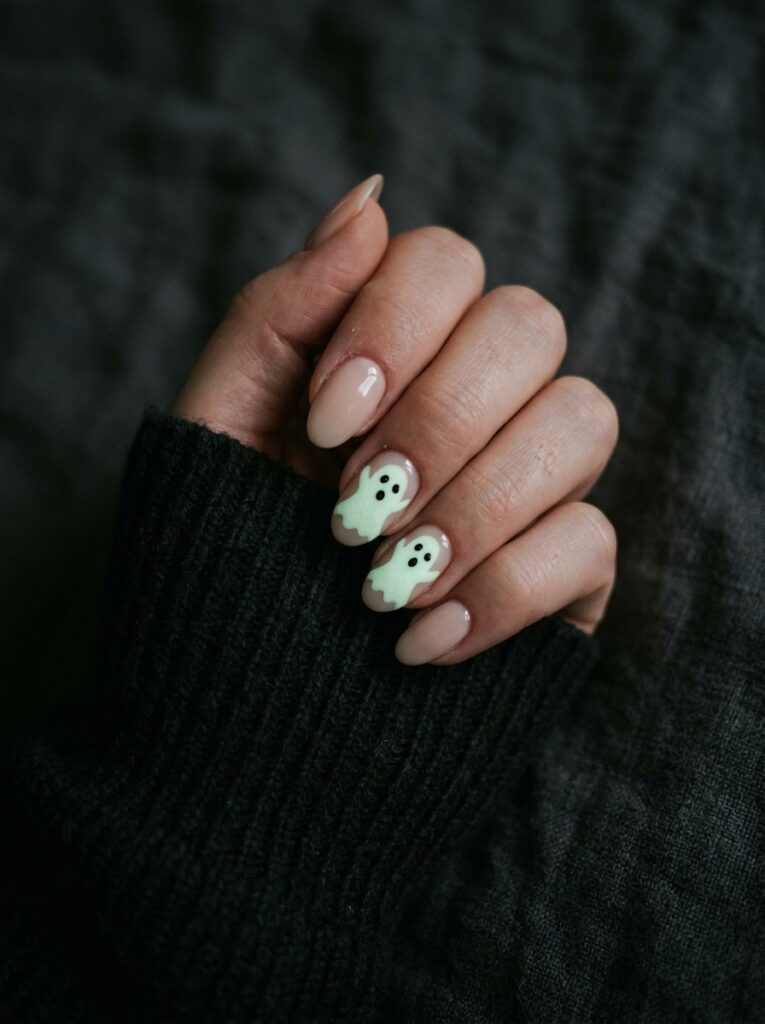
Glow-in-the-dark ghost nails look simple during the day and more dramatic at night.
Start with a pale base, then paint small white ghosts over glow polish. You can also use glow polish only for the eyes, outline, or background.
This idea works well for Halloween parties, night events, and trick-or-treating. It can also be used on press-ons if you do not want a long-term manicure.
Test the glow polish before finishing the full set. Some formulas may need several thin coats.
Best for: Parties, press-ons, gel nails, and night events.
Halloween Mix-and-Match Nails
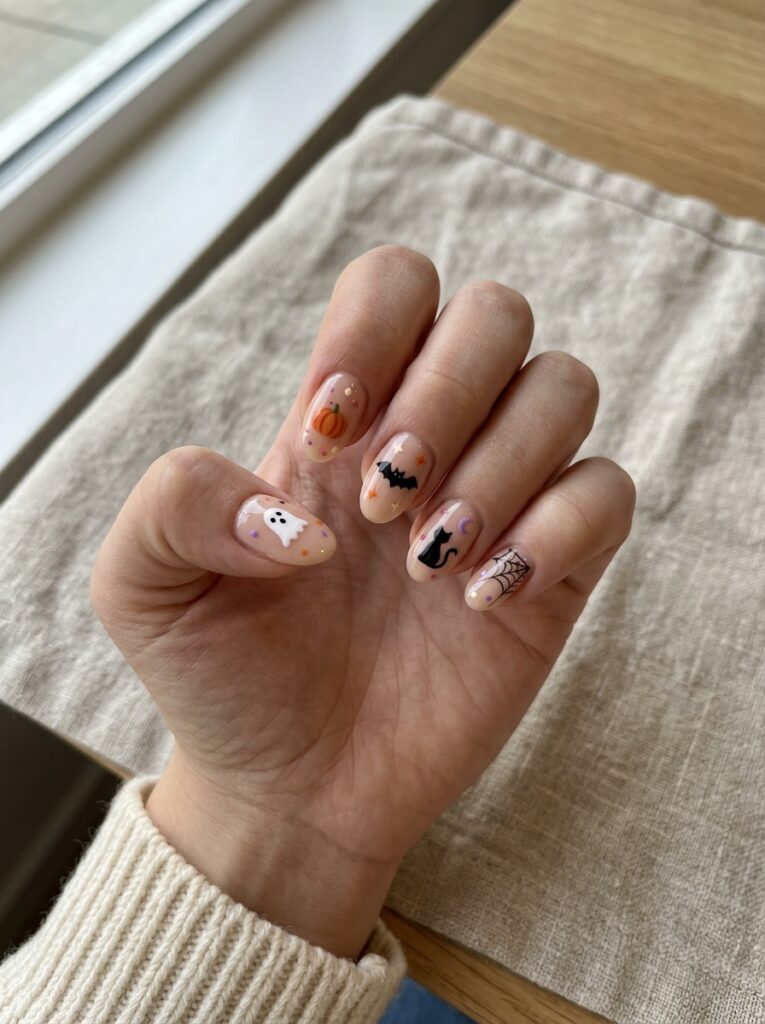
A mix-and-match manicure is useful when you cannot choose one Halloween theme.
Place a different symbol on each nail. You might use a ghost, pumpkin, bat, star, cat, candy, or web.
Keep the full set connected by repeating the same four or five colors. Orange, black, cream, purple, and pink work well together.
Use the same nude base on every nail to stop the set from looking messy. You can also repeat small dots or stars between the main designs.
Best for: Medium or long nails, salon visits, and bold nail lovers.
Mini Candy Corn Nails
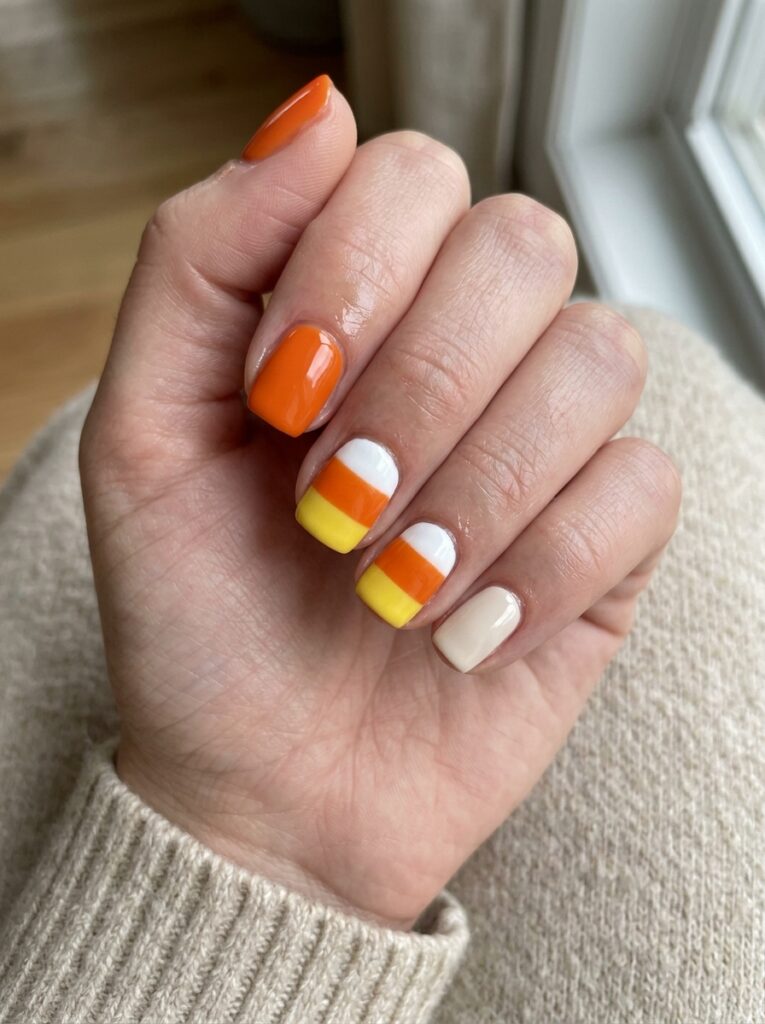
Candy corn nails bring bright color to a Halloween manicure. Use white, orange, and yellow polish in clean stripes.
You do not need the pattern on every nail. Try candy corn stripes on two accent nails and use solid orange or cream on the rest.
This design looks best when the color blocks are even. Nail tape can help you create cleaner lines at home.
For a lighter version, paint only the tips in white, orange, and yellow. Candy corn French tips look playful without covering the whole nail.
Best for: Short nails, colorful outfits, and easy DIY manicures.
Orange and Black Checkerboard Nails
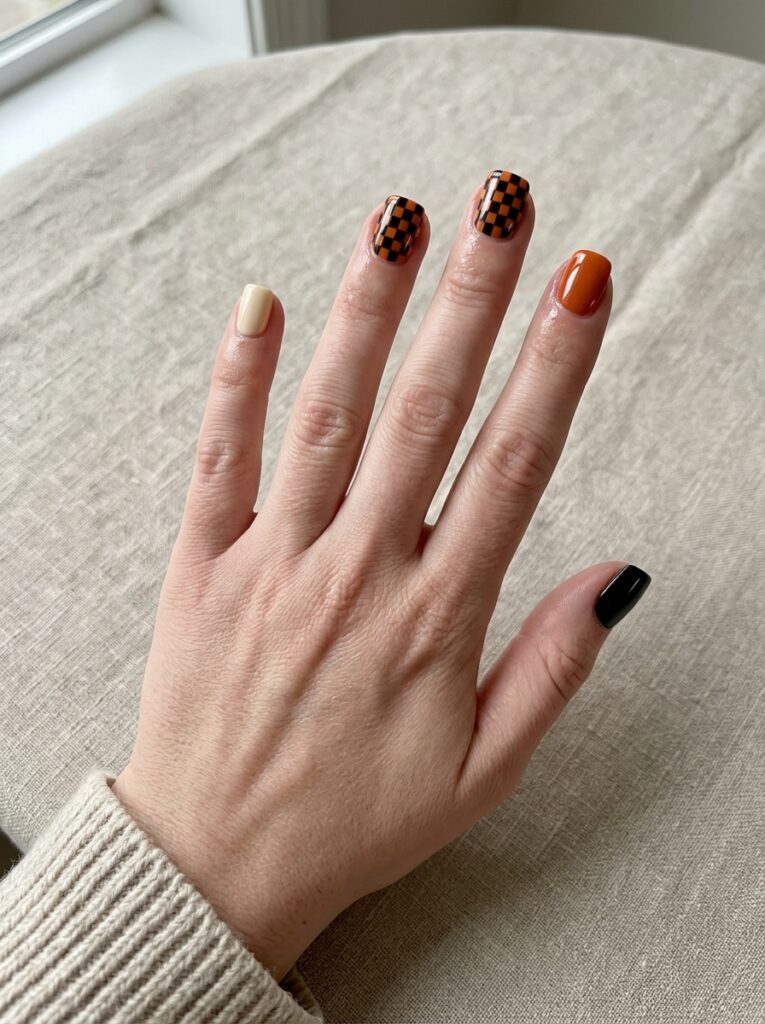
Orange and black checkerboard nails feel festive even without ghosts or pumpkins.
Use the pattern on one or two accent nails. Paint the other nails solid black, orange, or cream to keep the set balanced.
Small checks work better on short nails. Larger squares are easier to see on medium or long nails.
Use nail tape if you want cleaner blocks. You can also place a tiny smiling ghost over one checkerboard nail for a fun extra detail.
Best for: Square nails, retro outfits, and bold Halloween colors.
Pastel Monster Mix
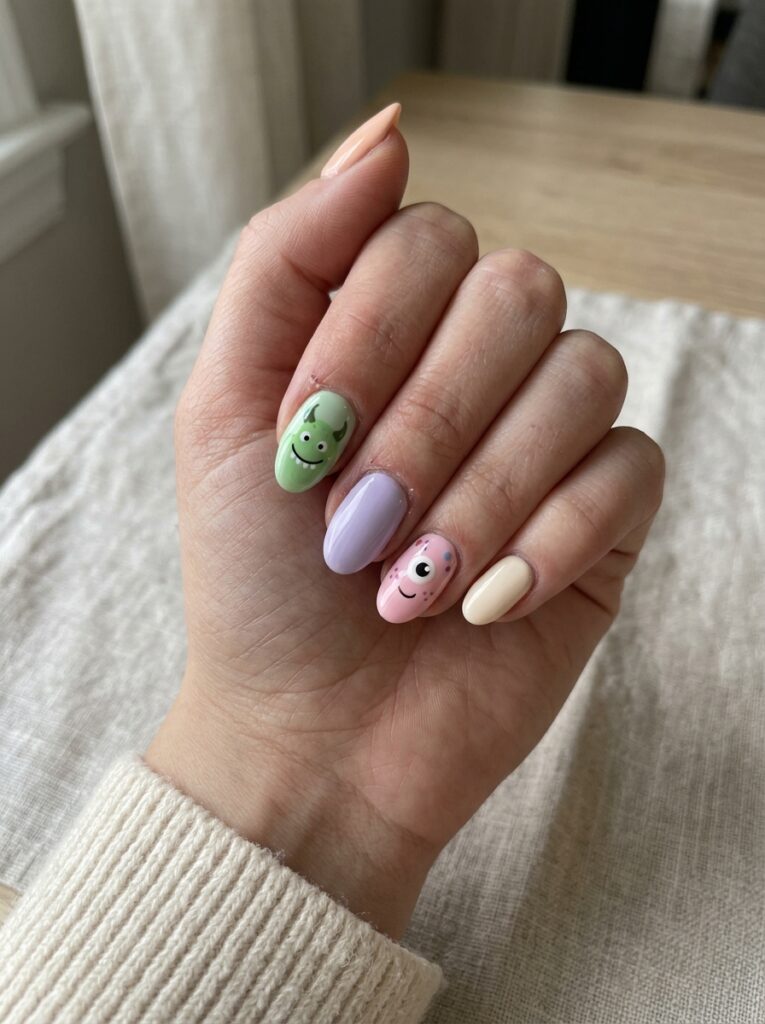
A pastel monster manicure lets you use several colors without making the set feel too dark.
Choose soft green, lavender, peach, pink, and cream. Add one friendly monster face to each accent nail. You might use a one-eyed creature, a smiling green face, or a tiny furry monster.
Keep the facial details simple so the set stays neat. Repeat the same colors across the nails to help the designs feel connected.
For a less busy look, use only two monster designs and keep the remaining nails solid.
Best for: Medium or long nails, colorful styles, and character art.
Pastel Pink Ghost Nails
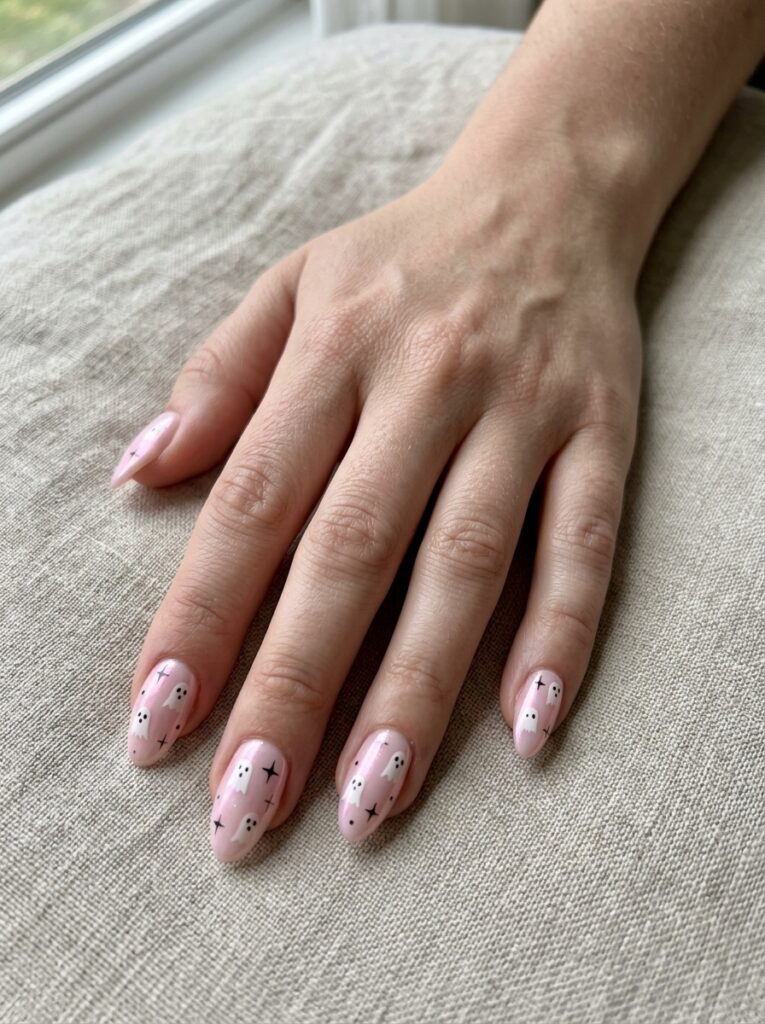
Pastel pink ghost nails are a good choice when you want Halloween art that still feels soft and feminine.
Use a pale pink base with white ghosts, tiny black stars, and small dots. The pink shade changes the mood of the manicure and makes the ghosts look sweeter.
This style works well on almond, oval, and medium-length nails. A glossy finish keeps it fresh, while a pink chrome top coat makes it feel more polished.
You can also add one glitter accent nail. Keep the glitter fine so it does not hide the ghost details.
Best for: Pink outfits, almond nails, and pastel nail lovers.
Polka-Dot Halloween Nails
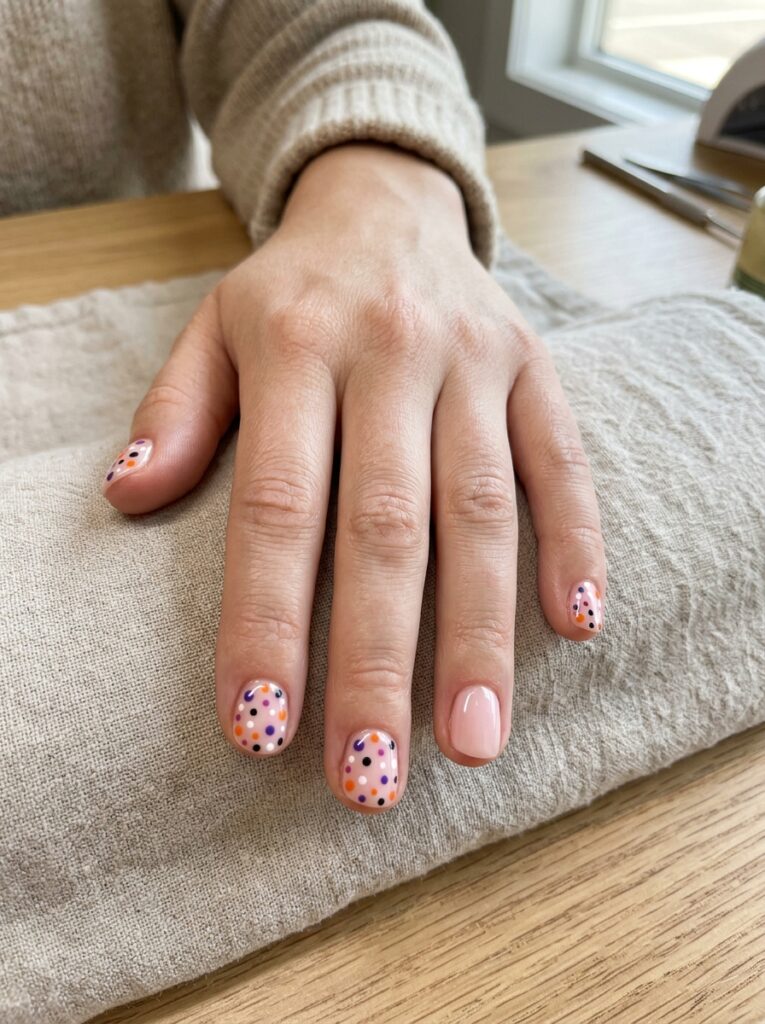
Polka-dot Halloween nails are easy, fast, and suitable for very short nails.
Use a nude, cream, or pale pink background. Add dots in orange, black, purple, and white. Change the size of the dots to make the pattern more interesting.
A dotting tool works best, but a toothpick or bobby pin can also work. Let each color dry before adding dots on top.
Keep one or two nails solid to give the pattern some visual rest. You can also add a tiny pumpkin or ghost on the ring finger.
Best for: Very short nails, beginners, and at-home manicures.
Pumpkin French Tips
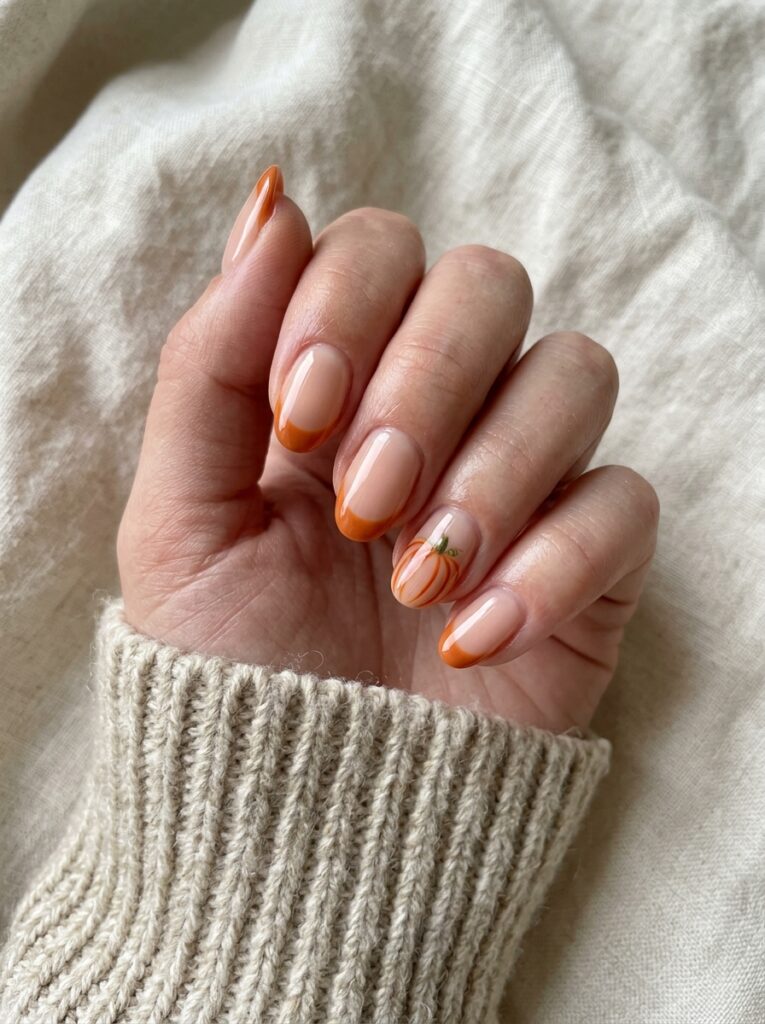
Pumpkin French tips give a familiar nail style a seasonal update.
Start with a clear, nude, or milky base. Replace the usual white tip with a curved orange section. Add thin pumpkin lines and one tiny green stem on selected nails.
This design works on square, oval, and almond shapes. It looks detailed, but you do not need art on every nail.
Alternate pumpkin tips with plain orange tips for a cleaner set. A glossy top coat can make the orange color look brighter.
Best for: Salon manicures, minimal Halloween looks, and medium nails.
Smiling Pumpkin Accent Nails
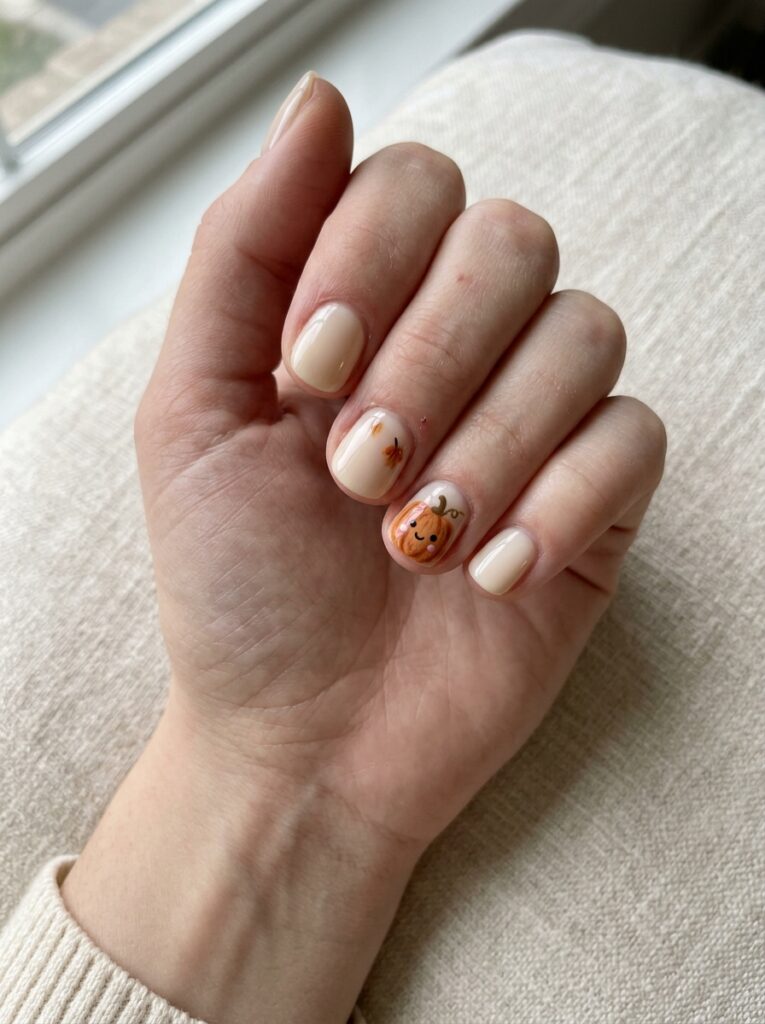
Smiling pumpkin nails give you a classic Halloween look without making the manicure feel scary. Start with cream, beige, pale peach, or soft orange polish.
Add one or two warm orange pumpkins with curved stems and friendly faces. Keep the other nails plain so the pumpkins stand out.
This design looks especially nice on short round or oval nails. It also works well with fall outfits in brown, cream, rust, or green.
For a softer version, replace bright orange with pastel peach. Add tiny pink cheeks to the pumpkin faces for an extra playful detail.
Best for: Natural nails, fall outfits, and beginner nail art.
Smiling Spider and Web Nails
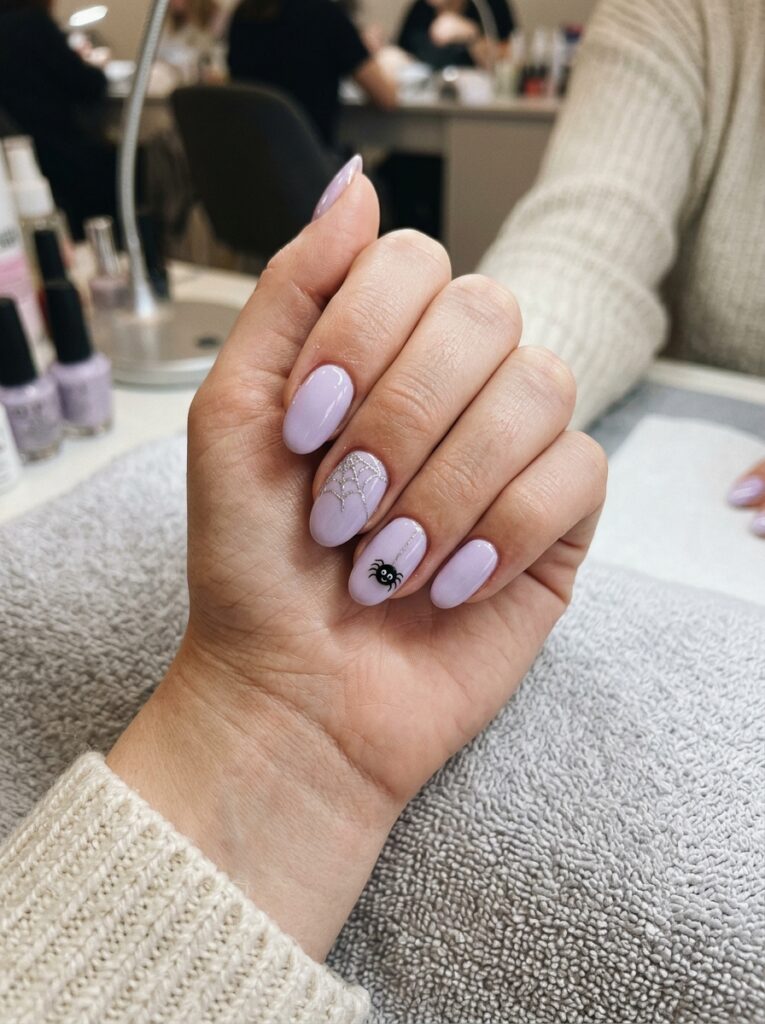
Spider webs do not have to look creepy. A round cartoon spider can make the design feel light and funny.
Use a nude, lavender, or pale grey base. Draw thin web lines on one or two nails. Add a small round spider with tiny eyes or a curved smile.
Keep the spider simple. Long legs and realistic details may make it look scarier than you want.
Use silver glitter polish for the web lines if you want a brighter finish. You can also place the web near the corner of the nail instead of covering the full surface.
Best for: Medium nails, playful styles, and salon art.
Strawberry Ghost Nails
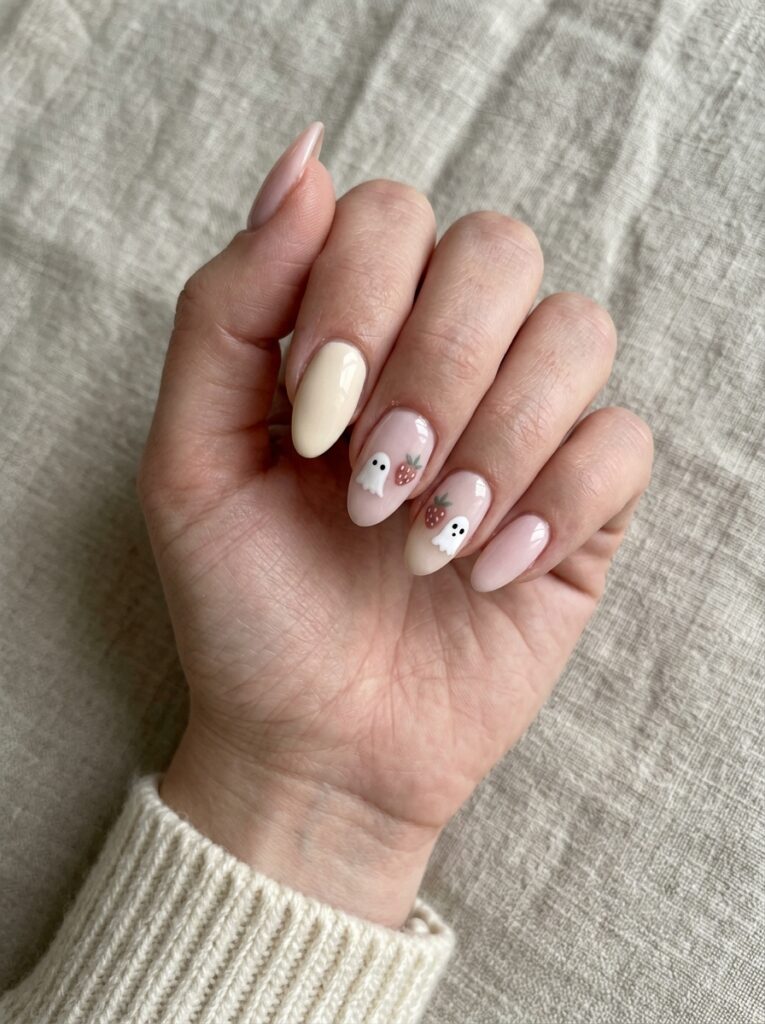
Strawberry ghost nails mix Halloween art with a sweet fruit theme.
Use pale pink, cream, soft red, and muted green. Add small strawberries beside tiny white ghosts. The mix feels fresh and less expected than a classic orange-and-black manicure.
This idea works best on medium almond nails because the extra space helps both designs stay clear.
For a fun accent, give one ghost a strawberry-shaped trick-or-treat bag. Keep the other nails simple with dots, leaves, or solid pink polish.
Best for: Pink styles, detailed salon art, and unique Halloween nails.
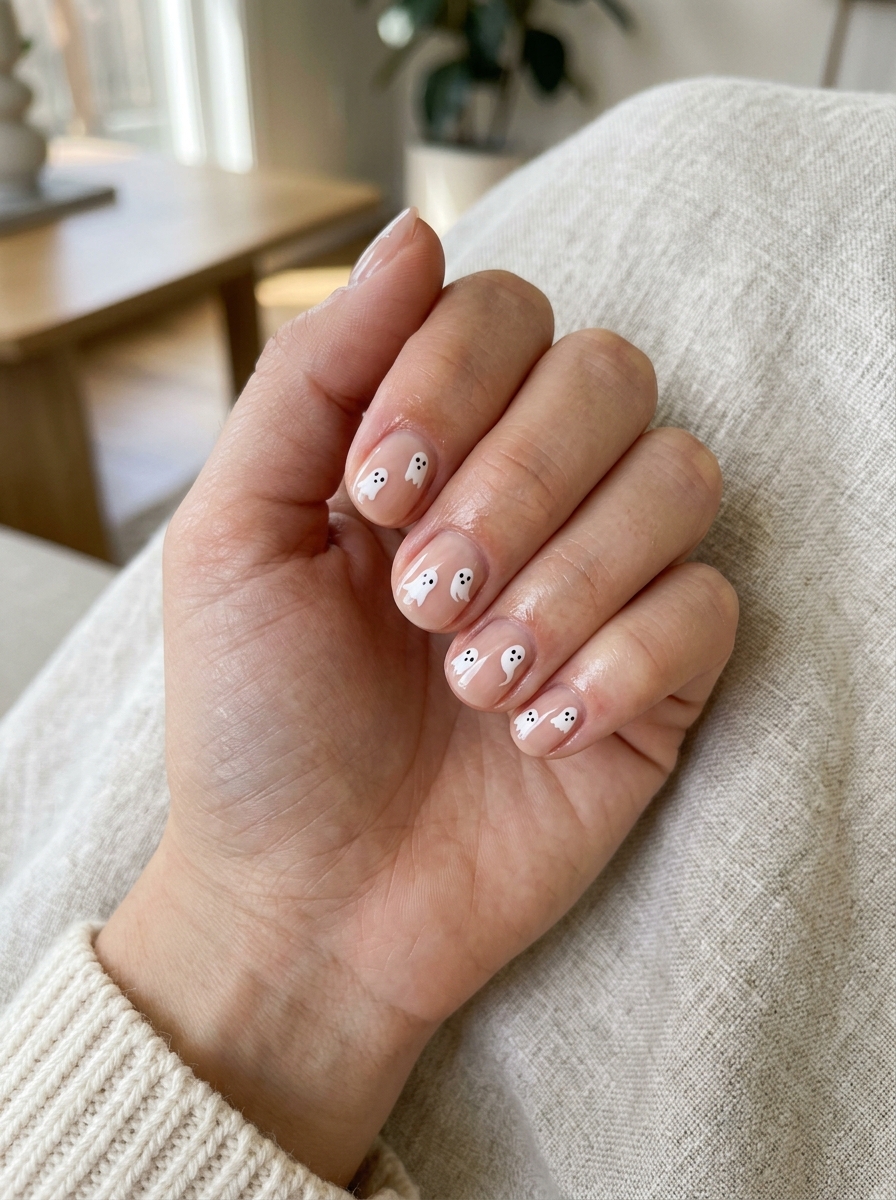
Tiny Ghosts on a Nude Base
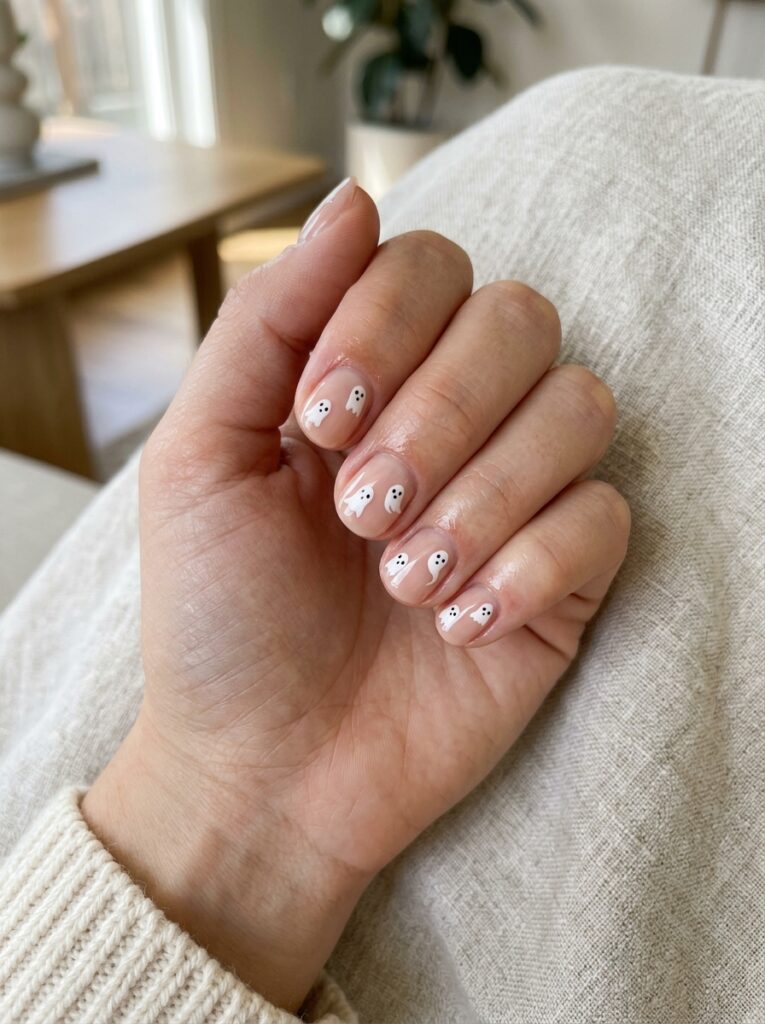
A sheer nude or pale pink base makes tiny white ghosts look soft and clean. Add small black eyes and change the shape of each ghost so the set feels playful.
This look works well on short or medium nails because the open background keeps the design from feeling crowded. It is also one of the easiest simple Halloween nail ideas for beginners.
Use one ghost on the ring finger for a subtle look. You can also place one tiny ghost on every nail and finish with a glossy top coat.
Best for: Short nails, beginners, work, and simple outfits.
Tiny Halloween Stickers on Short Nails
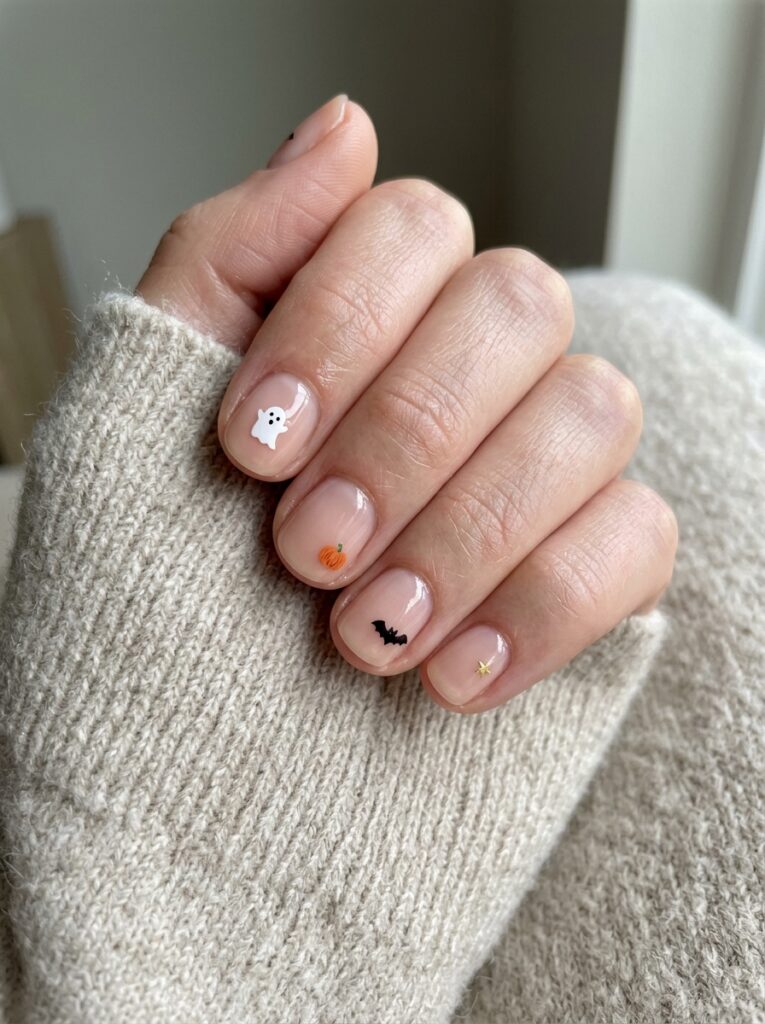
Halloween nail stickers make detailed designs much easier.
Choose small ghosts, pumpkins, bats, stars, or candies. Place one sticker near the tip, side, or cuticle instead of filling the whole nail.
This approach works well on very short nails because each small image stays clear. It also helps both hands match when freehand painting feels hard.
Press the edges down firmly and seal the sticker with a top coat. A matte finish can make the decals look painted on, while gloss adds more shine.
Best for: Beginners, short nails, and last-minute manicures.
Witch Hat and Sparkle Nails
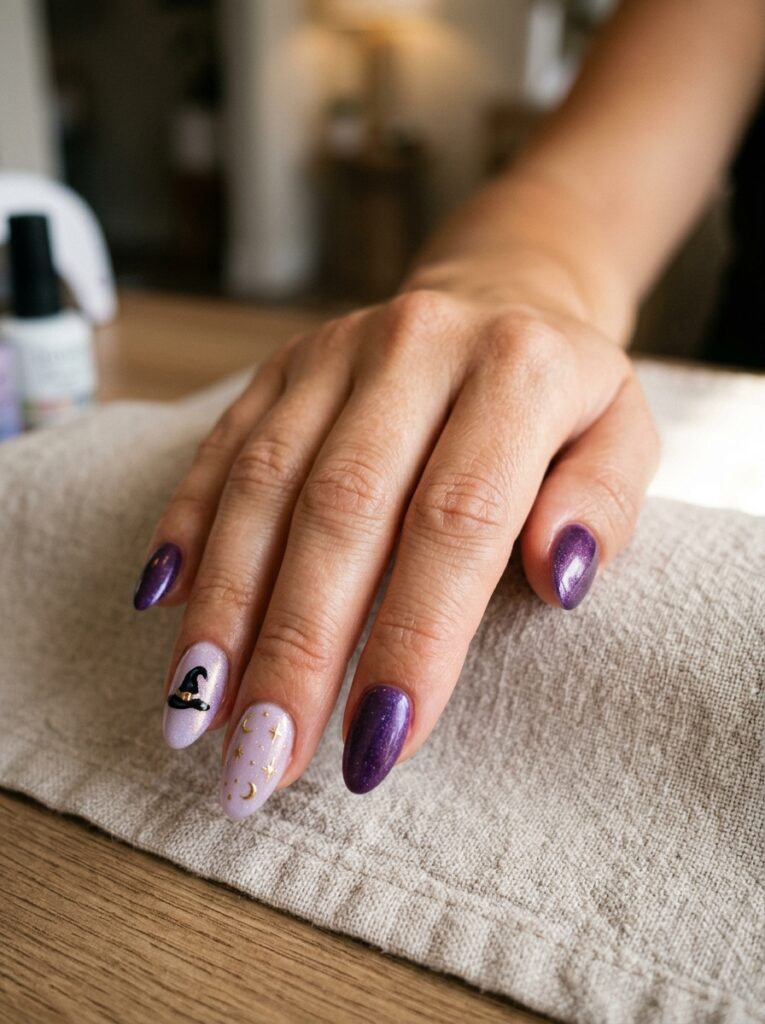
Witch hat nails can look soft and magical when you pair them with stars and moons.
Use a deep purple, pale lavender, or sheer nude base. Add tiny curved hats, gold stars, and small crescent moons. Avoid making the hats too sharp or large.
This style works well on almond nails because the shape matches the pointed hat detail. A velvet or cat-eye purple polish can add depth without adding more art.
For an easier version, use one witch hat accent nail and add small stars to the rest.
Best for: Almond nails, purple palettes, and magical themes.
The Best Easy Halloween Nails for Each Nail Length
You do not need long acrylic nails to wear Halloween art. The right size and placement matter more than length.
Easy Halloween nails for short nails work best when the shapes are bold and easy to read. Tiny ghosts, mummy eyes, dots, black cat ears, and small pumpkins fit well without making the nail look crowded.
Medium nails give you more room for thin webs, bats, lettering, and mixed patterns. You can also add two or three small details to each nail.
Long nails suit larger monster faces, witch hats, checkerboards, and full mix-and-match scenes. Still, you do not need to fill every open space.
| Nail Length | Designs That Work Well |
| Very short | Dots, tiny ghosts, stickers, black tips |
| Short | Pumpkins, cats, mummy faces, candy corn |
| Medium | Spider webs, bats, lettering, mixed symbols |
| Long | Monsters, witch art, detailed character sets |
A small, well-placed design often looks cleaner than several tiny details packed together.
Tools You Need for Easy DIY Halloween Nail Art
You do not need a large professional kit for basic DIY Halloween nail art.
Start with a base coat and a few useful polish colors. Black, white, orange, and a neutral shade can create many of the designs in this article.
A fine liner brush helps with web lines, whiskers, letters, and pumpkin details. A dotting tool is useful for eyes, stars, cheeks, and polka dots. A toothpick can work when you do not own a dotting tool.
Stickers and decals are helpful when you want both hands to match. They also save time when small art feels difficult.
You may also need:
- A cleanup brush
- Nail polish remover
- A glossy top coat
- A matte top coat
- A makeup sponge for gradients
- Glow polish
- Nail tape
- Press-on tabs or nail glue
Apply thin layers of polish. Thick coats take longer to dry and may smudge when you add details.
Let the base color dry before drawing characters. Finish by sealing the design with top coat, including the edges of stickers.
Start with one accent nail. Add more art only after you feel happy with the first design.
How to Make Halloween Nails Look Easy, Not Scary
Small choices can change the full mood of a Halloween manicure.
Use rounded shapes instead of long, sharp points. Give ghosts, spiders, pumpkins, and skeletons small eyes, curved smiles, or pink cheeks.
Color also matters. Replace dark red with pink, peach, lavender, orange, or cream. Use black as a small accent instead of covering every nail.
Leave some of the base visible. This open space helps the manicure feel lighter and cleaner.
You can also add:
- Tiny hearts
- Stars
- Candy shapes
- Small dots
- Fine glitter
- Pastel colors
- Glossy highlights
| Scarier Detail | Easyr Choice |
| Sharp teeth | Small smile |
| Dark red | Pink or orange |
| Realistic spider | Round cartoon spider |
| Full black nails | Black details on nude |
| Jagged shapes | Rounded shapes |
| Heavy artwork | Open space |
A simple formula works well: choose a pale base, add one rounded Halloween character, then finish with two small sparkle details.
Pick Your Favorite Halloween Manicure
A Halloween manicure can feel playful and seasonal without becoming dark or hard to wear.
You can keep things simple with tiny ghosts, dots, cat ears, or pumpkin tips. You can also choose pastel monsters, glowing details, checkerboards, or a full mix-and-match set.
Match the design to your nail length and skill level. Change the colors when needed. One accent nail can be enough when you want a quieter look.
Save your favorite design now so your October manicure is ready before Halloween.