Finding a nail design that feels Easy, trendy, and right for your age should not be difficult. Yet many designs online are too detailed, too expensive, or made for very long nails.
These Cute nails for teenagers include simple, colorful, and stylish options for school, weekends, birthdays, holidays, and special events. Some designs take only a few basic tools. Others may look better when done by a nail artist.
You will find ideas for short, medium, and long nails. There are soft pastel looks, bold patterns, tiny flowers, glitter details, and easy French tips. You can also change the colors to match your clothes, mood, or favorite season.
The goal is not to copy every detail. Choose the parts you like and make the design feel like your own. You will also find simple nails for teenagers who want a Easy look without a lot of upkeep.
How to Choose Cute Nails That Fit Your Life
The best Cute nail ideas for teens should match your daily routine. A design may look great in a photo, but it also needs to feel comfortable.
Start by checking your school rules. Some schools allow bright colors and small nail art. Others may ask students to keep their nails short and neutral.
Your daily activities matter too. Short round or squoval nails are often easier for typing, sports, music, and schoolwork. Longer almond nails can work well for birthdays, dances, and other events, but they may need more care.
Think about how much time you want to spend on your nails. A solid pastel color is easy to fix at home. Detailed art, gems, and chrome finishes may take more skill.
It also helps to choose colors that work with several outfits. Pale pink, lavender, light blue, white, and nude shades are easy to wear. Brighter colors can make a simple design feel more playful.
A useful formula is:
Short nails + soft colors + one accent design = an easy school-friendly manicure.
The best simple nails for teenagers are comfortable, easy to maintain, and close to your personal style.
Black and Pink Nails

Black and pink nails are a good choice if you like Easy designs with a stronger edge. Use black on some nails and pink on the others.
You can add hearts, swirls, stars, checks, or French tips. Leave a few nails solid to stop the set from looking too busy.
Matte black with glossy pink details creates an interesting contrast. Bright pink feels bold, while pale pink keeps the look softer.
Best for: Parties, weekends, and concerts
Difficulty: Medium
Best length: Short or medium
Blue Daisy Nails
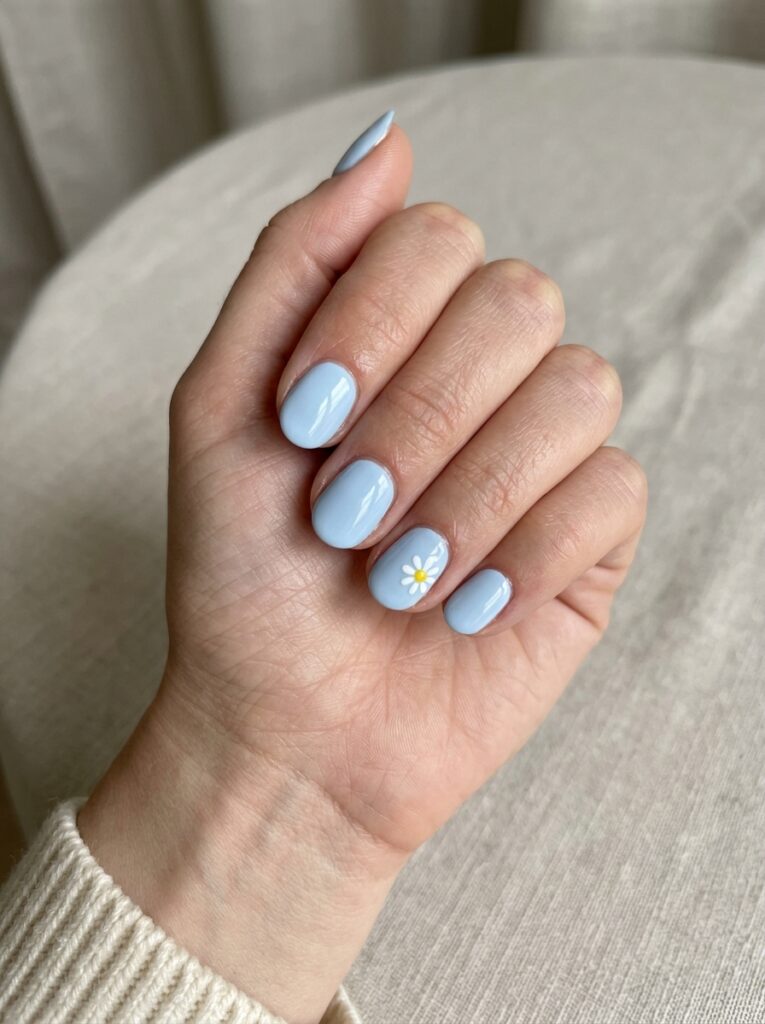
Blue daisy nails mix soft color with simple flower art. Use pale blue polish as the base, then add small white daisies with yellow centers.
You can place one flower near the corner of each nail. Another option is to decorate only the ring fingers and keep the other nails solid blue.
Short oval and squoval nails work well for this design. A dotting tool makes the petals easier to shape.
Best for: Spring, school breaks, and casual days
Difficulty: Easy to medium
Best length: Short
Butterfly Accent Nails

Butterfly accent nails add a pretty detail without covering the whole manicure. Use butterfly stickers, decals, or small painted wings on one or two nails.
Pink, lilac, white, and clear bases all work well. Smaller butterflies fit short nails better and look less crowded.
Keep the other nails plain or add thin French tips in a matching shade.
Best for: Spring, birthdays, and vacations
Difficulty: Easy with stickers
Best length: Short or medium
Checkerboard Nails

Checkerboard nails are bold, creative, and easy to change with color. Black and white create a classic pattern. Pastel pink and lavender make it softer.
The design can look busy when used on every nail. Try checkerboard art on two accent nails and paint the rest in a matching solid shade.
Nail wraps are useful if painting small squares feels difficult.
Best for: Weekends, concerts, and bold outfits
Difficulty: Medium
Best length: Short or medium
Cherry Nail Art

Cherry nails have a Easy retro feel. Use a pale pink, white, nude, or clear base. Then add tiny red cherries with thin green stems.
Place the cherries on two or three nails. Keep the other nails plain or add simple red French tips.
A small dotting tool can help you make the round fruit. Use a thin brush for the stems.
Best for: Summer, vacations, and retro outfits
Difficulty: Medium
Best length: Short or medium
Cloud Nails
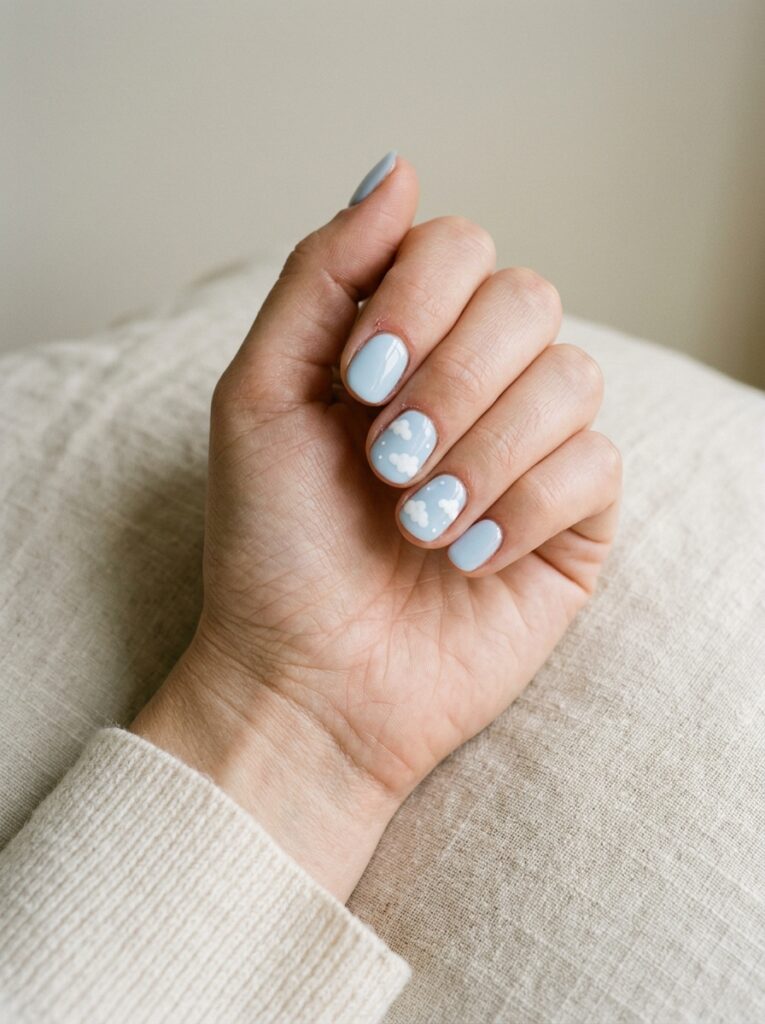
Cloud nails create a soft and dreamy look. Start with pale blue, pink, or lavender polish. Add small white clouds using grouped dots.
You can leave the clouds simple or add a few tiny stars. Too many extra details may make the design look crowded.
A glossy top coat gives the clouds a smooth finish. This design works well even when the clouds are not exactly the same shape.
Best for: School breaks, spring, and relaxed outfits
Difficulty: Easy to medium
Best length: Short or medium
Colorful French Tips
Colorful French tips give a classic manicure a fun update. Instead of white tips, use pink, blue, purple, green, or orange.
You can use the same shade on every nail or choose a different color for each tip. Thin lines look softer and may work better for school.
This design looks good on short square, round, or almond nails. Nail guides or striping tape can help you create cleaner lines at home.
Best for: School, weekends, and casual events
Difficulty: Easy to medium
Best length: Short or medium
Glitter Accent Nails

Glitter accent nails add sparkle without covering every nail. Paint most nails in one solid shade, then apply glitter to one or two nails on each hand.
Silver glitter works well with blue, pink, or black. Gold looks good with beige, cream, or dark red. Holographic glitter can make pastel colors feel more playful.
A peel-off base coat may make glitter polish easier to remove.
Best for: Birthdays, parties, and school dances
Difficulty: Easy
Best length: Any practical length
Lavender Swirl Nails

Lavender swirl nails look creative without needing perfect lines. Use lavender with white, clear, or pale pink polish.
Paint soft curved lines across a few nails. Each nail can have a different swirl pattern, so small mistakes will not stand out.
A thin nail-art brush works best. Use only two or three colors to keep the design balanced.
Best for: Birthdays, spring, and casual events
Difficulty: Medium
Best length: Medium
Minimalist Flower Nails

Minimalist flower nails are one of the easiest school-friendly styles. Start with a nude, clear, or pale pink base. Add one small flower to each accent nail.
White, yellow, blue, and pink flowers all work well. Thin petals create a soft look, while round petals feel more playful.
You can also use tiny flower stickers. This is one of the best simple nails for teenagers who want a design that is easy to wear.
Best for: School, spring, and everyday outfits
Difficulty: Easy
Best length: Short
Neon Tip Nails
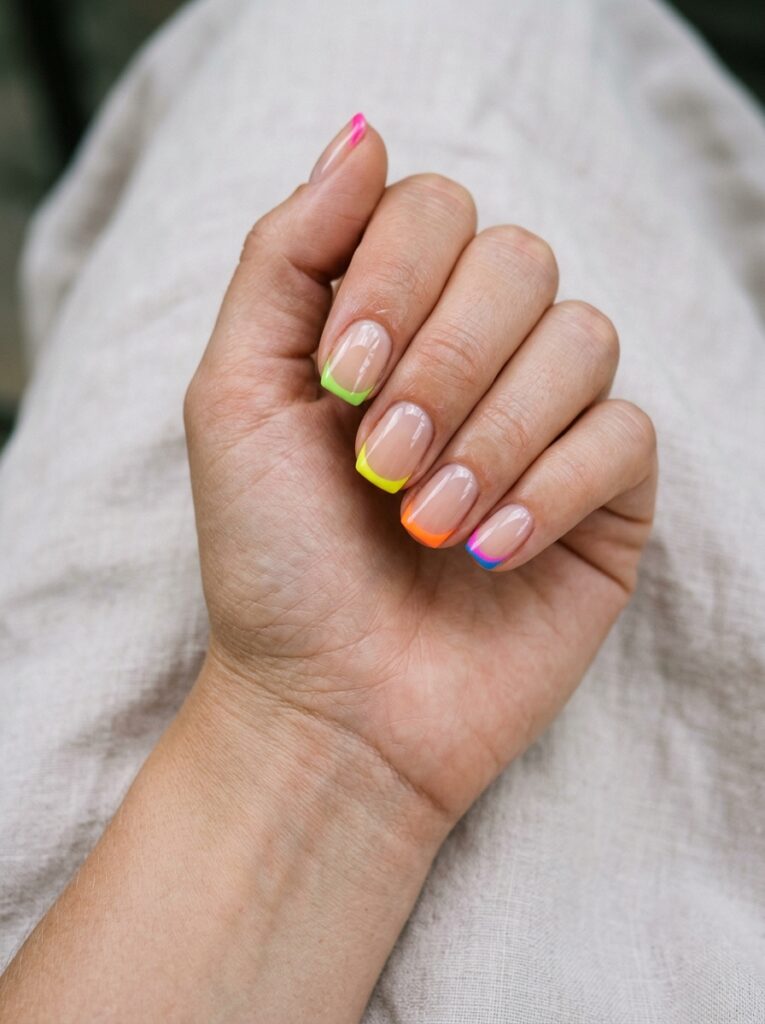
Neon tip nails add bright color without covering the full nail. Start with a clear or nude base, then add a thin neon line along each tip.
Try neon pink, green, yellow, or orange. You can use one shade on every nail or mix several colors.
Keep the tip line narrow if you want a more wearable look. Bright tips are also easier to match than full neon nails.
Best for: Summer, vacations, and festivals
Difficulty: Medium
Best length: Short or medium
Ombre Pink Nails

Pink ombre nails blend pale pink into white or clear polish. The soft color change makes the nails look smooth and polished.
You can create the effect at home with a small makeup sponge. Apply thin layers until the colors blend. Clean the skin around the nail before adding top coat.
A tiny gem on one accent nail can make the design feel more special.
Best for: Prom, dances, birthdays, and graduation
Difficulty: Medium
Best length: Medium
Pastel Rainbow Nails
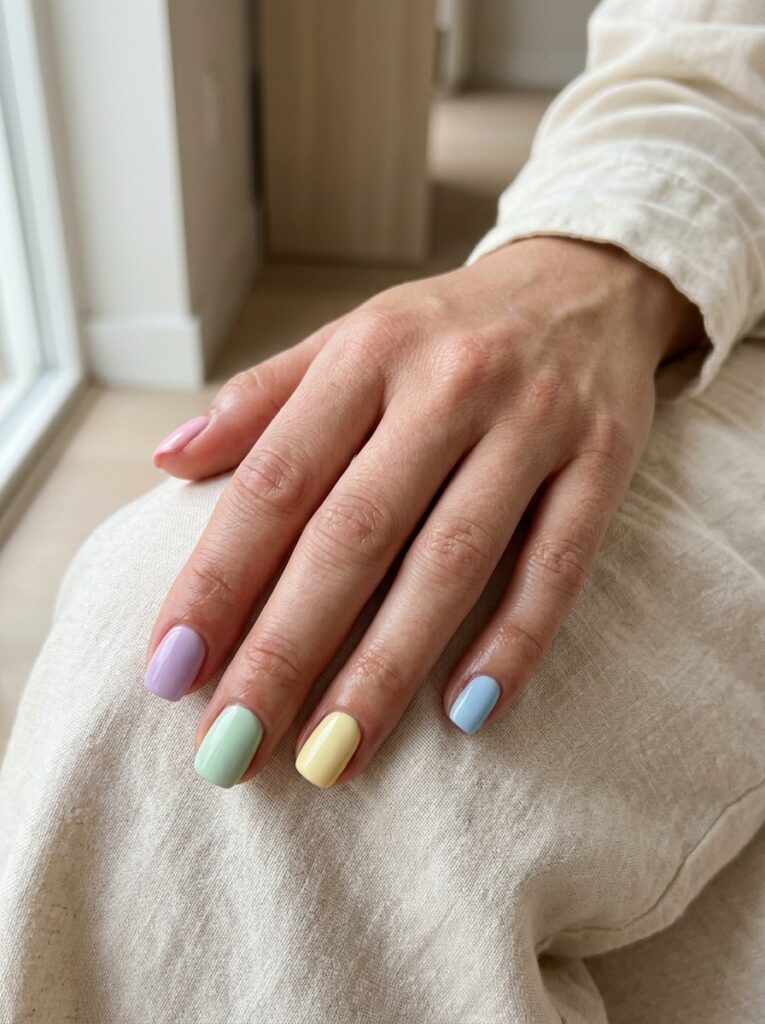
Pastel rainbow nails are bright without feeling too bold. Paint each nail a different soft shade, such as pink, lavender, mint, pale yellow, or baby blue.
This look works well on short round or squoval nails. It is also easy to create because you do not need to paint any detailed art.
Add a glossy top coat to make the colors look smooth and fresh. You can also use only three pastel shades if five colors feel too busy.
Best for: Spring, birthdays, and school breaks
Difficulty: Easy
Best length: Short or medium
Pink Chrome Nails
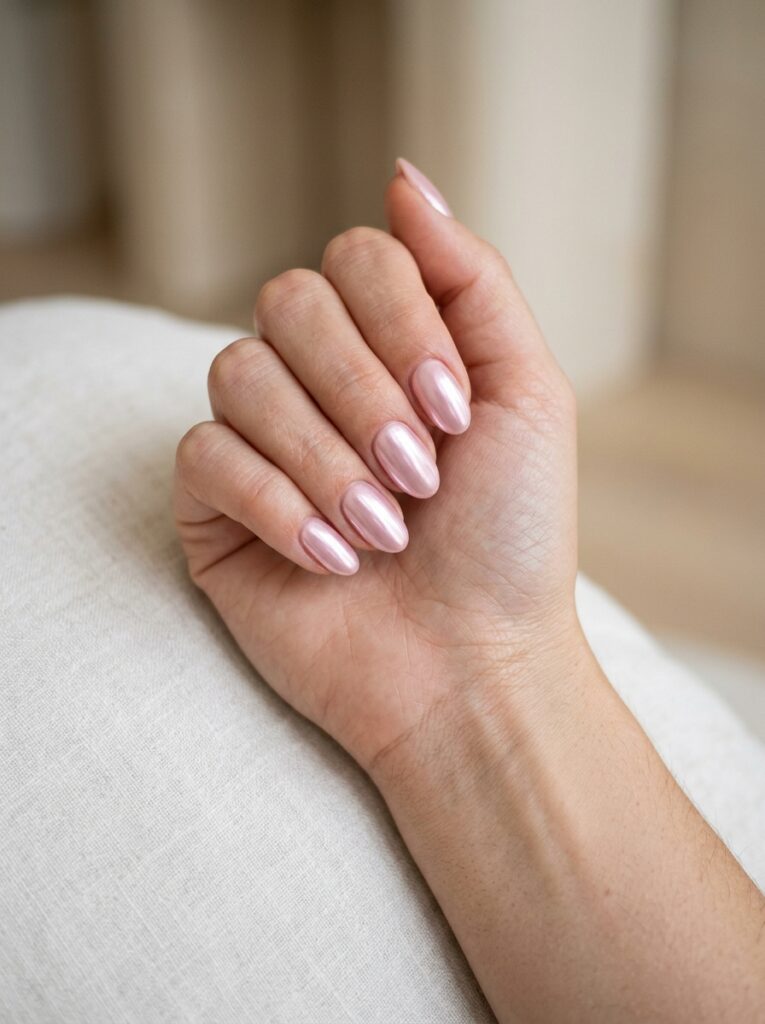
Pink chrome nails have a soft, shiny finish that catches the light. A pale pink base keeps the look pretty without making it feel too heavy.
Chrome powder is often used over gel polish, so this style may be easier to get at a salon. For a simpler home version, use pearly or metallic pink polish.
Keep the design smooth and skip extra gems if you want the chrome shine to stay in focus.
Best for: Prom, dances, birthdays, and parties
Difficulty: Salon-friendly
Best length: Medium
Polka Dot Nails

Polka dot nails are simple enough for beginners. Choose one base color, then add small dots with a bobby pin, toothpick, or dotting tool.
White dots look Easy over pastel pink, blue, or lavender. You can place the dots in neat rows or scatter them across the nail.
Try the pattern on one or two accent nails first. This makes the design faster and easier.
Best for: School, weekends, and beginners
Difficulty: Easy
Best length: Short
Short Nude Nails With Tiny Gems

Short nude nails with gems feel simple but still special. Use pale pink, beige, cream, or milky nude polish as the base.
Add one small gem near the cuticle on one or two nails. Avoid adding large stones to every finger because they may catch on clothes or hair.
Short round or squoval nails make this style easier to manage.
Best for: School dances, birthdays, and family events
Difficulty: Easy
Best length: Short
Smiley Face Nails
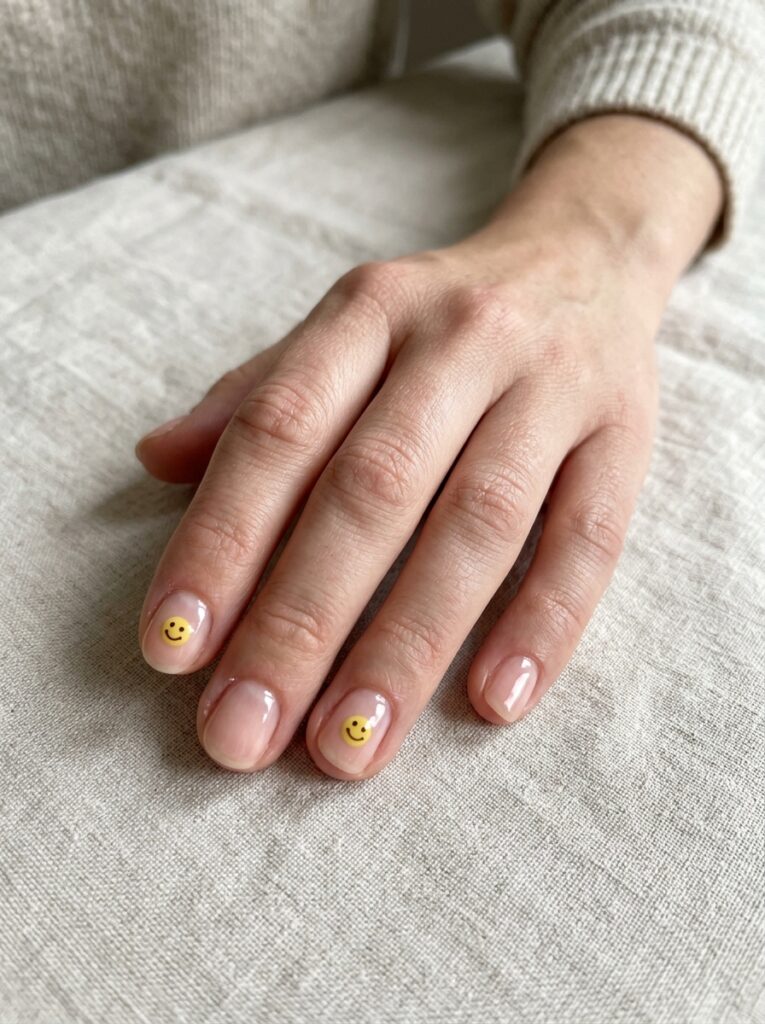
Smiley face nails are playful and easy to customize. Use a clear, pale, or colorful base, then add small smiley faces to one or two nails.
Yellow smiley faces create a cheerful look. Black smiley faces feel more modern. You can also mix them with dots, stars, or simple French tips.
Use nail stickers for a neat result. A dotting tool can also help you create the eyes and mouth.
Best for: Weekends, vacations, and casual outfits
Difficulty: Easy
Best length: Short or medium
Starry Night Nails

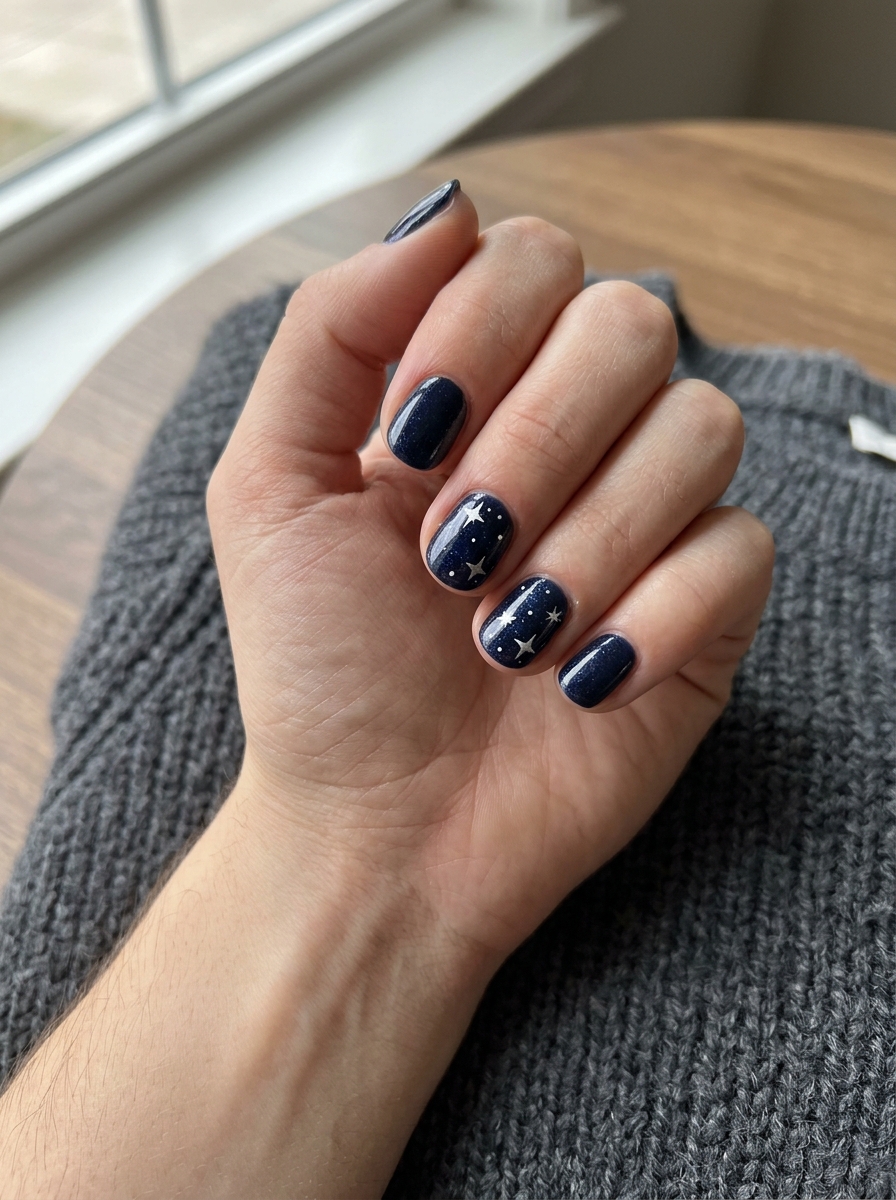
Starry night nails use dark shades, tiny stars, and small dots to copy the look of the night sky. Navy, black, lavender, and deep blue all work well.
Add white or silver stars on selected nails. Small dots can look like distant stars. A light shimmer top coat adds extra shine without hiding the design.
Keep the star shapes small for a clean result.
Best for: Winter, evening events, and parties
Difficulty: Medium
Best length: Short or medium
Strawberry Nail Design
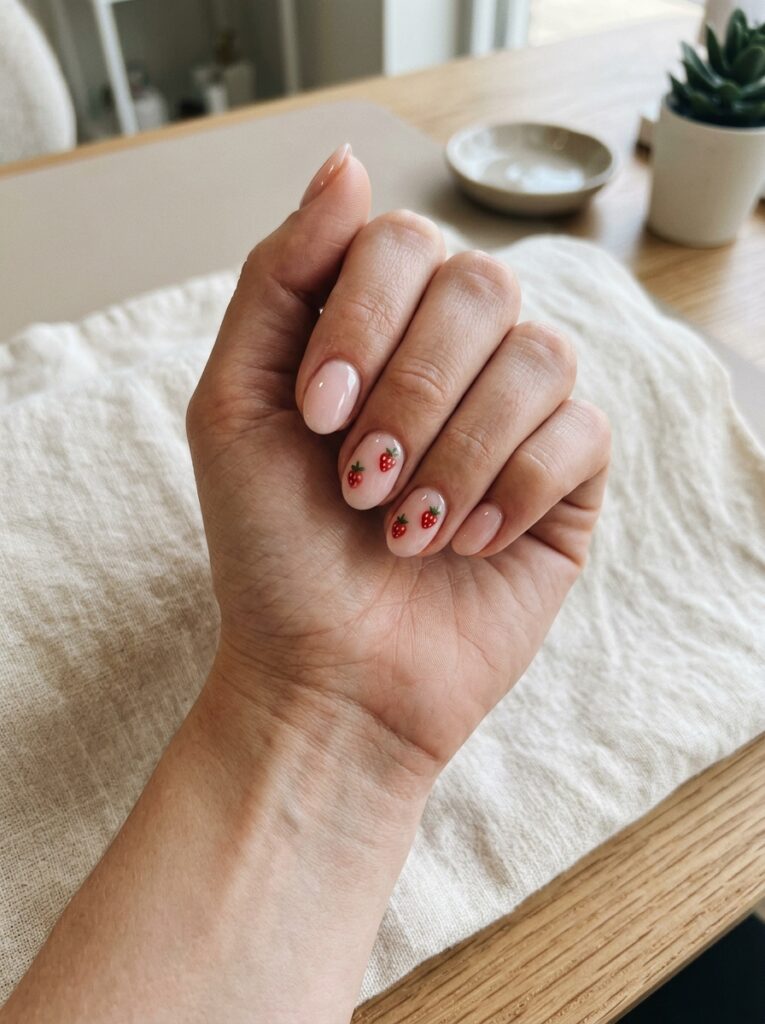
Strawberry nails are a Easy choice for warm weather. Start with a pale pink, white, or clear base. Add tiny red strawberries with small green leaves.
You can paint fruit on every nail, but two accent nails often look cleaner. Keep the strawberries small so the design does not feel crowded.
Detailed fruit can be hard to paint with a normal polish brush. Try decals or stickers if you want a faster option.
Best for: Spring, summer, and vacations
Difficulty: Medium
Best length: Short or medium
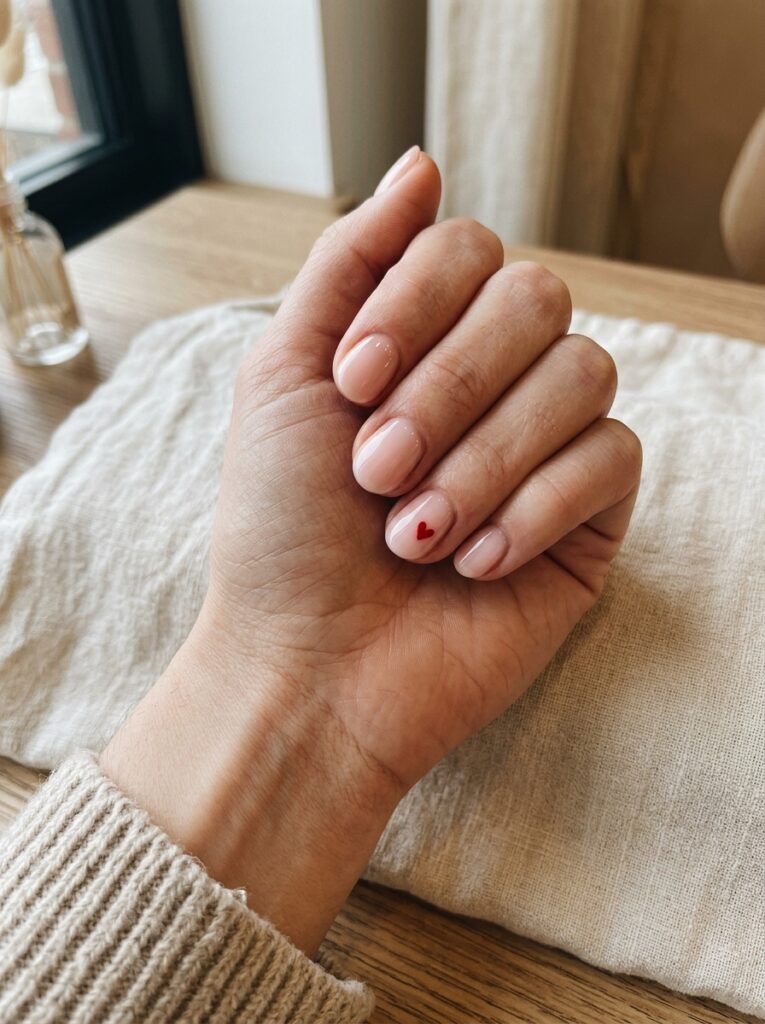
Tiny Heart Nail Art

Tiny heart nails feel sweet and simple. Start with a clear, nude, or pale pink base. Then add one or two small hearts on selected nails.
Red and pink hearts create a classic look. Black hearts feel a little bolder. White hearts look soft and clean.
You do not need to paint every nail. One heart on each ring finger can be enough. Heart stickers are also helpful if drawing small shapes feels hard.
Best for: School, birthdays, and Valentine’s Day
Difficulty: Easy
Best length: Short or medium
Which Nail Design Works Best for Each Occasion?
A good nail design should match the event and your daily needs. School nails for teenagers usually work best when they are short, clean, and easy to maintain.
Tiny flowers, small hearts, polka dots, nude shades, and thin French tips can add style without feeling too bold. Check your school rules before using long extensions, bright colors, or large gems.
For birthdays and parties, you have more room to try glitter, checkerboard patterns, smiley faces, or black and pink art. These designs feel fun in photos and can match a party outfit.
For formal events, prom nails for teens often use soft chrome, pink ombre, tiny gems, stars, or butterfly details. Choose a design that works with your dress instead of trying to match every color exactly.
| Occasion | Best Design Style | Suggested Length |
| School | Minimal flowers, hearts, or French tips | Short |
| Birthday | Glitter, chrome, or colorful art | Short to medium |
| Prom | Ombre, gems, or soft shine | Medium |
| Vacation | Neon colors and fruit art | Any practical length |
| Sports season | Solid polish or tiny accents | Short |
You can also change the colors without changing the full design. For example, use blue hearts instead of pink or pastel tips instead of neon ones.
Easy Ways to Recreate Teen Nail Designs at Home
You do not need professional skills to try easy nail art for teenagers. Start with simple patterns and basic tools.
First, clean your nails and remove old polish. Shape the edges gently with a nail file. Avoid filing back and forth too hard because this can make weak nails split.
Apply a thin base coat. This helps the polish go on more smoothly and may reduce staining from darker shades.
Next, apply two thin coats of color. Thick polish can take longer to dry and may form dents or bubbles.
Use simple tools for the design:
- A bobby pin for dots
- A toothpick for tiny hearts
- A makeup sponge for ombre
- Striping tape for French tips
- Stickers for flowers, stars, fruit, or butterflies
- A thin brush for swirls and stems
DIY teen nails are easier when you decorate only one or two accent nails. Paint the remaining nails in a matching solid color.
Let each layer dry before adding the next one. Finish with a top coat to add shine and protect the design.
Clean extra polish around your skin with a small brush or cotton swab dipped in remover. Work slowly. A simple design with clean lines often looks better than detailed art done in a rush.
Nail Care Tips That Help Teen Nails Stay Healthy
Nail care for teenagers should be simple and gentle. Healthy nails make every polish color and design look better.
Keep your nails clean and dry. Moisture trapped around damaged polish or extensions can cause problems. Wash your hands as usual, then dry around each nail.
Use hand cream and cuticle oil when the skin feels dry. Do not cut or push the cuticles too hard. Cuticles help protect the area where the nail grows.
Avoid peeling off gel polish. Peeling can remove thin layers from the natural nail and leave it weak. Ask a trained nail professional for help with gel or acrylic removal when needed.
Clean nail tools before using them. Do not share files, clippers, or cuticle tools unless they have been cleaned correctly.
Give your nails a break if they feel thin, sore, or damaged. Shorten them and avoid heavy extensions until they feel stronger.
Stop using a nail product if you notice itching, redness, swelling, pain, or a rash. Tell a parent or guardian and speak with a healthcare professional if the reaction does not improve.
Remember these basic rules:
- Do not peel off gel polish.
- Do not pull off loose extensions.
- Do not share dirty nail tools.
- Do not ignore pain or swelling.
- Do not keep using a product that irritates your skin.
Choose a Nail Design That Feels Like You
Easy teen nails do not need to be long, expensive, or hard to create. A soft pastel color can look just as stylish as detailed art. Tiny hearts, flowers, French tips, fruit designs, glitter, and chrome all offer different ways to show your style.
Think about your school rules, daily routine, nail length, and skill level before choosing a design. Start small if you are doing your nails at home. You can always add more details later.
Save your favorite three ideas and change the colors to match your clothes or mood. Whether you prefer fruit art, colorful tips, soft ombre, or tiny gems, these Cute nails for teenagers can help you find a look that feels fun, comfortable, and personal.